Since Microsoft knows its Windows 11 operating system is not entirely secure, it has raised the number of security features. On Windows 11, you get numerous security features to protect your computer like Facial Unlock, PIN/Password protection, Login after sleep, and more.
Another notable security feature is Dynamic Lock, which automatically locks your computer to ensure nobody else can use your PC when you leave it. Dynamic Lock is a bit different than other security features as users need to pair a Bluetooth device to enable the feature.
What is the Dynamic Lock Feature in Windows 11?
Dynamic Lock is a security feature that every user should enable and use. With this feature turned on, Windows can use devices paired with your PC to help detect when you are away.
When Windows detects that the paired device is out of Bluetooth range, it automatically locks the PC. So, the feature makes it more difficult for someone to gain access to your Windows device if you step away from your PC and forget to lock it.
Steps to Enable the Dynamic Lock in Windows 11
Now that you are fully aware of Dynamic Lock, you might want to enable and use the feature on your system. Here’s how you can enable the Dynamic Lock in Windows 11.
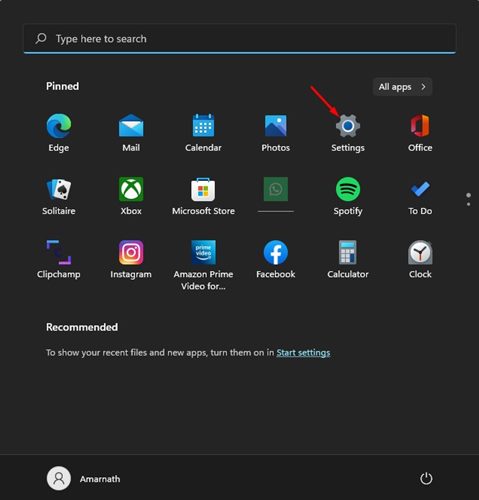
1. First of all, click on the Windows 11 Start menu and select Settings.
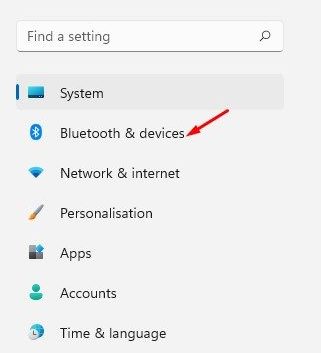
2. On the Settings app, click on the Bluetooth & devices option on the left pane.
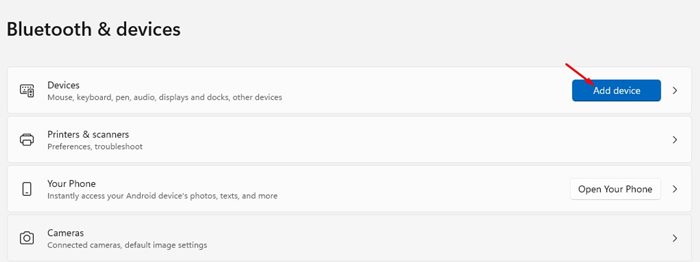
3. On the Right pane, click on the Add Device button behind the Devices.
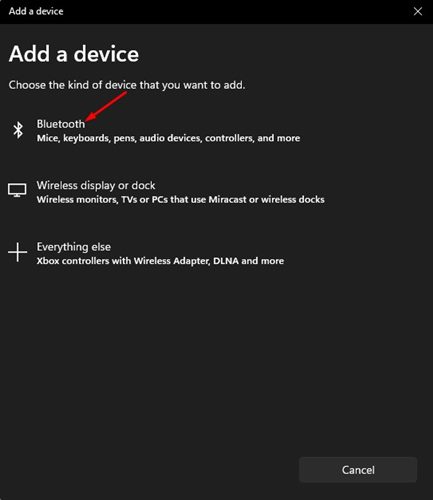
4. On the Add a device pop-up, click on the Bluetooth.
5. Now, Windows 11 will scan all available Bluetooth devices nearby. Make sure to turn on the Bluetooth on the other device you want to pair.
6. Once done, select your device and follow the on-screen instructions to complete the pairing process.
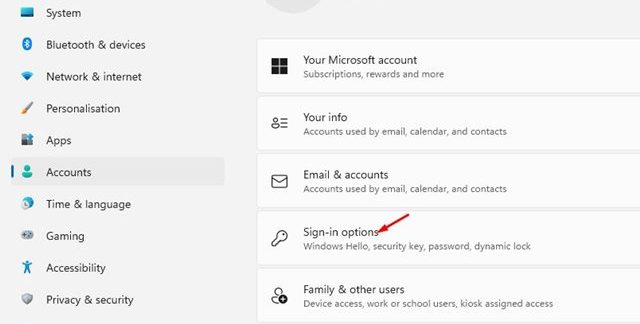
7. Once paired, head to the Settings > Accounts > Sign-in options.
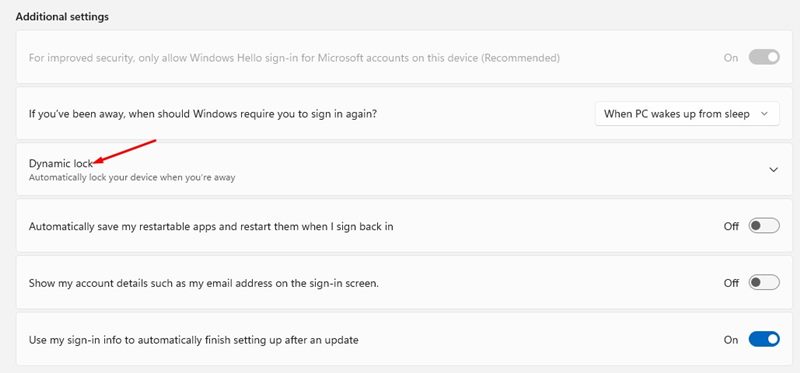
8. On the Sign-in options screen, expand the Dynamic Lock.
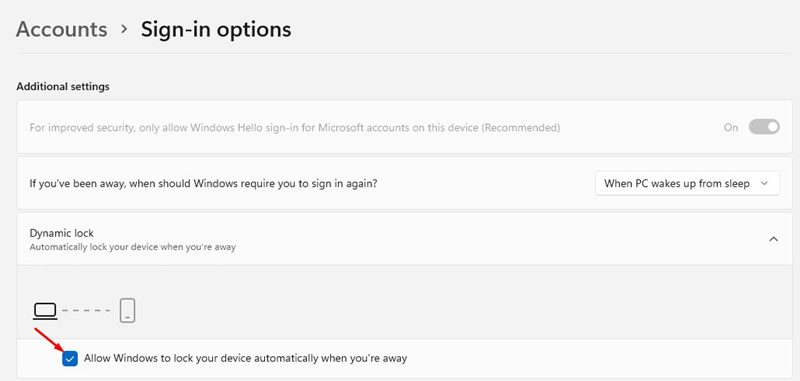
9. Next, check the box for Allow Windows to automatically lock your device when you’re away.
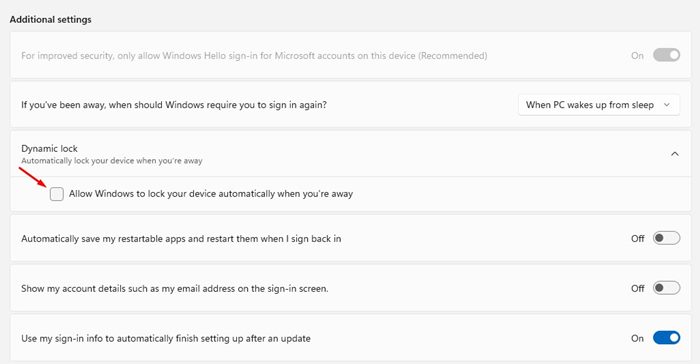
10. If you don’t want to use this feature, you need to disable the checkbox for ‘Allow Windows to automatically lock your device when you’re away on Step 9.
That’s it! This will enable the Dynamic Lock security feature on your Windows 11 computer. You are done.
Windows 11 can even enable the Login after sleep security feature, apart from the Dynamic Lock. Login after sleep feature also prevents unauthorized access to your Windows 11 PC in your absence.
If you are a busy person and often forget to lock your PC when you move away, you should enable the feature. The Dynamic Lock is just one of the many ways to protect your Windows 11 PC from unauthorized access.
The post How to Enable Dynamic Lock in Windows 11 (Full Guide) appeared first on Tech Viral.
from Tech Viral https://ift.tt/5yWsvXY


