Registry Editor or Windows Registry is a file that stores the database of settings used by the Windows operating system. This file holds the configuration for software, hardware devices, etc. You can access the registry file via the Registry Editor on Windows 11.
Registry Editor is for power users who know what to do when things go wrong; however, if you are going to edit it to avail some hidden feature, and that’s too without any knowledge, it’s best to safely back the Registry file on Windows 11.
Incorrect editing to the Registry file can invite many troubles and even prevent your PC from starting correctly. So, if you are about to make changes to the Windows Registry, it’s best to create a backup of it to restore the factory settings if anything goes wrong.
2 Ways to Backup and Restore the Registry on Windows 11
Hence, in this article, we will share a step-by-step guide on how to backup & restore the Registry on Windows 11. We have shared two methods; you can follow any of them. So, let’s get started.
1) Backup Registry via System Restore
A system restores point is a backup utility that backs up all Windows files and settings to a different drive. If you want to back up the registry, the easiest option is to create a system restore point.
In this way, you will have an option to roll back Windows to the previous state if anything goes wrong while editing the registry file. Here’s how to create a system restore point in Windows 11.
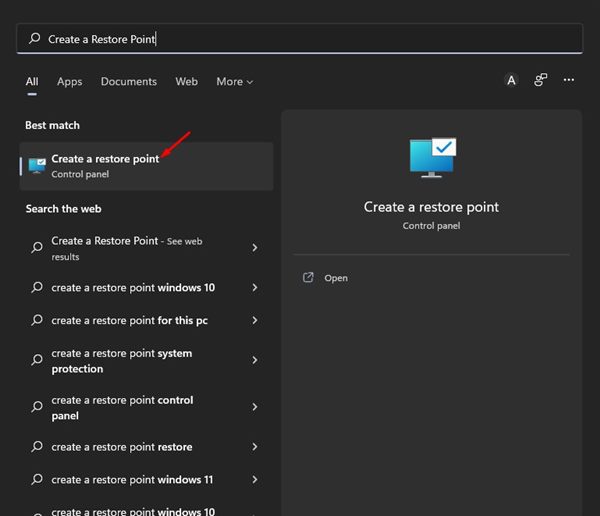
1. First, click on the Windows 11 search and type in Create a restore point. Next, open the Create a restore point app from the list.
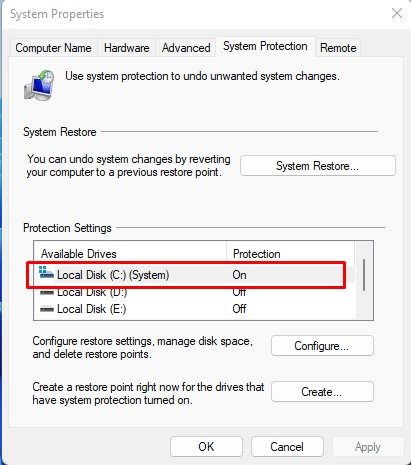
2. On the System properties, select your system installation drive.
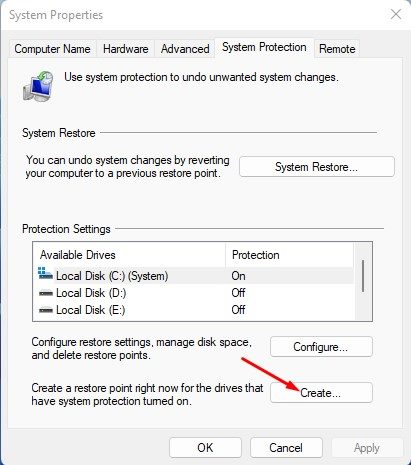
3. Next, click on the Create button, as shown in the screenshot below.
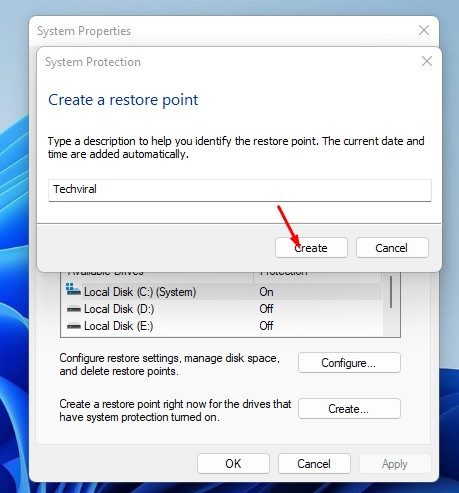
4. Now, you will be asked to type the description to help you identify the restore point. Type a description and click on the Create button.
That’s it! You are done. This is how you can create a restore point in Windows 11 operating system.
Restore the registry from the backup
During the registry editing, you can restore Windows 11 to its previous state if anything goes wrong. This will also revert the changes you made to the Registry. Here’s how to restore the registry from the backup.
1. First, click on the Windows 11 search and type in Create a restore point. Next, open the Create a restore point app from the list.
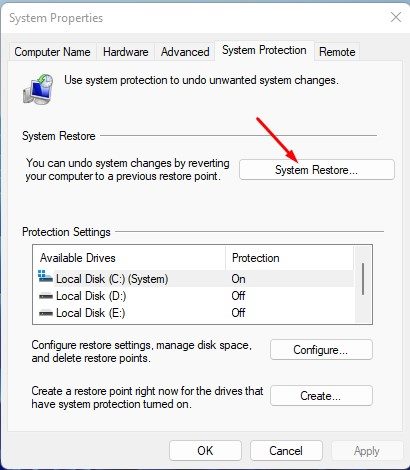
2. On the System Properties, click on the System Restore option as shown below.
3. On the System Restore window, click on the Next button.
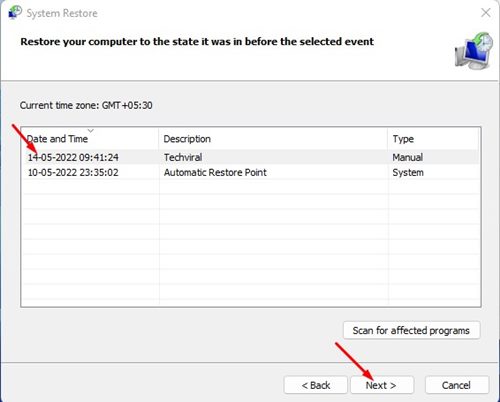
4. Next, select the restore point you have created before and click on the Next button.
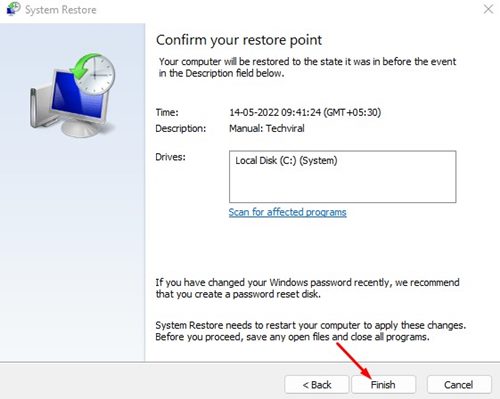
5. On the final page, click on the Finish button.
That’s it! You are done. This is how you can restore the registry from the backup file you have created.
2) Backup & Restore Registry via Registry Editor
The Registry Editor on Windows 11 provides you an option to backup and restore the Registry file. Here’s how you can backup & restore the registry in Windows 11.
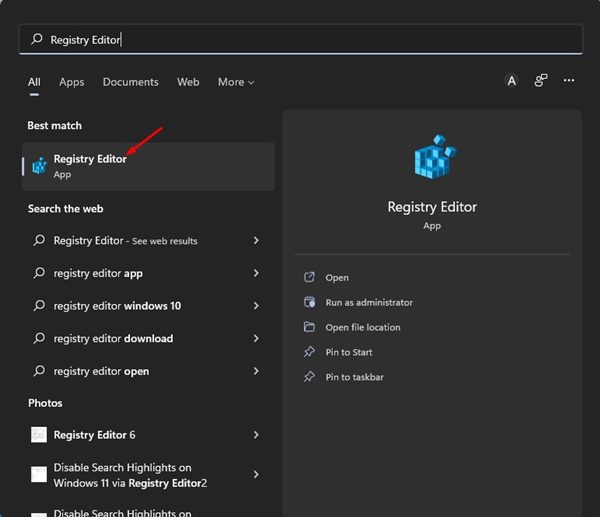
1. First, click on the Windows 11 search and type in Registry Editor. Next, open the Registry Editor app from the list.
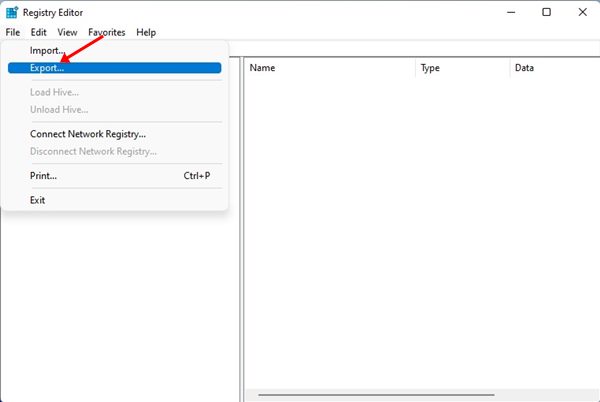
2. On the Registry Editor, click on the File button and select Export.
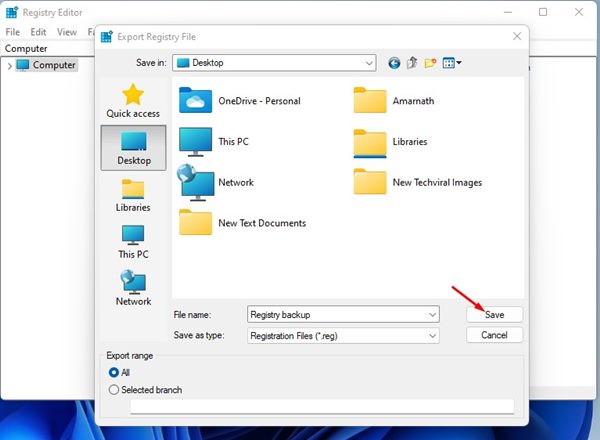
3. Now select the save location and click on the Save button.
4. This will backup the Registry settings on your Windows 11.
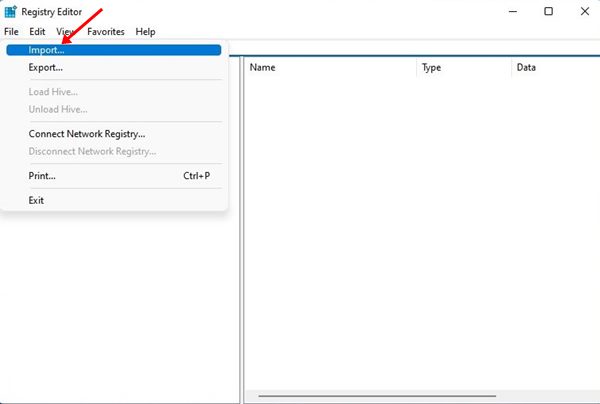
5. If you wish to restore the Registry, open Registry Editor and select File > Import.
6. Select the Registry backup file you have exported on the file picker.
That’s it! You are done. This is how you can backup & restore registry settings in Windows 11 via Registry Editor.
Also Read: How to Backup/Restore Drivers in Windows 11 using CMD (Command Prompt)
A Registry backup can help you restore the original PC settings if anything goes wrong. So, these are the two best ways to safely back up and restore the Registry on Windows 11. If you know any other ways to backup & restore the registry, let us know in the comments.
The post How to Safely Backup and Restore the Registry on Windows 11 appeared first on Tech Viral.
from Tech Viral https://ift.tt/m2N7oaB


