When Microsoft first introduced Windows 11, it shocked many users with its new design and features. Microsoft’s latest Windows 11 has been fully redesigned, and it ships with a new start menu, new File explorer icons, and new animations.
If you have just switched to Windows 11, you might have noticed that the new File Explorer misses out on the ribbon consisting of buttons and commands for common tasks. The File Explorer on Windows 10 has a command ribbon that provides access to most common tasks like copying & moving files and folders, creating folders, renaming files, compressing folders, and more.
Users who have used Windows 10’s classic file explorer interface for years might find it difficult to adapt to the new one. If you are one of those who don’t like the new File Explorer, you have the option to revert to the classic file explorer look.
Also read: How to Increase Shutdown Speed in Windows 11
Steps to Get the Classic File Explorer in Windows 11
Hence, if you want the Windows 10 Classic File Explorer’s look back in Windows 11, you have landed on the right page. Below, we have shared a step-by-step guide on re-enabling the classic file explorer in Windows 11. Let’s check out.
Important: The steps we have shared below won’t work in the latest Windows 11. It will work only on the older builds of Windows 11 that were released within the first few months of launch.
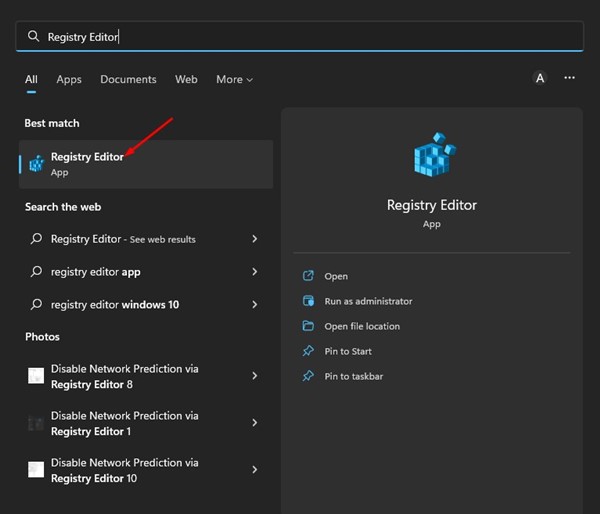
1. First, click on the Windows 11 search and type Regedit. Next, open the Registry Editor from the list of matching results.
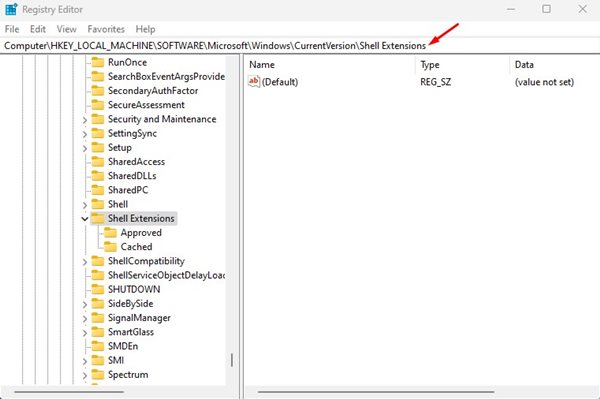
2. Now, on the Registry Editor, navigate to the following path:
HKEY_LOCAL_MACHINE\SOFTWARE\Microsoft\Windows\CurrentVersion\Shell Extensions
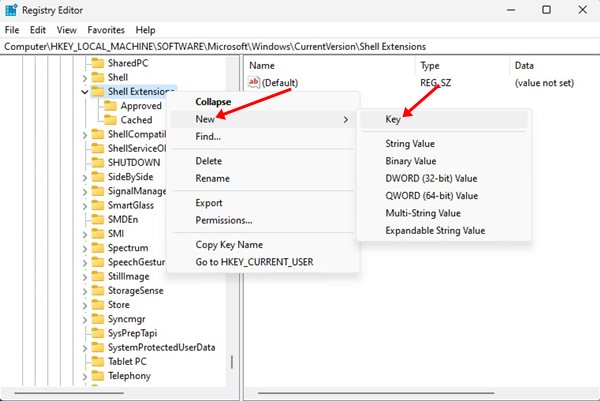
3. Right-click on the Shell Extension folder and select New > Key.
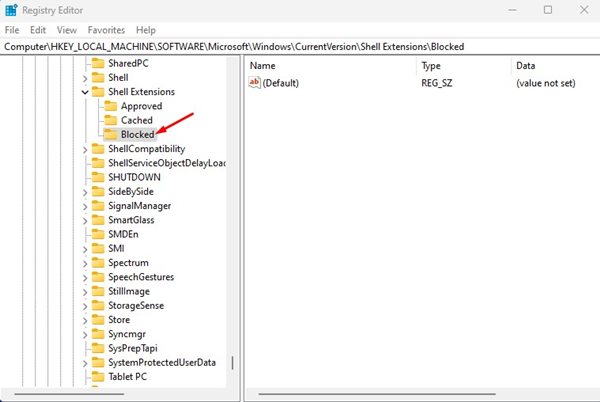
4. Name the new key as ‘Blocked‘.
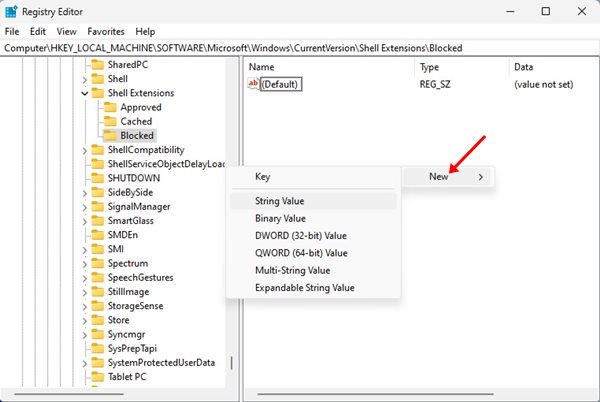
5. Once done, right-click on the Blocked key and select New > String Value.
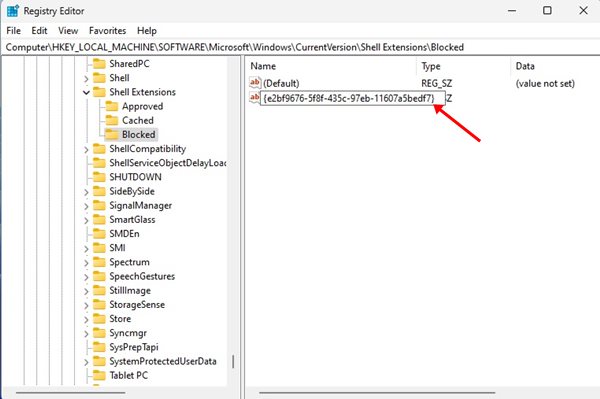
6. Name the newly created String value as "{e2bf9676-5f8f-435c-97eb-11607a5bedf7}"
That’s it! This will bring back the Windows 10 Classic File Explorer’s look in Windows 11. If you cannot view the classic file explorer, you might use the newer or the Dev/Beta builds of Windows 11. Make sure to restart your computer after making the changes.
Also read: How to Enable/Disable Online Speech Recognition in Windows 11
So, that’s all about how to re-enable the classic file explorer in Windows 11. If you want to switch to the modern file explorer, delete the key you created in Step 6. If you need any more help, let us know in the comments.
The post How to Get the Classic File Explorer in Windows 11 appeared first on TechViral.
from TechViral https://ift.tt/6jXPW4G


