As with every other version of Windows, Windows 11 creates and saves a desktop shortcut for every app you install. Windows 11 is a highly customizable operating system, and it even allows you to customize the context or right-click menu.
You can customize Windows 11’s context menu to display specific programs, settings, and more. You can easily add apps that you frequently use to the context menu. This way, you don’t have to depend on a desktop shortcut or start menu to launch your frequently used apps.
Hence, this article will discuss a working method that allows you to add apps to the context menu on Windows 11. So, let’s check how to add apps to the context menu in Windows 11.
Steps to Add Programs to the Context Menu on Windows 11
Please note that adding programs to the right-click menu on Windows 11 requires registry editing; hence, the process will be complicated. So, make sure to follow the steps carefully to avoid any errors.
We recommend you create a system image backup before implementing the steps. While editing the registry file, if anything goes wrong, you might lose your files. So, make sure to backup your important files before following the method.
Note: We have used the Steam desktop client to demonstrate the process. You can add any application you want.
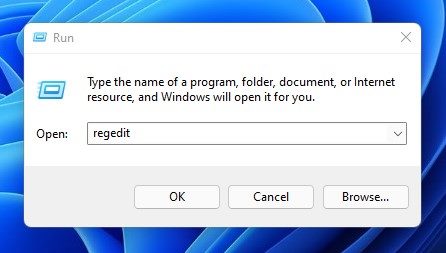
1. First, press the Windows Key + R button to open the RUN dialog box. Then, on the RUN dialog box, enter regedit and hit the Enter button.
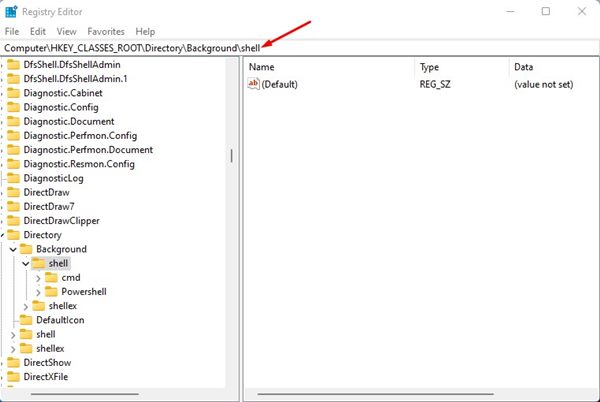
2. On the Registry Editor, navigate to the path:
Computer\HKEY_CLASSES_ROOT\Directory\Background\shell
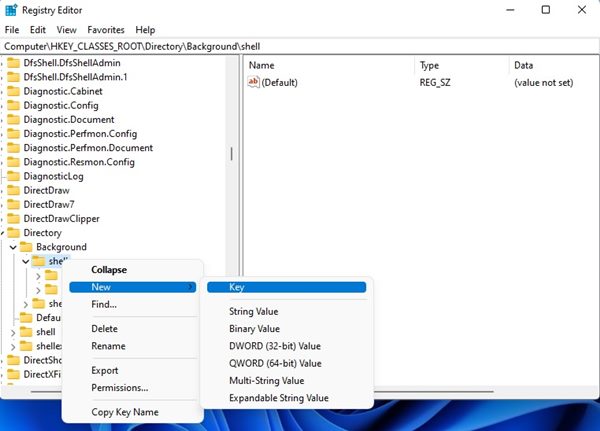
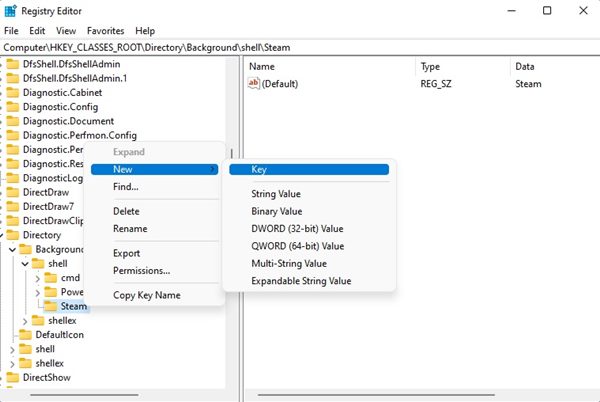
3. Right-click on the shell folder and select New > Key.
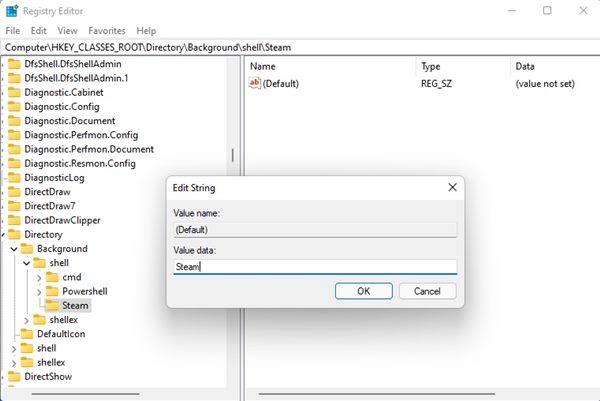
4. Name the new key Steam, and on the right pane, double click on the Default and type the app name in the Value field. In our case, the app name is Steam.
5. Now, right-click on the Steam key and select New > Key.
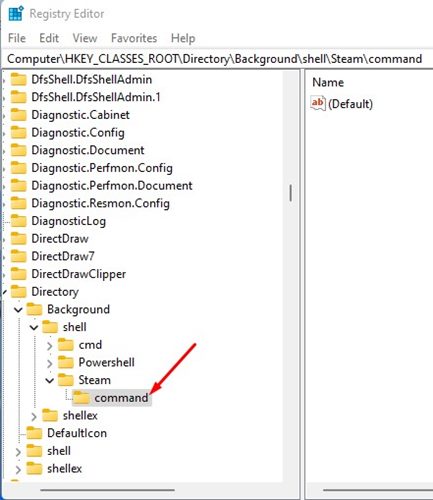
6. Name the newly created key as command.
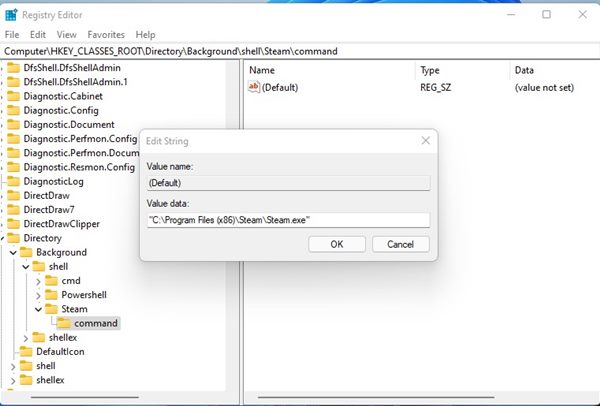
7. On the left pane, double click on the Default key and on the value data field, enter the path of your program’s executable file and click on the Ok button
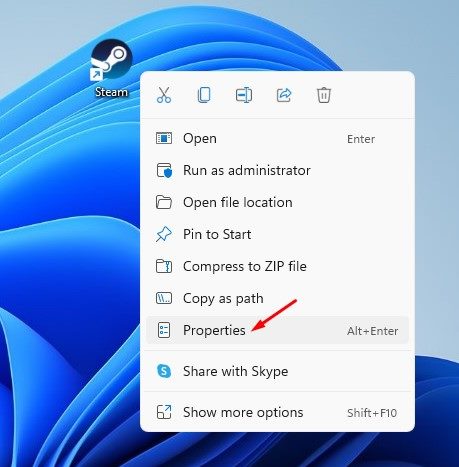
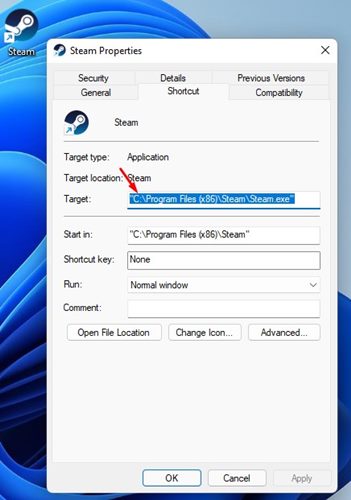
8. If you don’t know the exact path, right-click on your program’s desktop shortcut and select Properties. Now copy the path displayed on the Target field.
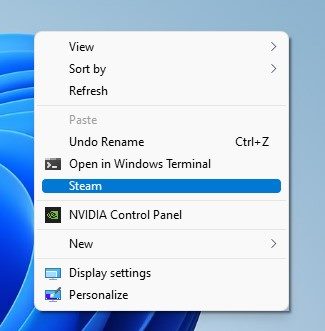
9. Right-click on a black space on Windows 11 desktop. You will find your program on the context menu.
That’s it! You are done. This is how you can add software shortcuts to the Windows 11 context menu.
Add Program Shortcut to Context Menu using WinAero Tweaker
WinAero Tweaker is a free Windows customization tool that you can use to add program shortcuts to the Context Menu on Windows 11. However, the tool only allows you to add system apps on the context menu. Here’s what you need to do.
1. First of all, download & install WinAero Tweaker on your Windows 11 computer. Once installed, open the application.
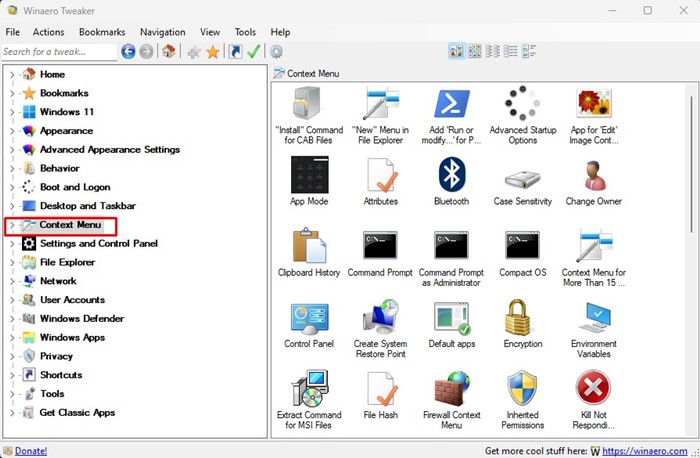
2. On the left pane, scroll down and expand the Context Menu section.
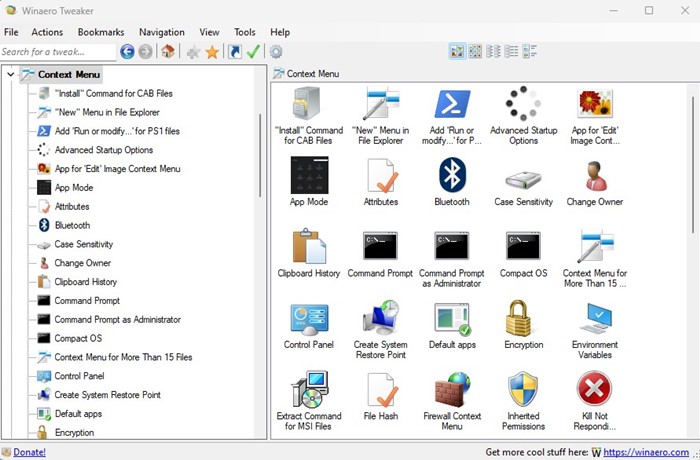
3. Now, you will find various options. You can add these options to your context menu.
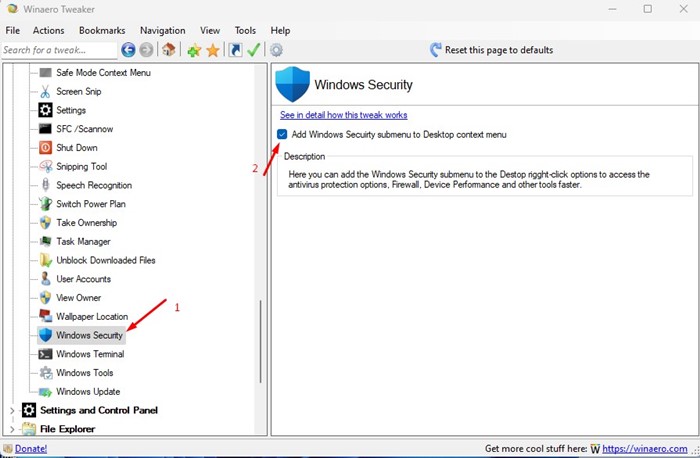
4. For example, if you want to add Windows Security to the context menu, select the Windows security app. On the right side, check the option that reads “Add (Program Name) to the desktop context menu”.
That’s it! The program will be added to your Windows 11’s context menu.
So, these are the best ways to add programs to the context menu in Windows 11. You can add as many app shortcuts as you want to the context menu by following the method we have shared. If you have any doubts about this, let us know in the comment box below.
The post How to Add Programs to the Context Menu on Windows 11 appeared first on TechViral.
from TechViral https://ift.tt/lO6sApC


