When you connect an external or internal drive to your PC, Windows automatically assigns a name to it. Windows 10 and 11 assigns ‘Local Disk’ as volume labels for internal and external drives like Local Disk (C:), Local Disk (D:), and so on.
While we are usually very comfortable with the default volume label, you always have an option to change it. On Windows 11, you can easily change the volume label for connected drives and assign your own.
Please note; that we are not talking about the drive letter. We are talking about the Volume Label that reads ‘Local Disk’. You can use File Explorer, Drive Properties, or Windows 11’s Settings app to change the drive or volume label.
Change Drive or Volume Label in Windows 11
Below, we have shared a step-by-step guide on renaming drive or volume labels in Windows 11. Hence, if you are interested in changing the drive or volume label in Windows 11, you are reading the right guide. Let’s get started.
1) Change Volume Label using File Explorer
In this method, we will use Windows 11’s File explorer to assign a different name to our connected drive. Follow some of the simple steps we have shared below.
1. First, open File explorer on your Windows 11 PC. Double-click on This PC or press the Windows Key + I buttons to open File Explorer.
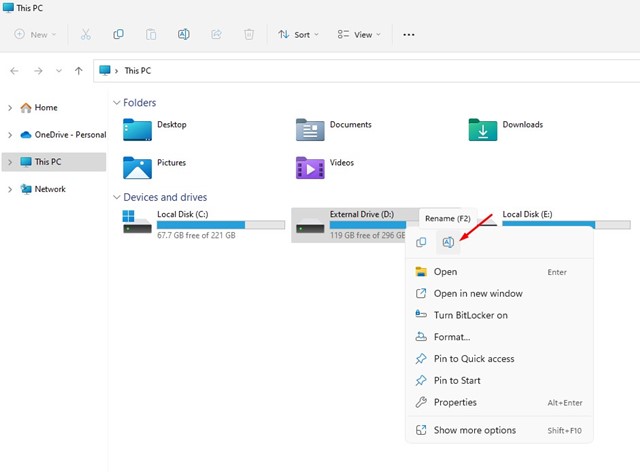
2. On the File Explorer, right-click on the drive whose volume label you want to change and select Rename.
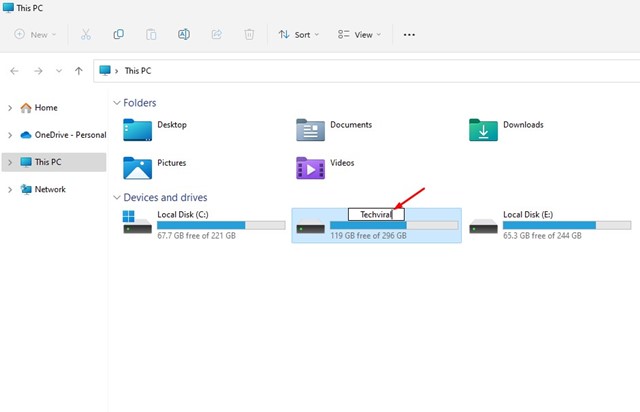
3. Now, enter the name you want to assign.
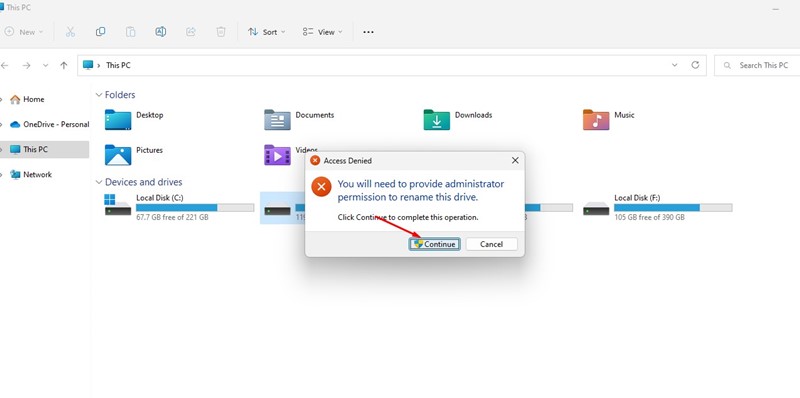
4. If you are not using the Administrator account, you will see an Access Denied prompt. Click on the Continue button to change the name.
That’s it! You can change the drive or volume label on Windows 11 via File Explorer.
2) Change Volume Label via Drive Properties
This method will change the drive or volume label via the Drive Properties. Follow some of the simple steps we have shared below.
1. First, open File explorer on your Windows 11 PC.
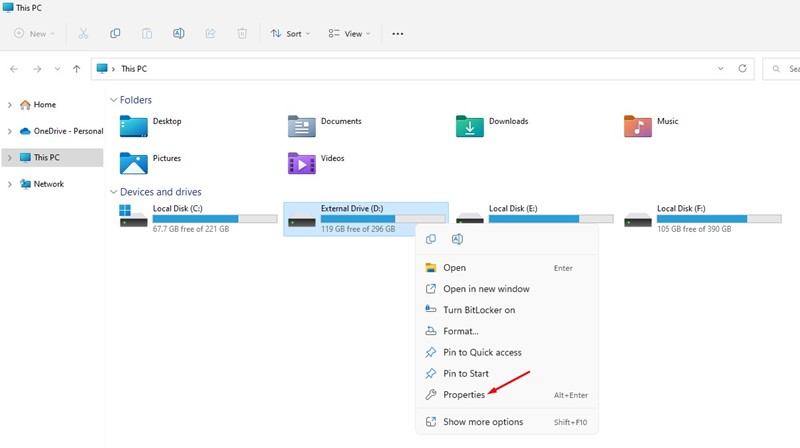
2. Now, right-click on the drive whose name you want to change and select Properties.
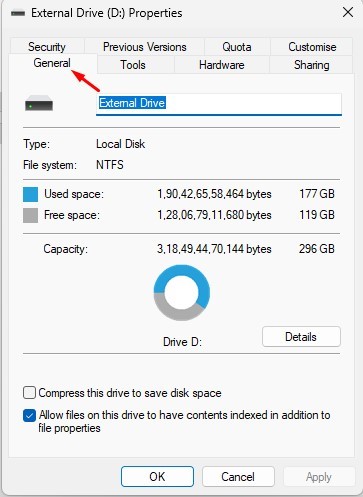
3. On the Drive Properties, switch to the General tab.
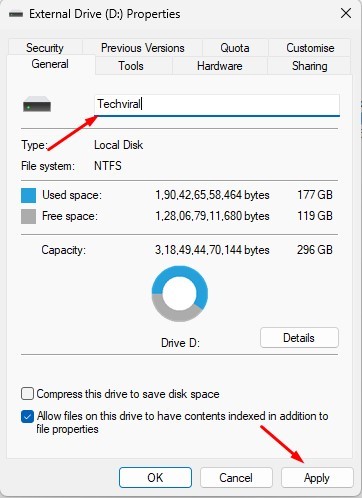
4. On the Name field, enter the name you want to set.
5. Once done, click on the Apply button then on Ok.
That’s it! This is how you can change the drive or volume label from Properties.
3) Change Drive or Volume Label from Settings
This method will use Windows 11’s Settings app to change the drive or volume label. Follow some of the simple steps we have shared below.
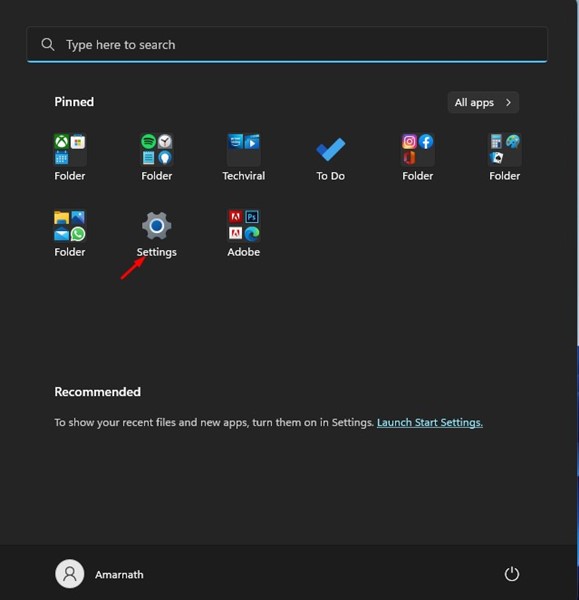
1. First, click on the Windows 11 Start button and select Settings.
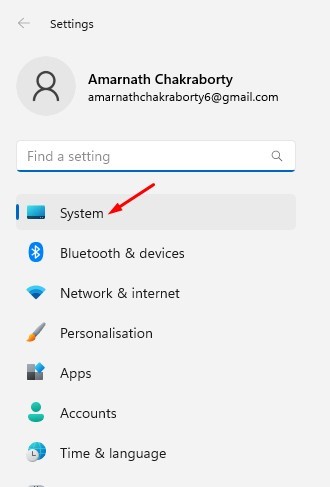
2. On the Settings app, switch to the System tab below.
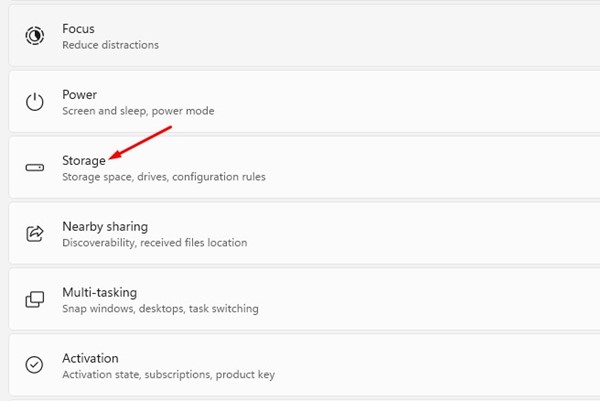
3. On the right, scroll down and click on Storage.
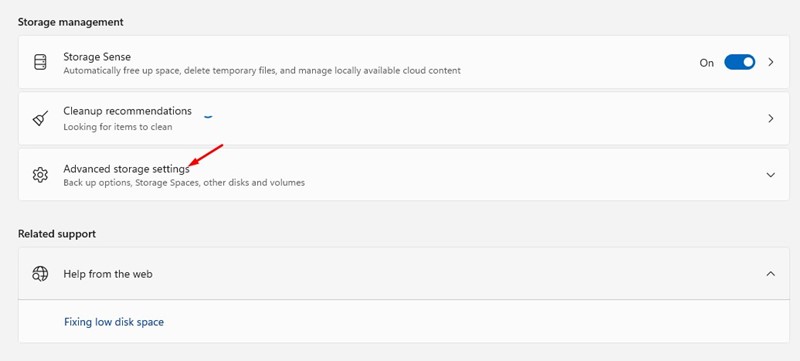
4. Now scroll down and expand the Advanced Storage settings option.
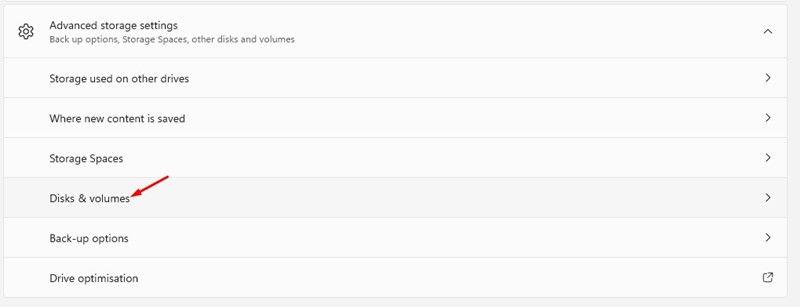
5. Next, click on the Disks & Volumes.
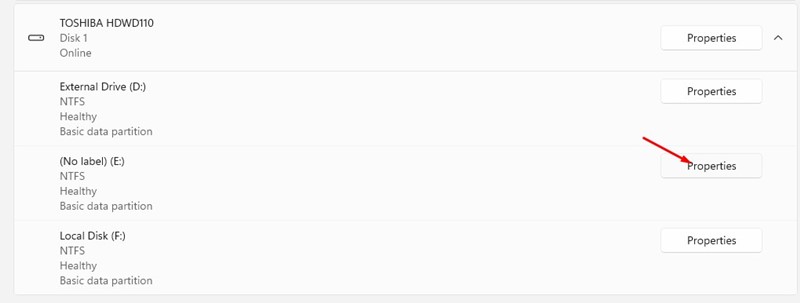
6. Now, click on the Properties button beside the volume where you want to assign a new name.
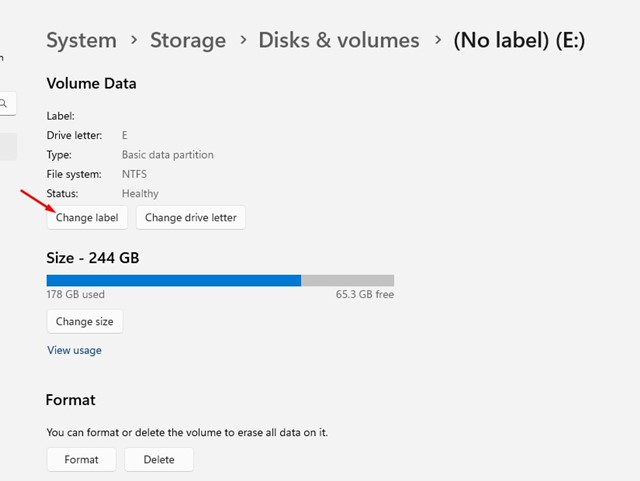
7. On the next screen, click on the Change label button.
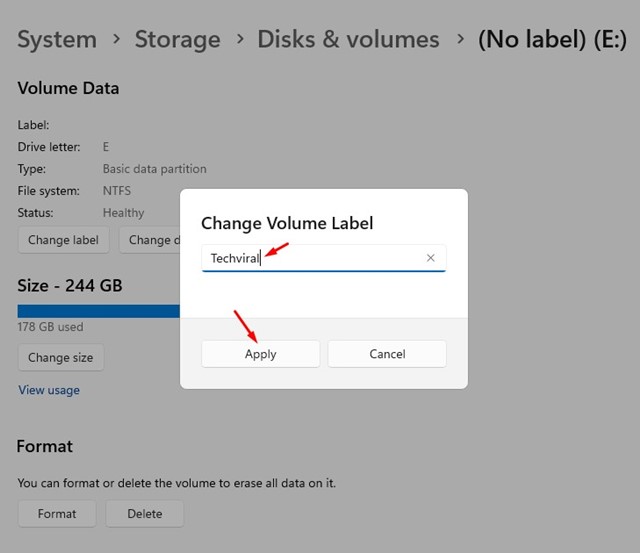
8. Now, type the new volume label and click the Apply button.
That’s it! This will change the volume label of your selected drive on Windows 11.
Also read: How to Mount Folder as Drive in Windows 11
So, these are the three best ways to change the volume label on Windows 11 computer. If you know any other ways to change the volume label for connected drives on Windows 11, let us know in the comments below.
The post How to Change Drive or Volume Label in Windows 11 (3 Methods) appeared first on TechViral.
from TechViral https://ift.tt/XK6u7Ci


