If you often download files from the internet, you might already be familiar with the RAR files. Sooner or later, you may come across a file you download that ends up being in the RAR extension.
RAR is a file format for compressing files into an archive. It’s very similar to the ZIP files but has some added benefits. If you have to reduce file size, you can choose to compress that file into an archive.
What makes RAR file most useful is its encryption system. RAR files can be password protected to keep the files inside them safe and secure and prevent unauthorized access. A few days ago, we shared a detailed guide on password-protecting ZIP files; today, we will discuss the same for the RAR file format.
Password Protect RAR Files on Windows 11
Hence, if you are looking for ways to password protect RAR files in Windows 11, you have landed on the right page. Below, we have shared a step-by-step guide on password-protecting RAR files in Windows 11. Let’s get started.
1) Create a Password Protected RAR File
This method will use the WinRAR application to create a password-protected RAR file. To create a password-protected RAR file, follow some of the simple steps we have shared below.
1. First of all, download & install WinRAR on your Windows 11 computer.
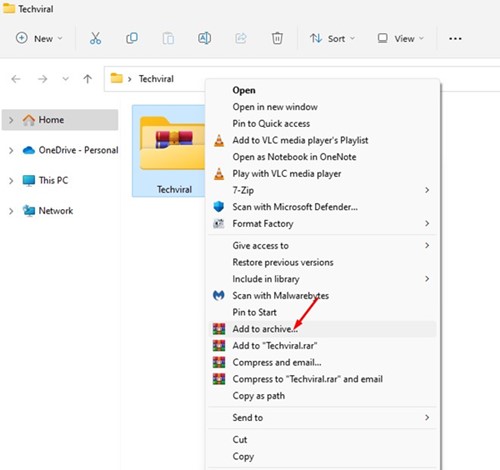
2. Once installed, navigate to the file or folder you want to compress. Right-click the file or folder and select the Add to archive option.
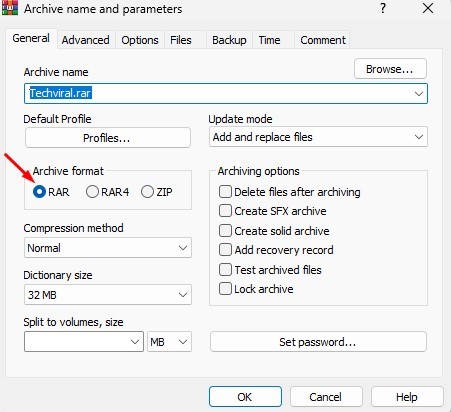
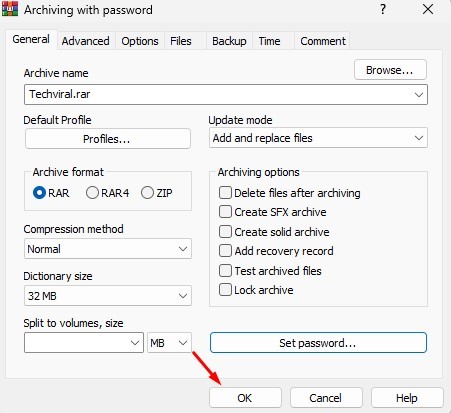
3. Now, on the archive name and parameters window, select ‘RAR‘ on the Archive format.
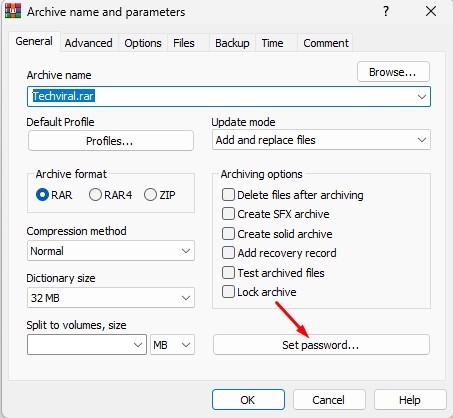
4. On the right pane, click on the Set password button under the archiving options.
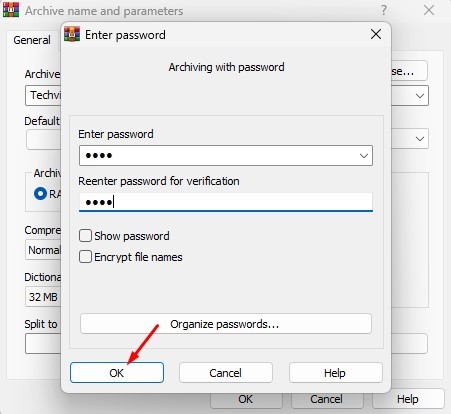
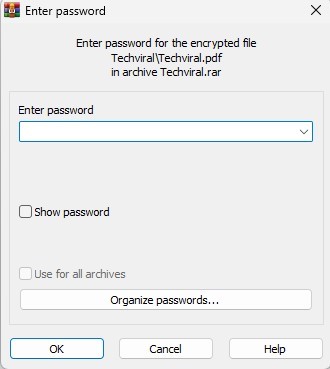
5. On the Enter password prompt, enter and reenter your password. Next, click on the Ok button.
6. Now, click the Ok button on the Archiving with password Window.
7. This will create a password-protected RAR file. You will be asked to enter the password if you try to extract the RAR file.
That’s it! This is how you can create a password-protected RAR file in Windows 11 via WinRAR.
2) How to Set Password on Existing RAR archive?
You can use WinRAR to password-protect existing RAR archives as well. You need to follow some of the simple steps we have shared below. Here’s how to password protect the existing WinRAR archive in simple steps.
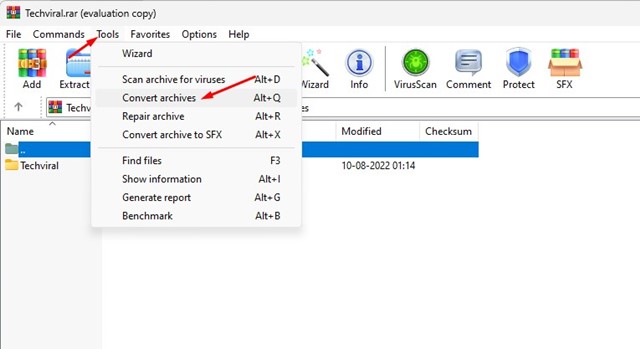
1. First of all, right-click on the RAR file you want to password protect and select ‘Open with WinRAR‘
2. Next, click on the Tools > Convert Archives option.
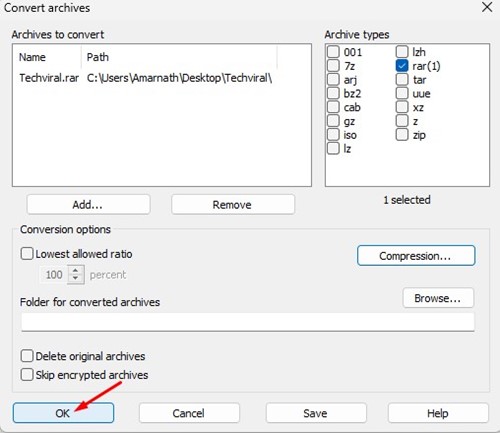
3. On the Convert Archive prompt, click the Compression button in the Conversion options section.
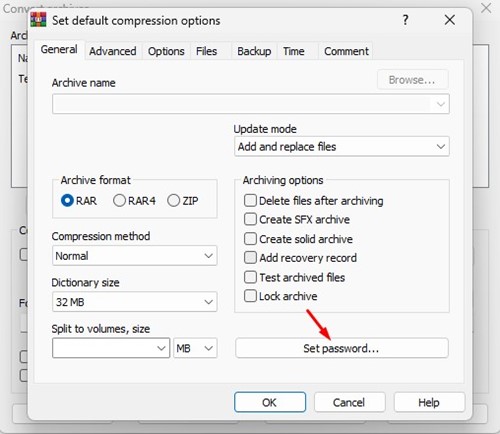
4. On the Set default compression options prompt, click on the Set password button.
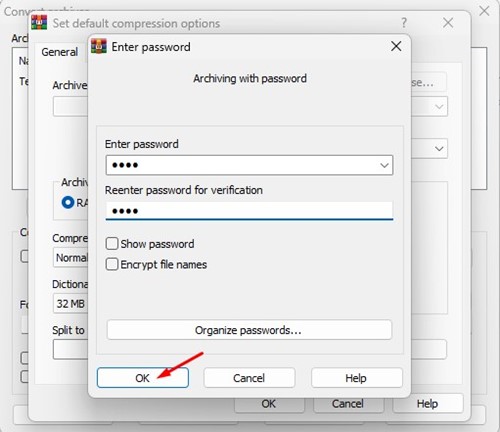
5. Next, enter the password and click on the Ok button.
6. Click on the Ok button on the archiving with a password prompt.
7. Next, click on the Ok button on the Convert archives prompt.
That’s it! This will password protect your existing RAR file on Windows 11.
Also Read: How to Crack WinRAR Password Protected Files
So, this guide is about creating a password-protected RAR file on Windows 11. We have also shared steps from setting a password to existing RAR archives. If you need more help password-protecting RAR files on Windows 11, let us know in the comments below.
The post How to Password Protect RAR Files on Windows 11 appeared first on TechViral.
from TechViral https://ift.tt/ALDy8oM


