It doesn’t matter how powerful your gaming PC is; if you’re using Windows, you will likely face problems. Windows operating system has more bugs than macOS or Linux, which is the only reason it receives frequent updates.
While playing games on your Gaming PC, you may experience issues like frame drops, games taking a long to start, and a computer showing BSOD while starting games. Some users have also reported monitor gets into power-saving mode while playing games.
If you are facing issues while playing games on your Windows 11 computer, you can do quite a few things to get your problems fixed. The best way to fix gaming-related issues on Windows 11 is by resetting the graphics card.
Reset Graphics Card on Windows 11
Since it was the graphics card that was responsible for playing games, you may try to reset it. Resetting the graphic card will rule out incorrect settings and bugs. Below, we have shared a few simple methods to reset graphics cards on Windows 11. Let’s get started.
1) Restart the GPU Only
If your device lags while launching a game, you can restart the GPU unit instead of restarting your entire Windows device.
It’s pretty easy to restart the Graphics card on Windows 11, as a keyboard shortcut is available.
To restart the Graphics card in Windows, you need to press the Windows Key + CTRL + SHIFT + B button together. As you press the key combination, your screen will turn black.
Don’t worry, as this is a part of the process. Your Windows experience will be recovered as soon as the restart process is complete.
2) Disable & Enable the Graphic Card on Device Manager
Another best method to restart the graphics card on Windows 11 is the Device Manager. On Device Manager, you need to make a few changes to restart the graphics card. Here’s what you need to do.
1. First, click on the Windows 11 search and type Device Manager. Next, open the Device Manager app from the list.
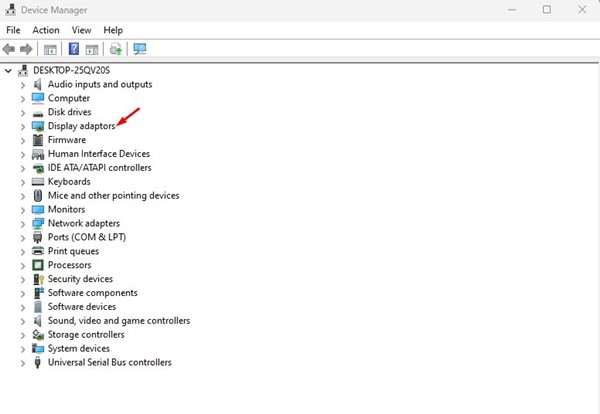
2. On the Device Manager, expand the Display Adapters.
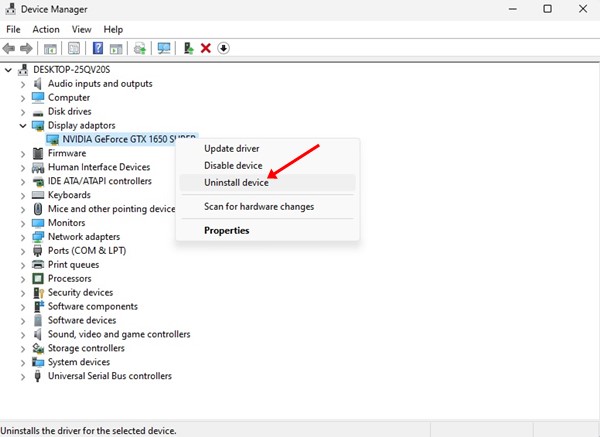
3. Now, right-click on your Graphics card and select Uninstall Device.
4. This will uninstall the graphic card driver. Once done, restart your computer.
That’s it! During the restart, Windows 11 will automatically install the Graphic card again. This is the easiest method to reset the graphics card in Windows 11.
3) Reset Graphics Card from BIOS
Resetting the graphics card is possible from the BIOS, but the steps will be a bit complicated. Here are some simple steps to reset the graphics card from BIOS.
1. First, restart your computer and enter the BIOS. You need to press the F10 key to enter the BIOS setup. You may have to press F8, ESC, or DEL on some motherboards.
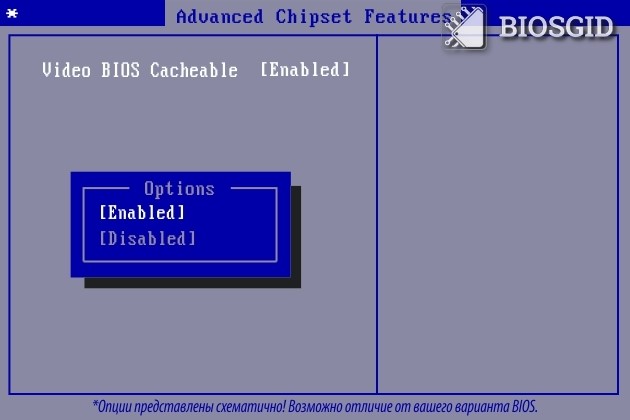
2. On the BIOS setup, find and select the Advanced Chipset Features.
3. On the next options, select ‘Video BIOS Cacheable‘.
4. Now use the + and – keys to change the BIOS Settings.
5. Next, press the F10 key on your keyboard. You will see a confirmation prompt; click on the Yes button.
That’s it! This will possibly reset the Graphics card settings. The steps may vary depending on the motherboard you are using.
4) Update Your Graphics Card
Well, if you are still getting problems related to graphics cards while playing games, updating the graphics drivers is a good idea. Maybe you are facing problems due to outdated graphics card drivers. Updating the graphics driver won’t reset the graphics settings, but it will fix many issues.
1. First, click on the Windows 11 search and type Device Manager.
2. On the Device Manager, expand the Display Adapters.
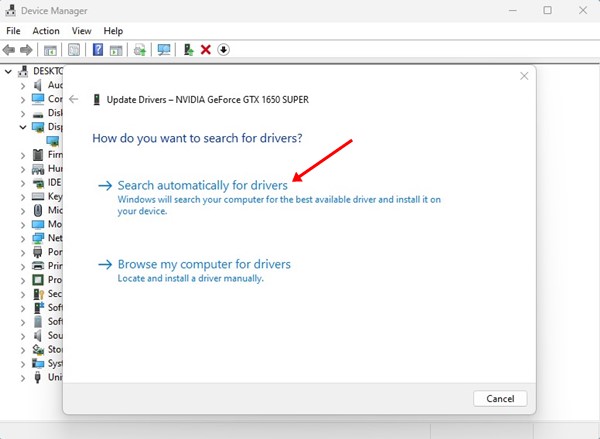
3. Now, right-click on your Graphics card and select Update driver.
4. On the next window, select Search automatically for the drivers.
That’s it! This is how you can update the graphics card drivers on Windows 11 computer.
Also read: How to Check the Graphics Card (GPU) in Windows 11
So, these are some of the best methods to reset graphics cards in Windows 11. If you know other ways to reset the graphics card, let us know in the comments below.
The post How to Reset Graphics Card on Windows 11 (4 Methods) appeared first on TechViral.
from TechViral https://ift.tt/Dhl9jcC


