Windows 11 is the new desktop operating system from Microsoft, and it has introduced many new features and awesome changes. Users who are using Windows 10 and have a compatible device will get a free Windows 11 upgrade.
Whereas users who don’t have a compatible PC might have to perform a clean installation. Microsoft upped the system requirements for Windows 11, and your PC should have a compatible processor, support for TPM 2.0, Secure Boot, and an online Microsoft account.
If your PC doesn’t match these requirements, you must follow our guide to Install Windows 11 on Unsupported PCs. This article will discuss how to install Windows 11 without a Microsoft account.
There could be various reasons why you would want to install Windows 11 without Microsoft Account. Maybe you plan to use a local account because you’re setting up Windows 11 on a family member’s PC, or you just don’t want to give away your email on a computer.
Install Windows 11 Without Microsoft Account
Whatever the reason is, it’s possible to install Windows 11 without a Microsoft Account. Below, we have shared some simple steps to install Windows 11 without a Microsoft account. Let’s get started.
Install Windows 11 Without Microsoft Account
In this method, we will disable the internet connectivity just when the Windows 11 OOBE setup screen appears. Here’s what you need to do.
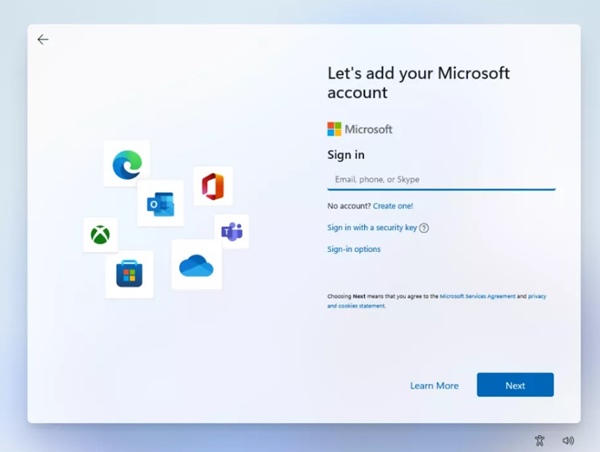
1. First, reach the step when the Windows 11 installation wizard asks you to sign in to your Microsoft account.
2. You can plug off the ethernet cable to disconnect the internet. You need to execute a command to disable the internet if not possible.
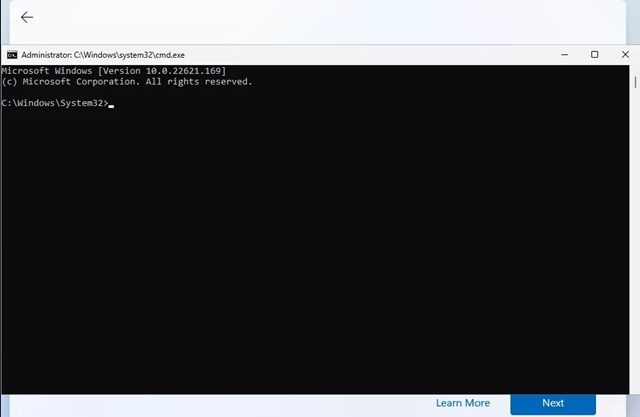
3. On the Installation wizard, press the Shift + F10 button. This will open the Command Prompt.
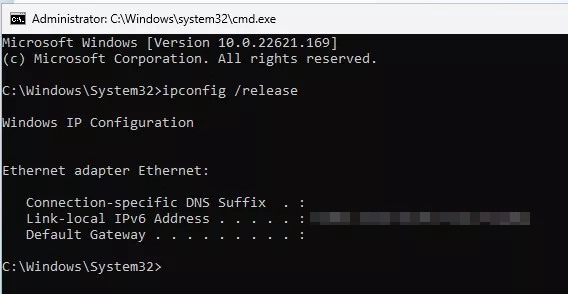
4. On the Command Prompt, execute the command ipconfig /release
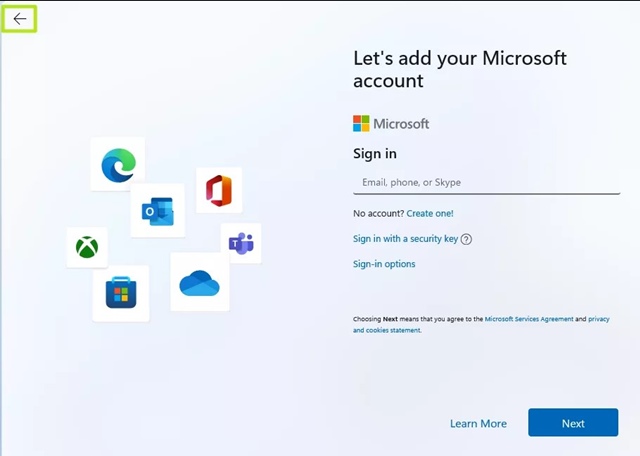
5. This will disable the internet, close the Command Prompt. On the Windows 11 setup screen, click on the back arrow button in the top left corner.
6. The Windows 11 setup wizard will ask you to enter a name. Simply create a user account to use Windows 11.
That’s it! This is how you can install Windows 11 without a Microsoft account.
Bypass Microsoft Account Requirement with Rufus
In this method, we will use a portable bootable USB tool, Rufus, to bypass the requirement and create Windows 11 Bootable USB. Here’s how to install Windows 11 without Microsoft Account via Rufus.
1. First, download the latest version of Rufus on your Windows device.
2. Since it’s a portable tool, you need to run the Rufus executable file to use it.
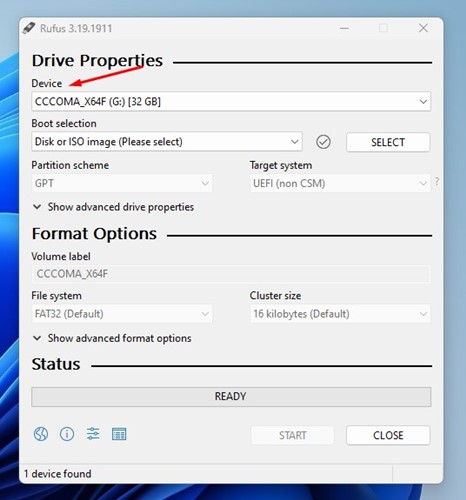
3. Select your USB device or Pendrive on the Device drop-down.
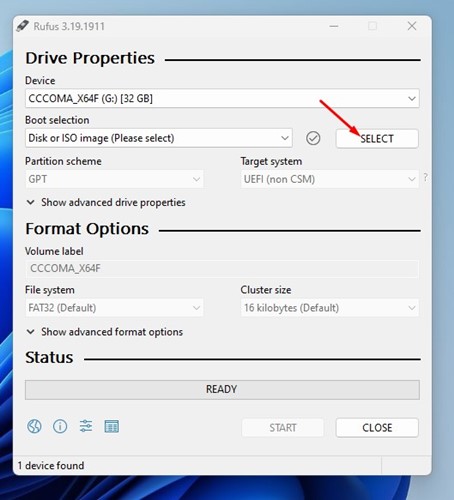
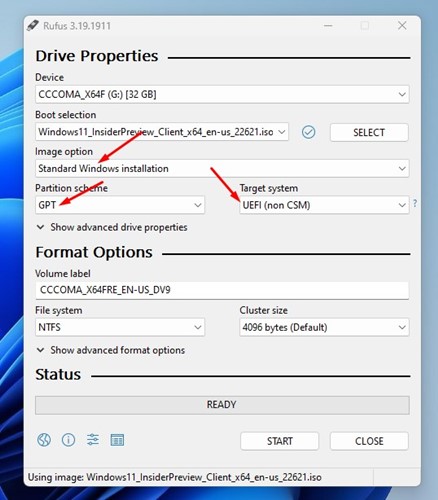
4. Now, on the Boot selection, select ‘Disk or ISO image‘ and click on the Select button beside it. Now select the Windows 11 ISO file.
5. Make other selections and click on the Start button at the bottom.
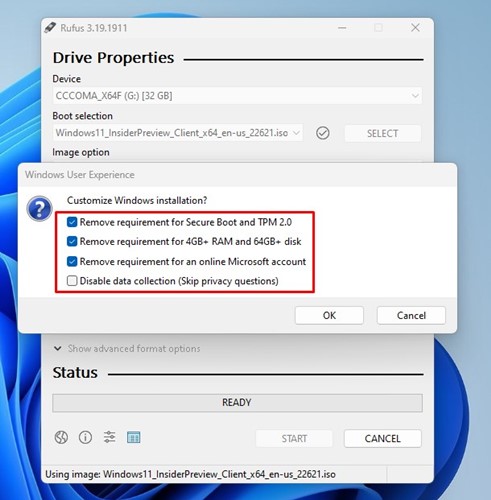
6. Now, you will see a Windows User Experience prompt. Here you need to check the option ‘Remove requirement for an online Microsoft Account‘. Once done, click on the Ok button.
If you want, you can also check the other two options – – Remove requirement for Secure Boot and TPM 2.0 and the requirements for 4GB+ RAM and 64GB+ storage space. Additionally, there’s also an option to disable the data collection (this will skip the privacy questions)
That’s it! Now Rufus will flash Windows 11 on your selected USB Drive/Pendrive. Once flashed, you need to use this USB to install Windows 11. You won’t see the screen asking you to enter a Microsoft Account.
Also read: Windows 11 ISO Free Download Full Version
So, these are the two best methods to install Windows 11 without a Microsoft Account. All the shared methods work in the latest version of Windows 11. If you need more help installing Windows 11, let us know in the comments below.
The post How to Install Windows 11 Without Microsoft Account appeared first on TechViral.
from TechViral https://ift.tt/FfwDE83


