When Windows 10 was first introduced to the public, Microsoft shocked many users by announcing its new Windows Security app.
Windows Security is designed to provide real-time protection against threats and has features like Core Isolation and Memory Integrity that prevent hackers from accessing your device.
This article will discuss the Memory Integrity security feature and how to resolve its error. If you face problems like Memory Integrity is off or grayed out, continue reading the guide.
What is Memory Integrity in Windows?
To understand Memory Integrity, you first have to know about the Core Isolation feature. Core Isolation is basically a feature that provides added protection against any malware or other form of hacking attacks.
It protects by isolating your important computer processes from your operating system and device. Memory Integrity is a part of core isolation designed to prevent malicious code execution.
Memory Integrity is also known as Hypervisor-protected Code integrity (HVCI). Its sole purpose is to prevent malicious software and programs from accessing drivers or gaining control over high-security processes.
How to Fix Memory Integrity is Turned Off on Windows 11?
Since Windows Security is available on Windows 11, the core isolation feature, Memory Integrity, is also available. However, many Windows 11 users face problems turning on the Memory Integrity feature.
So, if you are also experiencing problems related to Memory Integrity on Windows 11, check out the troubleshooting methods we have shared below.
1. Turn on Memory Integrity using Windows Security
From Windows Security, you can enable or disable the Memory Integrity feature. So, if the Memory Integrity is off, you can use the Windows Security app to turn it on. Here’s what you need to do.
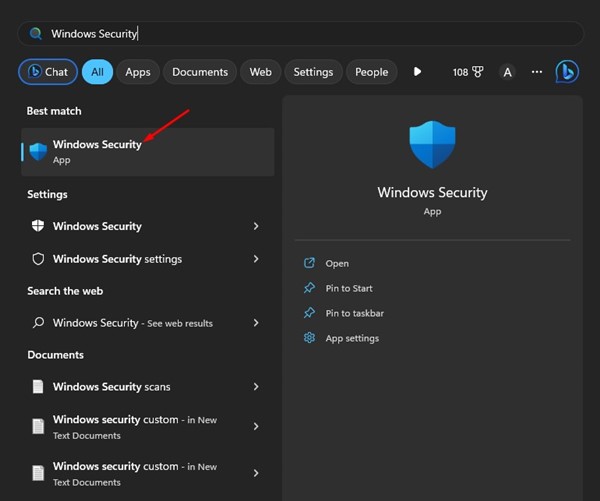
1. First, click on the Windows 11 search and type in ‘Windows Security‘.
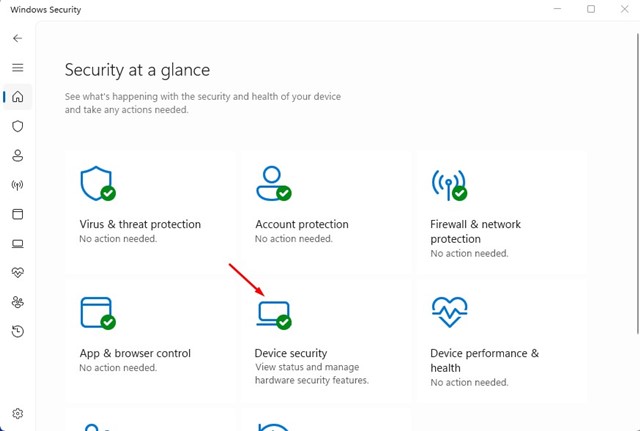
2. When the Windows Security app opens, click on the ‘Device Security‘ tab.
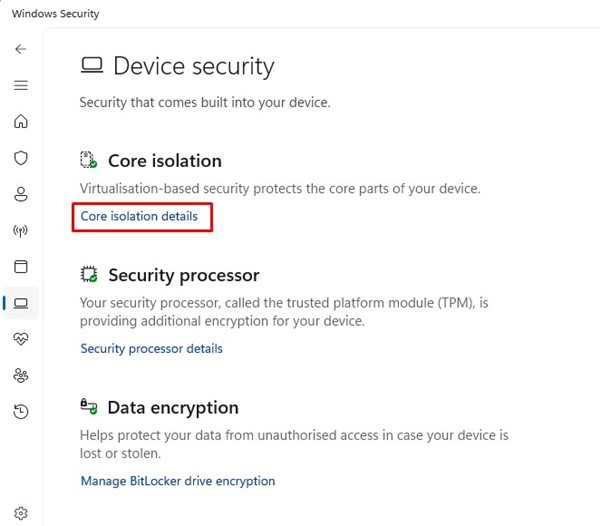
3. Click the ‘Core isolation details‘ link on Device Security.
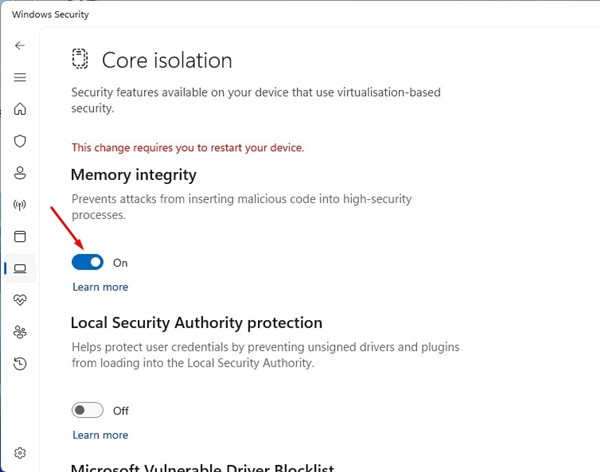
4. On the Core isolation, enable the toggle for ‘Memory Integrity‘
5. The change would ask you to restart your computer/laptop. Restart your computer to turn on Memory Integrity on Windows 11.
That’s it! This is the easiest method to turn on Windows 11 Memory Integrity security feature.
2. Turn on Memory Integrity using Registry Editor
You can also use the Registry Editor on Windows 11 to resolve Windows 11 Memory Integrity is off issue. Here’s what you need to do.
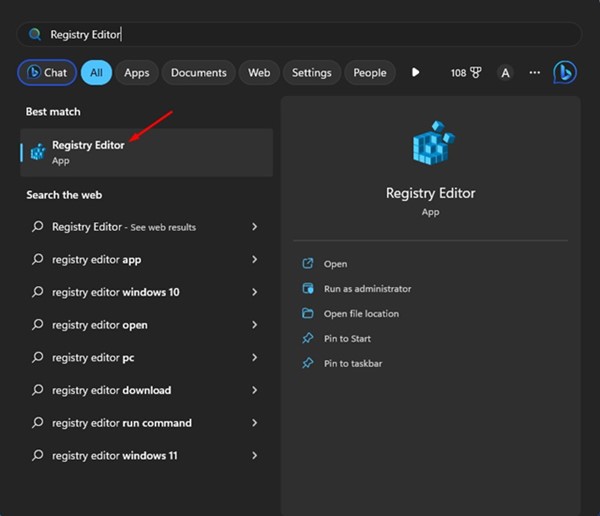
1. Click on Windows 11 search and type in ‘Registry Editor‘. Next, open the Registry Editor app from the list.
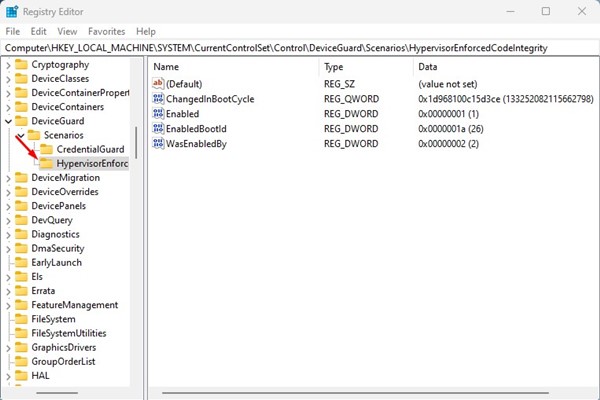
2. When the Registry Editor opens, navigate to the following path:
Computer\HKEY_LOCAL_MACHINE\SYSTEM\CurrentControlSet\Control\DeviceGuard\Scenarios\HypervisorEnforcedCodeIntegrity
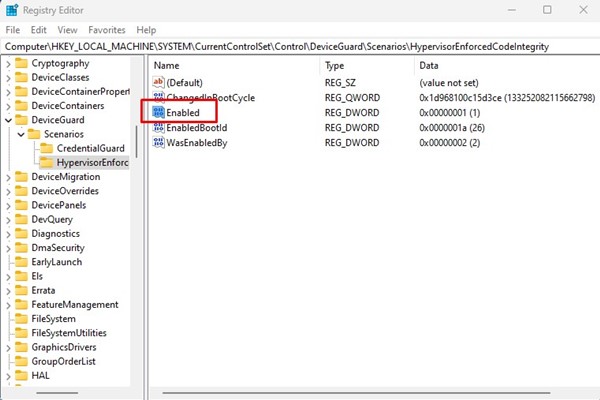
3. Double-click the ‘Enabled‘ key on the right side.
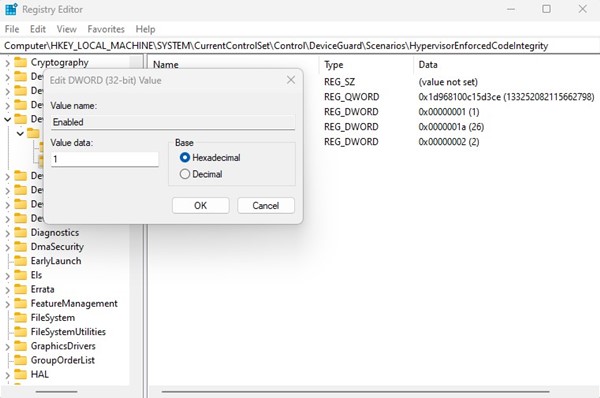
4. On the Edit DWORD (32-bit) Value prompt for ‘Enabled’, enter ‘1‘ on the Value Data field and click the ‘Ok‘ button.
5. To disable Memory Integrity, enter ‘0‘ on the Value data field and then click on the ‘Ok’ button.
That’s it! After making the changes, make sure to restart your Windows 11 computer.
3. Identify and Fix Driver Problems
Driver problems are one of the most prominent reasons Memory Integrity is disabled on Windows 11. The best way to deal with this is to identify and fix the existing driver issues. Here’s what you need to do.
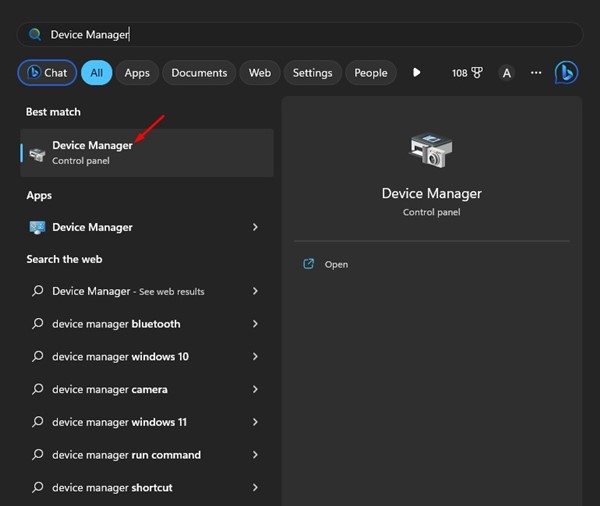
1. First, click on the Windows search and type in ‘Device Manager‘. Next, open the Device Manager app from the list.
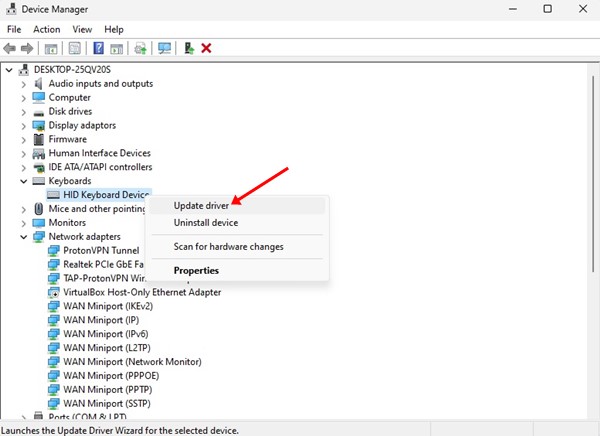
2. When the Device Manager opens, check for the installed drivers with a yellow exclamatory mark at the end.
3. Those are incompatible drives. You need to right-click on them and select ‘Update Driver‘.
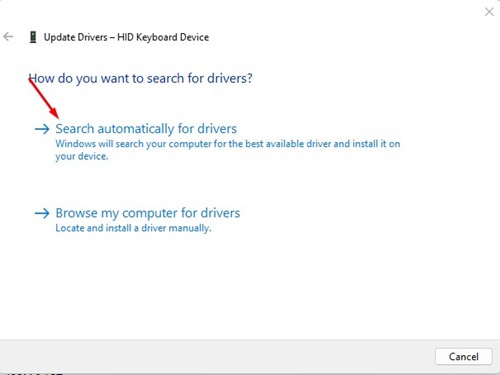
4. Select the ‘Search automatically for drivers ‘ option on the next screen. This will download the latest version of driver from the internet and will install automatically.
That’s it! This is how you can find and update the problematic drivers on Windows 11.
4. Remove all incompatible drivers
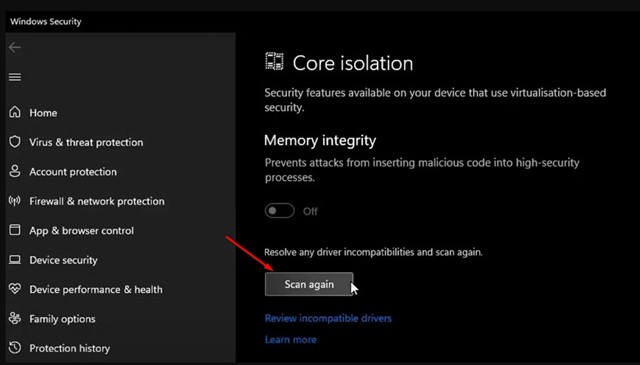
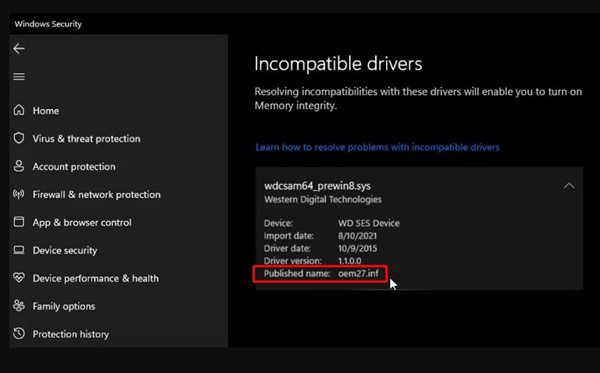
If the Memory Integrity is off due to Driver incompatibilities, you will find an error saying, ‘Resolve any driver incompatibilities and scan again’.
You must click the ‘Scan again‘ button on the Core isolation screen to find all incompatible drivers.
Once you find the incompatible driver, note down the ‘Published Name‘ and then follow the steps below.
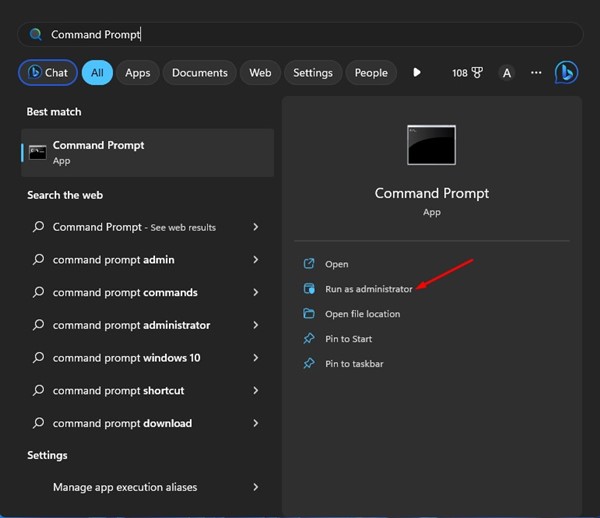
1. Open Windows 11 search and type in Command Prompt. Right-click on the Command Prompt and select ‘Run as administrator‘.
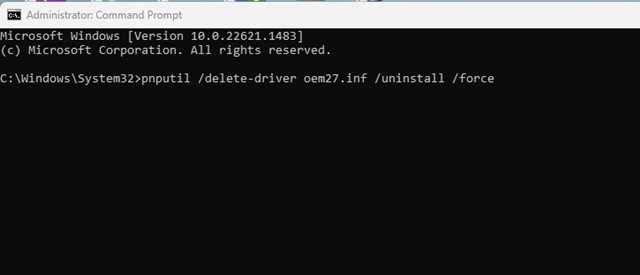
2. When the Command Prompt opens, execute the command:
pnputil /delete-driver (driver's published name) /uninstall /force
Important: Replace the (driver’s published name) with the name you have noted in the Core Isolation screen.
For example: pnputil /delete-driver oem27.inf /uninstall /force
That’s it! This will remove the incompatible driver from your device. Now restart your Windows 11 PC to install the compatible driver version.
5. Fix Corrupted System Files
Corrupted system files are another reason Memory Integrity is off issue on Windows 11. Hence, you can run the System File Checker (SFC) utility to find and repair the corrupted files.
You can use the Command Prompt to run the SFC utility on your Windows 11. For that, follow the steps we have shared below.
1. First, click on the Windows 11 search and type ‘Command Prompt‘. Next, right-click on the Command Prompt and select ‘Run as administrator‘.
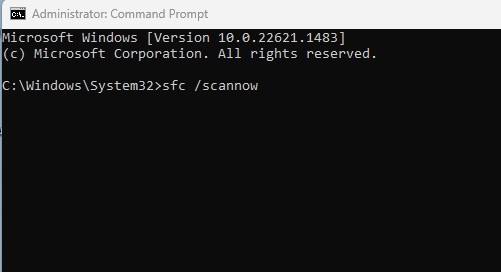
2. When the command prompt opens, execute the command:
sfc /scannow
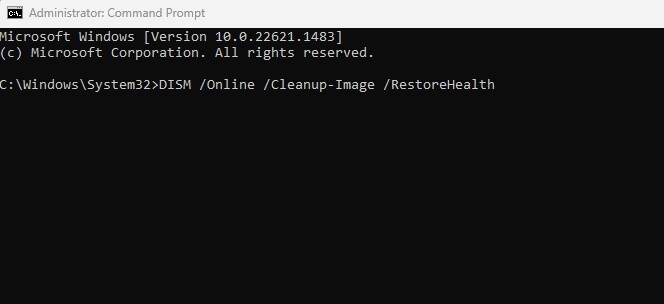
3. Now, you need to wait until the scan completes. If the scan returns an error, execute the below command:
DISM /Online /Cleanup-Image /RestoreHealth
That’s it! Once the scan completes, restart your Windows 11 PC and try to enable the Memory Integrity again. This time the security feature will be turned on without any issue.
6. Update your Windows 11
Keeping the operating system up-to-date is an evergreen method for eliminating bugs and security issues.
Timely updates are important, especially if you want to use new features and security patches. For example, the version of Windows you are using has a bug preventing you from enabling the Memory Integrity Core isolation feature.
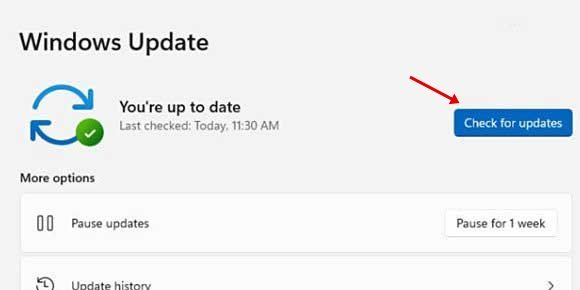
The best you can do is update the operating system. For example, to update Windows 11, head to Settings > Windows Update > Check for Updates.
These are some of the best ways to resolve the Memory Integrity is off issue on Windows 11. However, it’s an essential security feature and should be turned on. If you need more help dealing with memory integrity problems, let us know in the comments below.
The post Memory Integrity is Off on Windows 11? Here’s How to Enable it appeared first on TechViral.
from TechViral https://ift.tt/Y6ks0uf


