You may want to use a VPN service for various reasons. Let’s say you are browsing the web and suddenly come across a site that failed to open due to geo-restrictions. At that time, you can connect to a VPN app and switch servers to unblock the site.
Other reasons for using a VPN include creating a secure connection over the internet, masking the IP address, encrypting your data, and eliminating a wide range of trackers from the web page.
While VPN is good and available for all platforms, have you ever wondered what a VPN is and how it actually works?
What is a VPN?
VPN is basically a Virtual Private Network that masks your Internet Protocol (IP) address. It hides your IP address and makes tracking difficult.
Since it switches your device’s IP Address and makes it look like it’s from a different location, it can unlock various websites.
VPN for iPhone also does the same and ensures the guarding of your data. There are a few key things to consider while choosing a VPN service.
How to Choose the best VPN Service?
Purchasing a VPN service is pretty easy; you just go to the VPN provider’s website, purchase the VPN plan, download the app, and start using it on your device.
However, that isn’t all you should know before purchasing a VPN service. There are some crucial points a user needs to consider before purchasing any VPN service, like the Encryption Level, VPN speed & server availability, and more.
In one of our articles, we have mentioned all the important factors you should consider before purchasing a VPN service. You can check out that article here.
How to Connect VPN on iPhone (Apps)
Like Android, hundreds of VPN apps are also available for iPhones. You will find VPN apps on the Apple App Store; some are free, while others are premium.
If you want the best results, it’s recommended that you purchase a reputable premium VPN app to use on your iPhone. Below, we have shared the steps to use ProtonVPN on iPhone, which is free to download & use.
1. Open the Apple App Store on your iPhone.
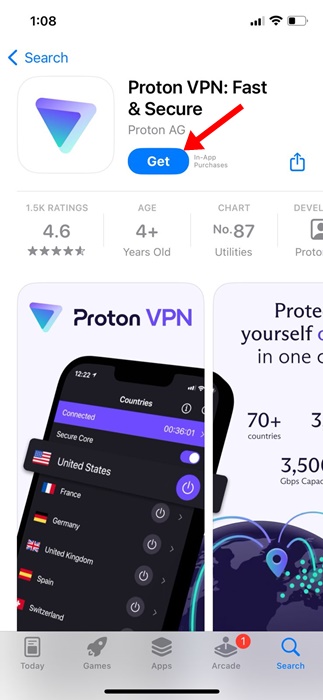
2. Now search for the VPN app you want to download & use. For example, we have used the ProtonVPN. Tap on Get to download the VPN app on your iPhone
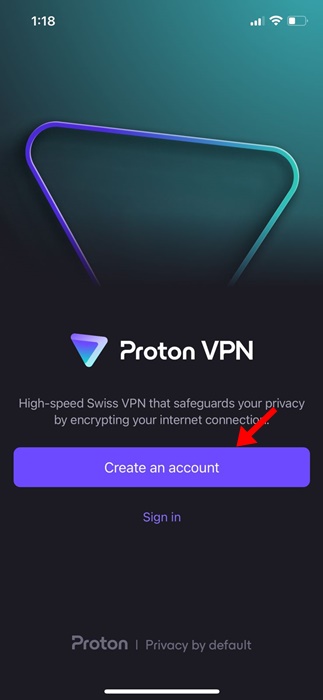
3. Now launch the VPN app on your iPhone. You will be asked to sign in to an account. If you have purchased a VPN plan, log in with the same account you used.
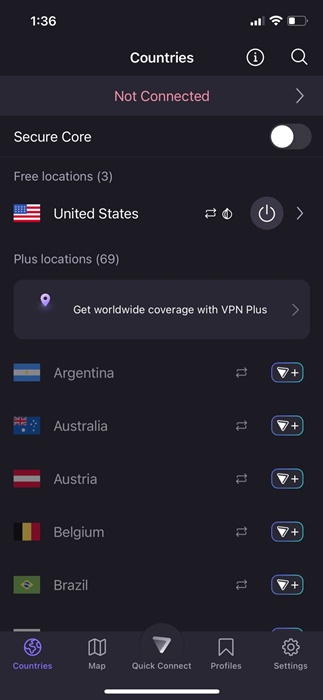
4. Once logged in, you can see the main interface of the ProtonVPN.
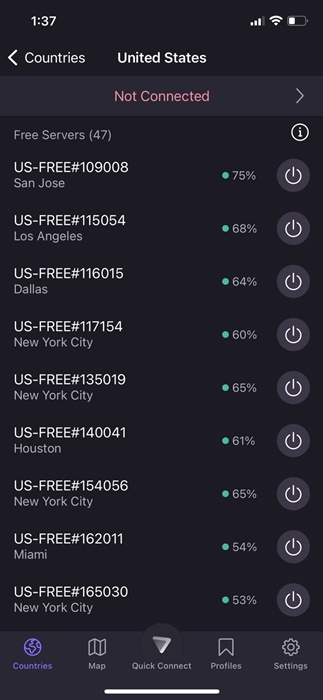
5. Select the server you want to connect to and tap Connect.
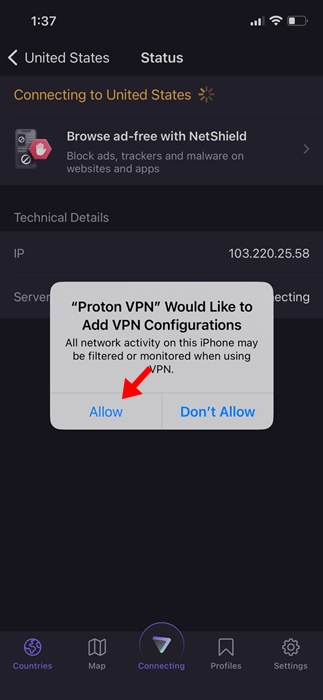
6. Now, the iPhone will ask you to add the VPN configuration. Tap on Allow.
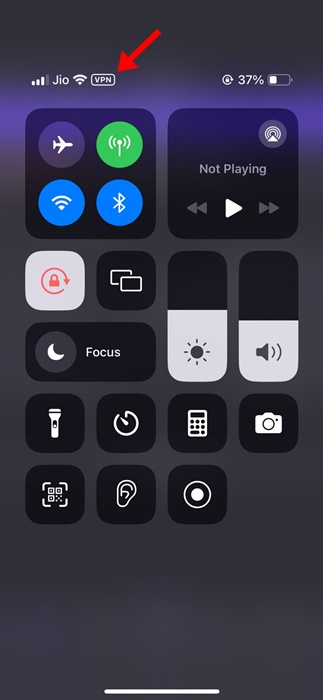
7. This will connect to the VPN server. You can confirm this by opening your iPhone’s Control Center. The VPN icon will appear at the top, below your network information.
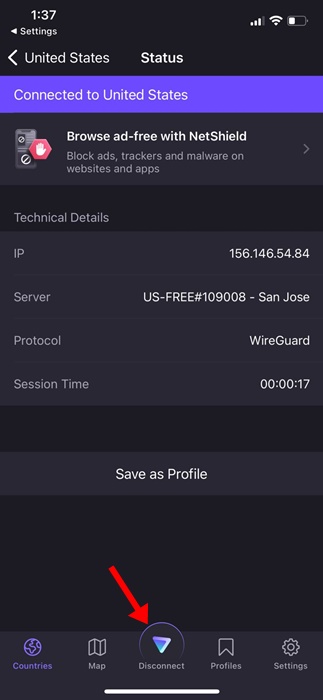
8. To close the VPN Connection, tap on the Disconnect button.
That’s it! This is how you can connect to a VPN on an iPhone with the help of a third-party app.
How to Manually Configure VPN on iPhone
While connecting through a mobile app is super easy, not all VPN providers have a dedicated app. If you have the VPN configuration, you can manually configure the VPN on an iPhone.
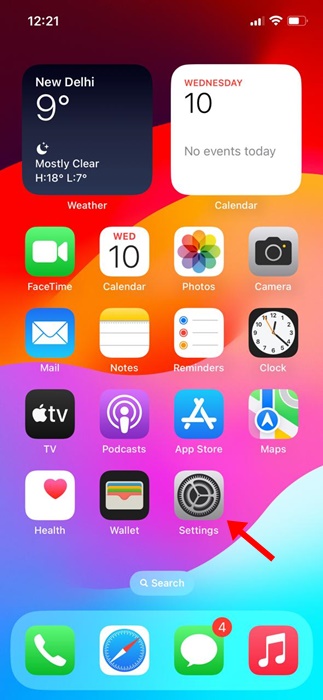
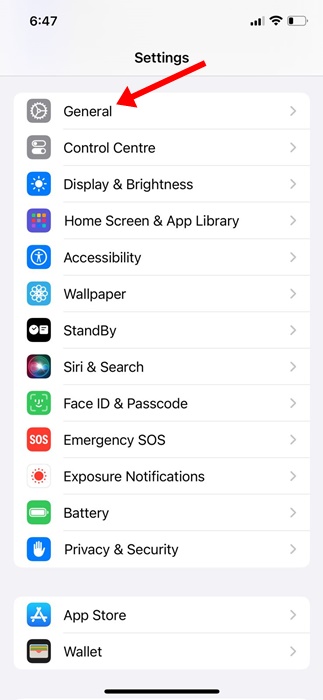
1. Open the Settings app on your iPhone.
2. When the Settings app opens, tap on General.
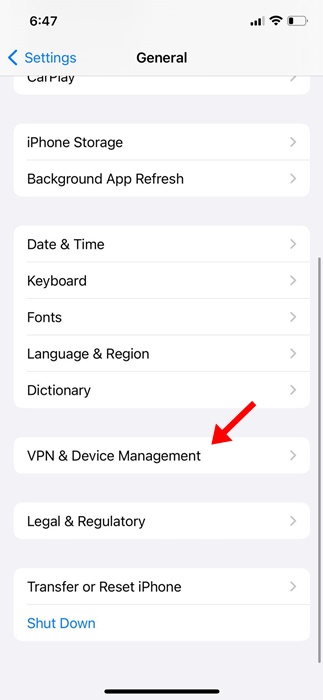
3. On the General screen, tap on the VPN & Device Management.
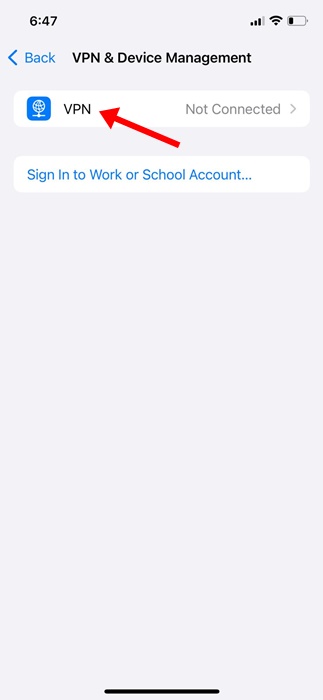
4. Next, tap on the VPN.
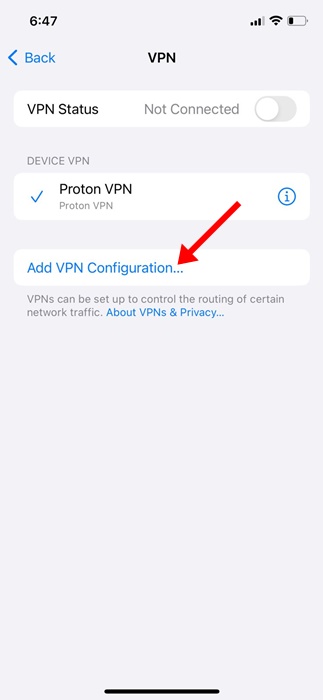
5. On the next screen, tap on the Add VPN Configuration.
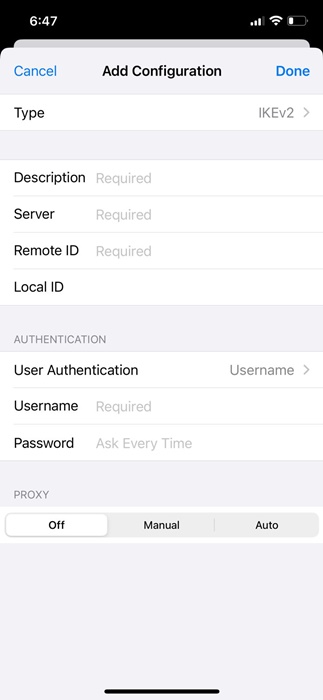
6. Now, choose the Type and fill in all details. You can grab these details from your favorite VPN provider’s website or contact support and ask for the configuration.
7. After filling in the required details, tap on Done.
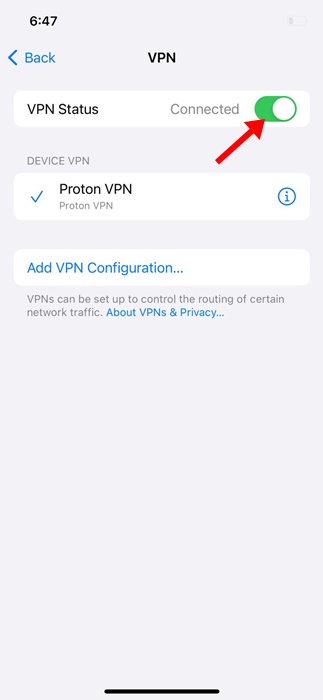
8. Now select your newly configured VPN and enable the Status toggle. If everything you’ve entered is correct, you will be connected to the VPN without error.
That’s it! This is how you can manually configure & connect to a VPN on an iPhone.
So, this guide is all about how to set up a VPN on an iPhone. Let us know if you need more help connecting to a VPN on your iPhone. Also, if you find this guide helpful, don’t forget to share it with your friends.
Also read: How to Take Scrolling Screenshots on iPhone
The post How to Set Up VPN on iPhone (iOS 17) appeared first on TechViral.
from TechViral https://ift.tt/02ygiz9


