Let’s admit it: there is nothing more frustrating than a monitor that keeps going black out of nowhere and without any reason. If you’re a gamer, this can completely ruin your gaming experience on a Windows 11 PC.
We keep receiving messages from Windows 11 users asking about the same problem, so we finally created this article containing potential fixes.
The good thing is that the Screen goes black every couple of seconds, which is a problem that can be easily fixed by modifying some settings. Below, we have shared some simple methods to fix Monitor goes black every few seconds.
Possible Reasons for Monitor Going Black for a Second
There’s no specific reason to pinpoint, but the problem generally appears when something interferes with the connection. Here are a few possible reasons for the Monitor going black for a few seconds.
- Lose, poorly fitted, or damaged cables that connect your monitor to your PC.
- Outdated or Corrupted Graphics Drivers.
- Incorrect Power Settings configuration.
- Incompatibility & Stability issues.
- Hardware Problems in your Monitor or PC.
How to Fix Screen Goes Black for a Second Issue?
Since we don’t know the actual reason that triggers the black screen issue on a Windows PC, we have to follow all troubleshooting methods that deal with the monitor, graphics drivers, and system files. Here’s what you can do.
1. Closely Examine the Cable Connections
If the monitor keeps going black every couple of seconds or minutes, it is usually a result of loose, poorly fitted, or defective cable connections.
So, the first thing you should do is examine the cable connections. You need to check for the cable connecting your monitor to your CPU.
Check whether the cable is damaged, fitted in the right port, etc. If you’re unsure, try a different cable and monitor and see if it helps.
2. Update your PC’s Graphics Driver
Outdated or incompatible graphics drivers are among the most prominent reasons for the Screen going black issue. Hence, it’s recommended that you update your PC’s graphics driver as well and see if it helps. Here’s how to update your PC’s graphics driver.
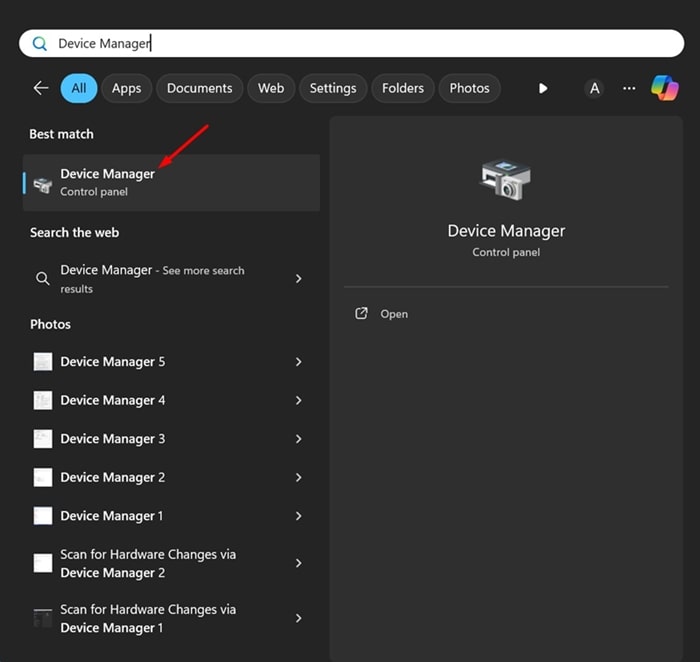
1. Type in Device Manager on the Windows 11 Search. Next, open the Device Manager app from the list of best match results.
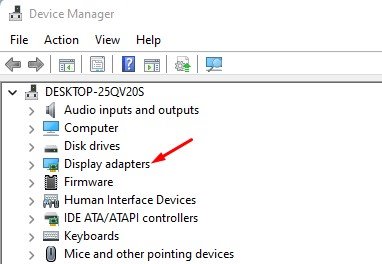
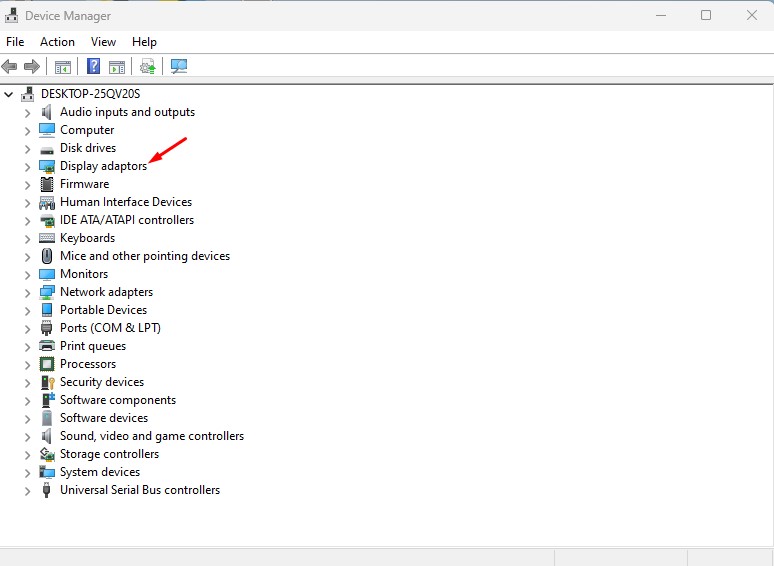
2. When the Device Manager opens, expand the Display Adapters tree.
3. Right-click on your current graphics adapter and select Properties. On the Properties, click Update Driver. Or else, right click on your graphics driver and select Update Driver.
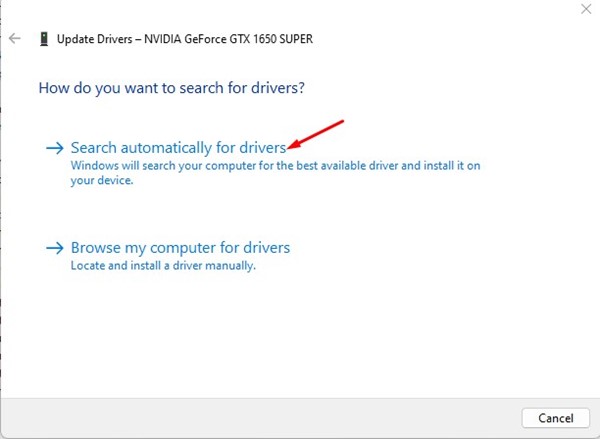
5. On the How do you want to search for drivers? prompt, select ‘Search automatically for drivers’.
That’s it! Now, Windows 11 will automatically search for available graphics driver updates. If an update is available, it will be downloaded and installed automatically.
3. Roll back your Graphics Drivers
If updating the driver doesn’t help and brings more problems, it’s best to roll back your graphic card’s driver. Here’s what you need to do.
1. Type in Device Manager on the Windows 11 Search. Next, open the Device Manager app from the list of best match results.
2. When the Device Manager opens, expand the Display Adaptors tree.
3. Right click on your current graphics adapter and select Properties.
4. On the Properties, click Roll Back Driver (If available)
5. Now, you must follow the on-screen instructions to complete the driver rollback process.
That’s it! This is how you can roll back graphics drivers on your Windows 11 computer.
4. Make Changes to your PC’s Power Settings
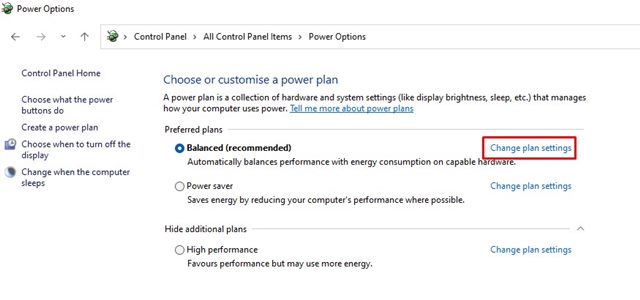
You can modify the Power Plan settings to prevent your Screen from going black after a few seconds. Here’s what you need to do.
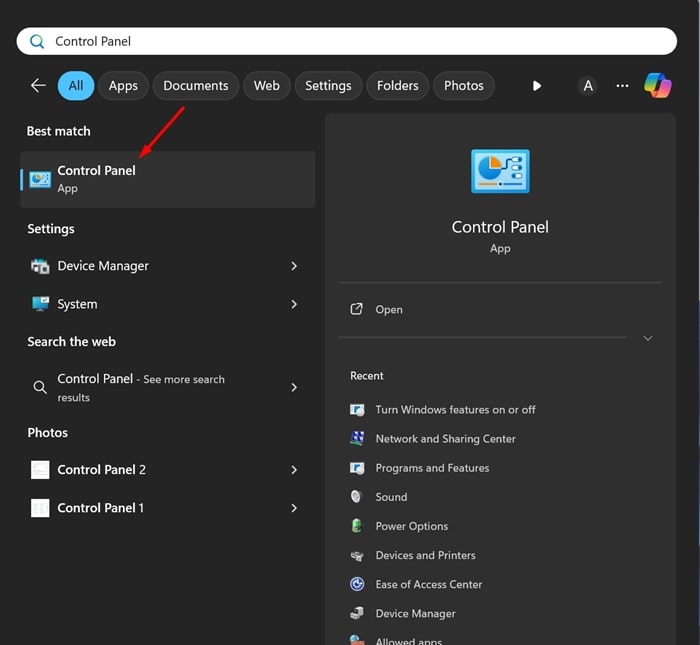
1. Type in Control Panel on the Windows Search. Next, open the Control Panel app from the list of best match results.
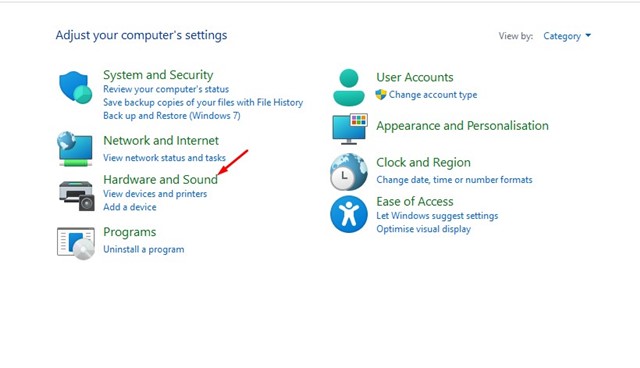
2. When the Control Panel opens, type in Hardware and Sound.
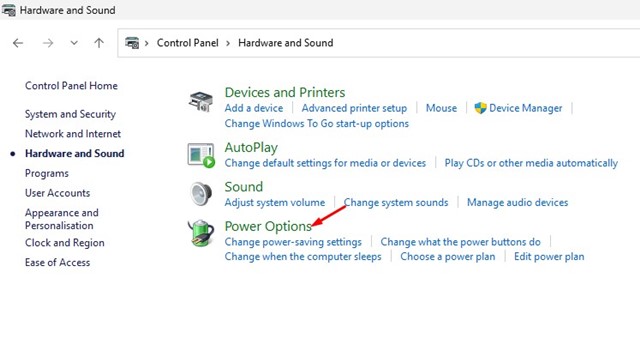
3. On the right side, click on Power Options.
4. Select the Change Plan Settings beside your selected Power Plan.
5. Next, select Never for both On Battery and Plugged in on the Turn off the Display and Put the computer to sleep.
6. After making the change, click on the Save Changes button.
That’s it! This is how you can change the power plan settings on Windows 11 to fix the monitor that keeps going black for a second.
5. Perform a Clean Boot
Performing a clean boot will help you fix the Screen Goes Black problem by eliminating third-party app conflict. You need to perform a Clean Boot and check if the problem persists.
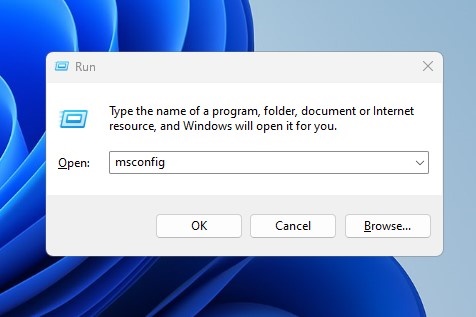
1. Press the Windows Key + R button on your keyboard. This will open the RUN dialog box. On the RUN dialog box, type msconfig and press Enter.
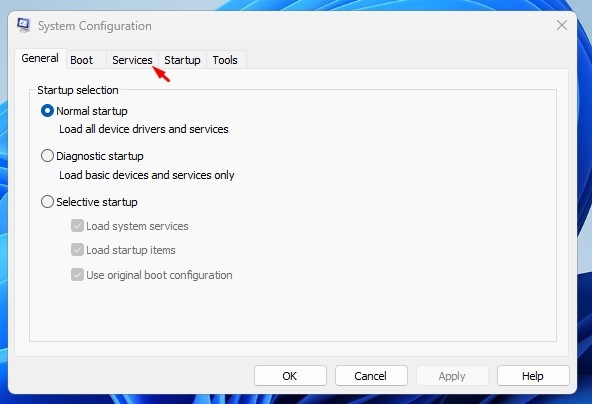
2. On the System Configuration utility, switch to the Services tab.
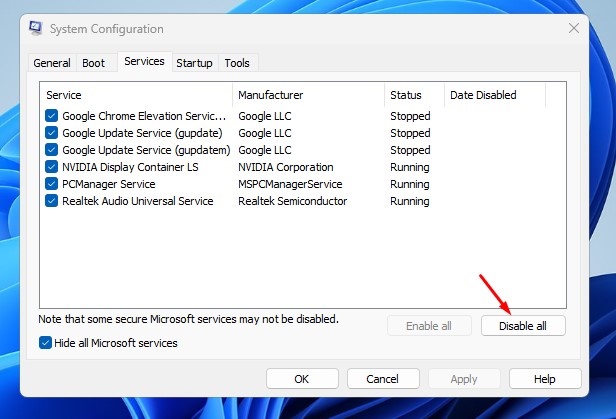
3. Next, check the ‘Hide All Microsoft Services’ and click Disable All.
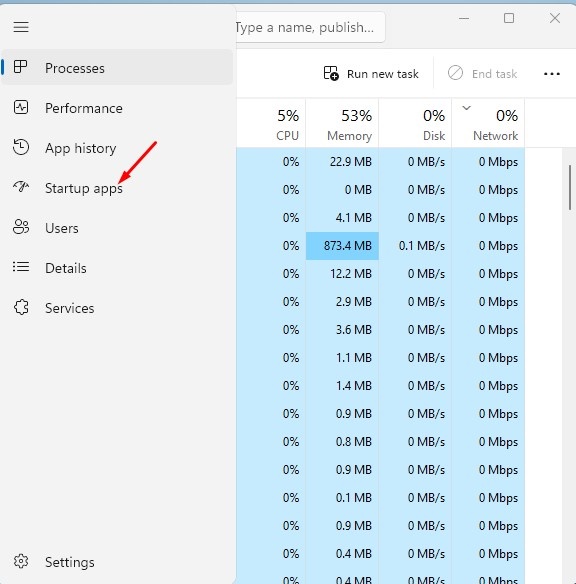
4. Next, open Task Manager and switch to the Startup tab.
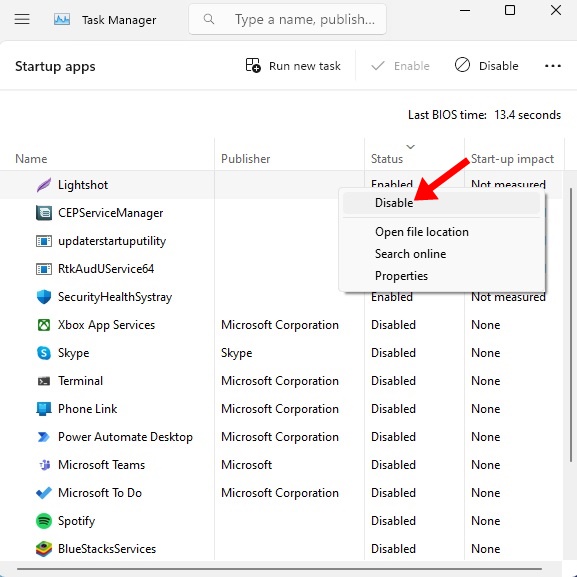
5. Right click on the Startup problems that are enabled and select Disable.
6. Finally, click on Apply on the System Configuration utility and close it.
That’s it! Now restart your Windows 11 Computer. This will boot your PC in a clean state without any third-party apps or services. Now check whether the Screen still goes black after a second or minute.
6. Disable the Overclocking
Overclocking the GPU or CPU improves system performance. Gamers often overclock their GPU and CPU frequencies to boost their gaming performance.
However, overclocking has its own disadvantages, like system hangs, crashes, heating issues, and more.
Your PC’s monitor may be going black out of nowhere due to overclocking. So, it’s recommended to undo any overclocking and see if it helps.
7. Perform a System Restore
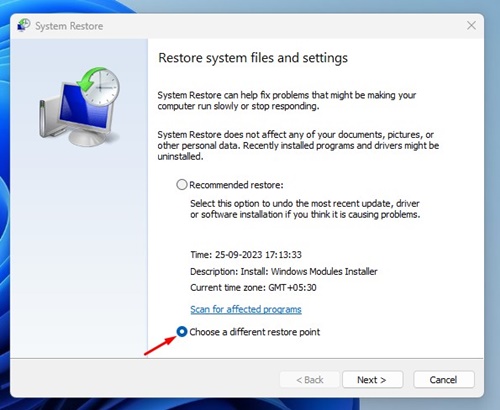
If you still can’t fix the black screen issue, it’s best to perform a system restore. A System Restore will roll back your device settings to a previous date when everything was working fine. Here’s how to perform a system restore on Windows.
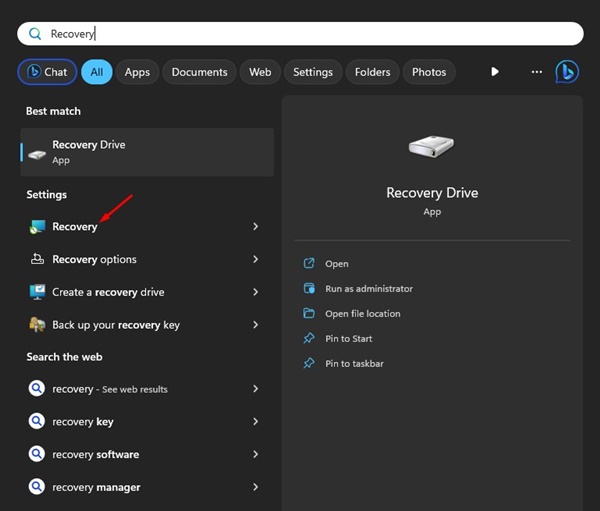
1. Type in Recovery on the Windows 11 Search. Next, open the Recovery app from the list of best match results.
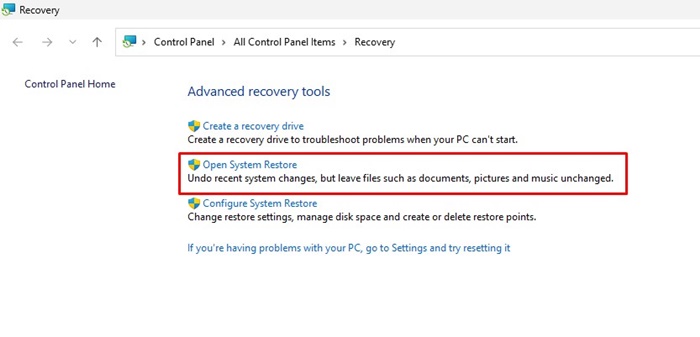
2. On the Recovery screen, click on Open System Restore.
3. On the next Screen, select Choose a different restore point.
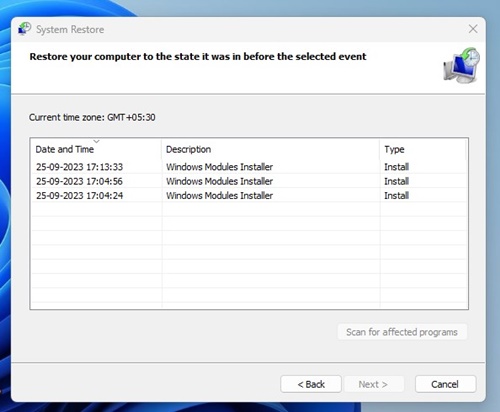
4. Select a Restore point created on a date when your PC is working fine and click Next.
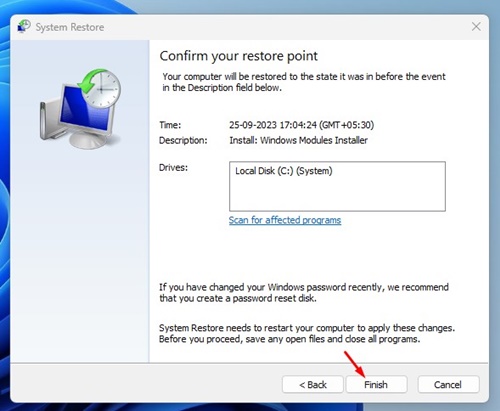
5. On the confirmation prompt, click Finish.
That’s it! This is how you can perform a system restore on your PC. After the system is restored, check if your monitor still goes black.
8. Rule out the SMPS Issues
SMPS or PSU issues are often known for triggering such problems. If you suspect that your PSU is making noise or has lots of dust, you can get it checked by a technician.
An SMPS issue can fail to provide a power supply to the Graphics Card or even your monitor, leading to frequent lags or the Screen going black for a second.
If nothing worked in your favor, you must rule out hardware issues. Pay special attention to the GPU, SMPS, and, of course, the monitor.
So, these are some best methods to fix Screen Keeps Going Black for a second. I hope the methods we have shared have helped you fix the issue. If you’re still experiencing the problem, it’s recommended to contact Microsoft’s support team.
The post How to Fix Screen Goes Black For a Second on Windows appeared first on TechViral.
from TechViral https://ift.tt/8xU7lOh


