

Google Chrome is definitely the most popular and most used desktop web browser worldwide. It offers a few exciting features that are supposed to provide a better user experience.
However, recently, a few users have been facing problems while downloading files using the Google Chrome browser. According to the user reports, the newly downloaded files do not show up in the Downloads folder and are deleted.
Why are my downloaded files deleted?
If your downloaded files are automatically deleted, there could be various issues. It’s possible that the browser’s enhanced protection feature is preventing the file from downloading because of a virus or malware.
The firewall/antivirus program and third-party software interference could also be a reason. Whatever the reason is, if your downloaded files are getting deleted, here’s what you can do.
How to Fix Chrome Automatically Deletes Downloaded Files?
You can prevent Google Chrome from automatically deleting your downloaded files by changing the browser settings. Here’s what you need to do.
1. Make Changes to the Safe Browsing
The Safe Browsing modes of Google Chrome prevent malicious files from downloading. Even when the download completes, it’s automatically deleted to prevent your system. So, you need to make a few changes to the Safe Browsing mode of Google Chrome to allow all downloads.
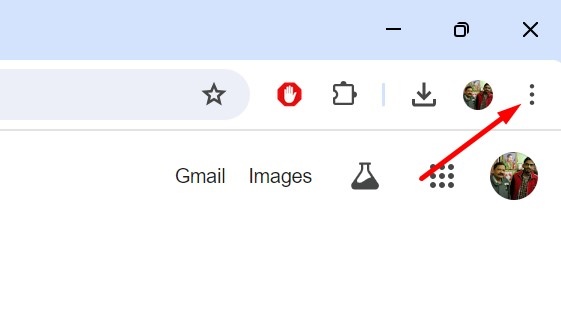
1. Launch the Google Chrome browser on your PC.
2. When the browser opens, click on the three dots at the top right corner.
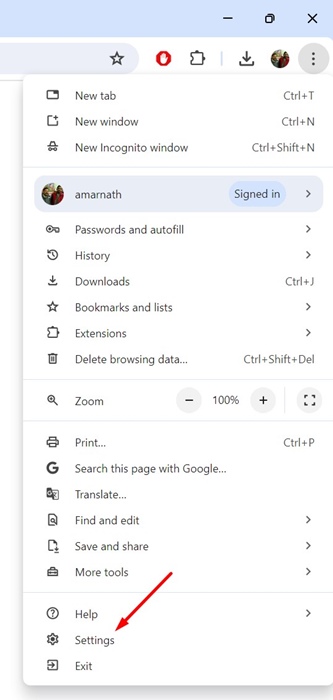
3. On the menu that appears, select Settings.
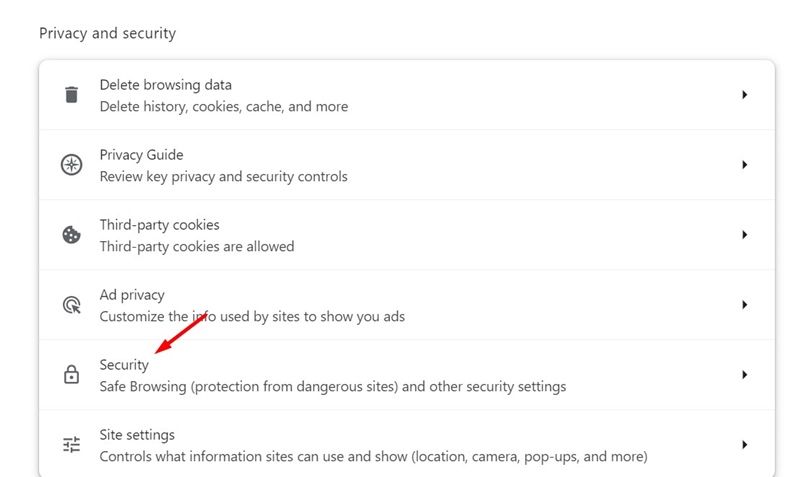
4. On the Settings screen, switch to the Privacy and Security tab.

5. On the right side, click on Security.
6. On the Safe browsing, select No Protection.

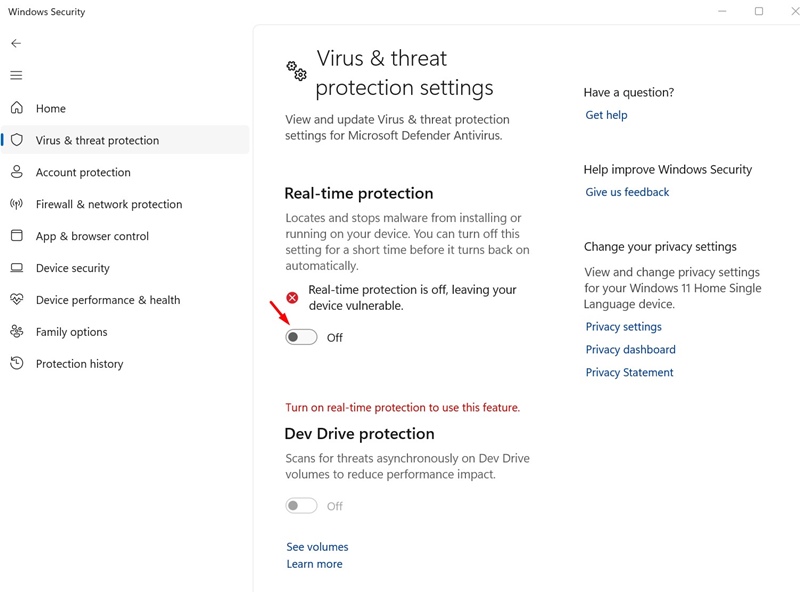
2. Turn Off the Threat Protection on Windows Security
Windows Security is another reason your files get deleted after downloading. While it’s not recommended to turn off Windows Security’s real-time protection, if you still want your downloads, you can disable it temporarily.
1. Launch the Windows Security app from the Windows 11 Start menu.

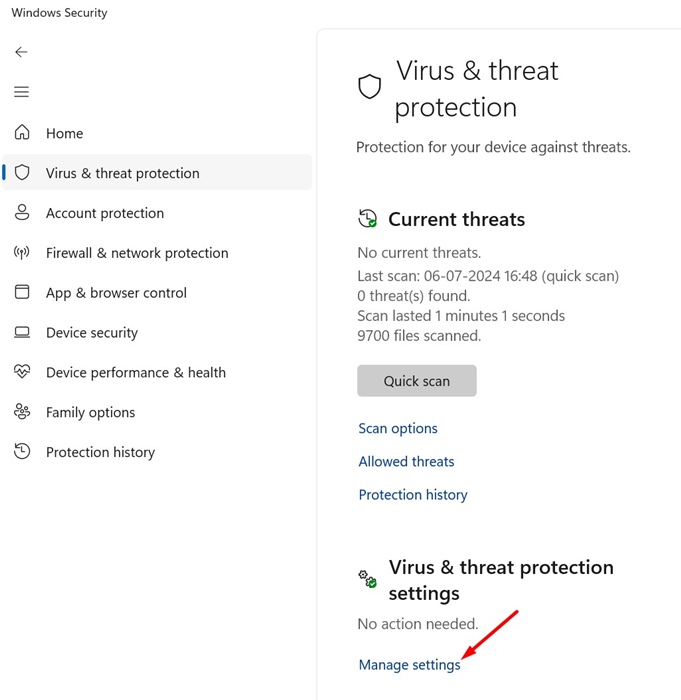
2. When the Windows Security app opens, switch to the Virus & threat protection.

3. Next, click the Manage Settings link under the Virus & threat protection settings.
4. On the next screen, turn off the toggle for Real-time protection.
3. Turn Off the Third-party Antivirus, Firewall, or VPN Apps
Third-party Antivirus, Firewall, or VPN apps can sometimes interfere with ongoing downloads and prevent them from being saved.
If you suspect a firewall restriction, you need to add Google Chrome to the Firewall exception list. You also need to do the same for Windows Defender.
And if you’re using any VPN or Proxy, keep them disabled until the download completes.
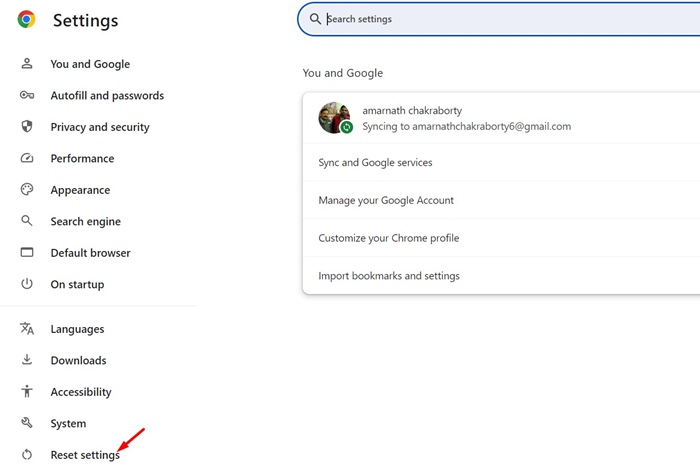
4. Reset the Google Chrome Settings
If nothing works for you to fix Chrome automatically deleting downloaded files, your best bet is to reset all Chrome settings to their default values. Here’s what you need to do.
1. Launch the Google Chrome browser. Next, click on the three dots at the top right and select Settings.
2. On the Chrome settings, switch to the Reset Settings tab.
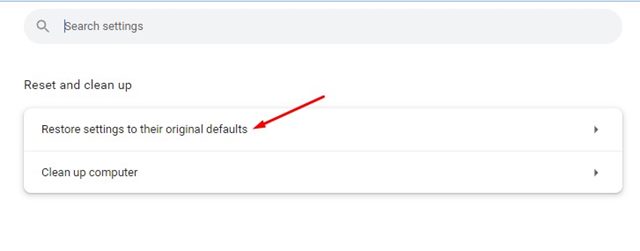
3. On the right side, click on Restore settings to their original defaults.
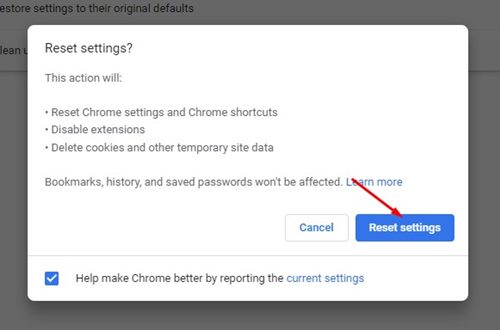
4. On the confirmation prompt, click Reset Settings.
Our shared methods will help you prevent Chrome from deleting your downloads. If the downloads are not deleted by Chrome, they will be available on the Recycle Bin, Quarantine folder of Windows Security, etc. Let us know if you need more help on this topic in the comments. Also, if you find this guide helpful, don’t forget to share it with your friends.
The post How to Fix Chrome Automatically Deletes Downloaded Files appeared first on TechViral.
from TechViral https://ift.tt/tEgBvUY

