

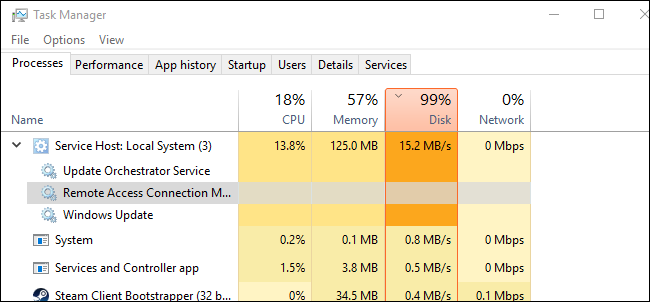
Many Windows users have suffered from the problem where up to 95% of their CPU and Disk have been used by a process called Service Host: Local System and Service Host: Network Service. These two processes often cause 99% to 100% of Disk and CPU resources.
Many readers have asked us about Service Host: Local System and what it does. Well, it’s one of the vital system processes for a reason. So, in this article, we will cover everything about Service Host: Local System.
What is Service Host: Local System?
Service Host: A local system is vital and operates automatically. Service Host Local System’s process includes Windows Auto Updates, Background Task Management, IP Configuration, and many more. During the Windows Auto Update, the Service Host: Local System can also consume your internet data.
However, the Service Host: Local System runs silently and doesn’t interrupt our ongoing work. Still, if your computer runs on less than 2GB of RAM or has a low-end processor, it can interrupt your entire Windows experience. This process also causes overheating issues, harming the battery life of a laptop.
According to Windows Users, the Service Host: Local System’s high CPU and Disk usage is caused by the Windows System Service known as Superfetch. But it’s still a critical process that deals with lots of stuff. Usually, the Service Host: Local System troubles users after startup when it tries to do different tasks simultaneously.
Superfetch is a technology that allows the operating system to manage random memory. Thanks to Superfetch, our apps open quickly. Superfetch analyzes the RAM usage patterns to learn what type of apps you run most often. Over time, Superfetch marks these apps, preloading them into the RAM, which causes the app to start quickly.
However, we hardly need this feature, and the SuperFetch service causes high CPU and RAM usage. Thus, the SuperFetch service is the root cause of High CPU usage on Windows. To fix the Local Host: System Service’s high CPU usage, we need to disable Superfetch.
Fix Service Host: Local System High Disk, CPU, and Memory Usage
We will list some easy methods to fix the Service Host: Local System High Disk Usage. Follow the steps carefully to avoid errors.
1. Disable Superfetch
1. First, open Task Manager on your Windows 10 computer and then maximize the Service Host: Local System
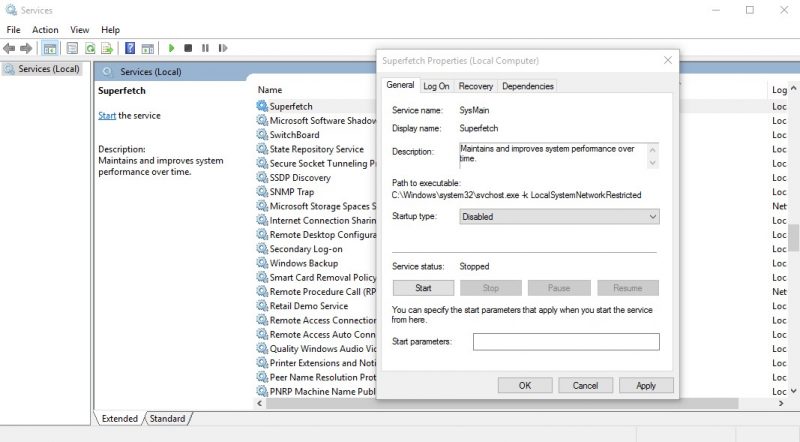
2. Next, find and right-click on Superfetch and then select Open Services.
3. Now, under the Services, find Superfetch. Right-click on it and then select properties. Under the Startup type, select Disabled and click Apply.
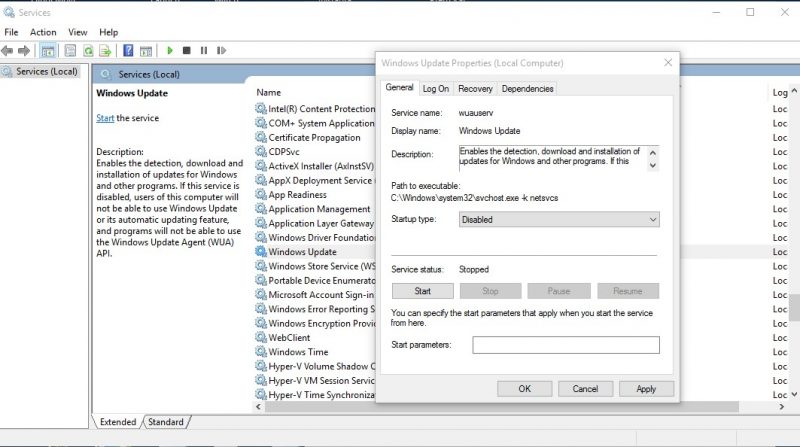
4. Next, find Windows Update, right-click on it and select Properties. Under the Startup type, select Disable and click Apply.
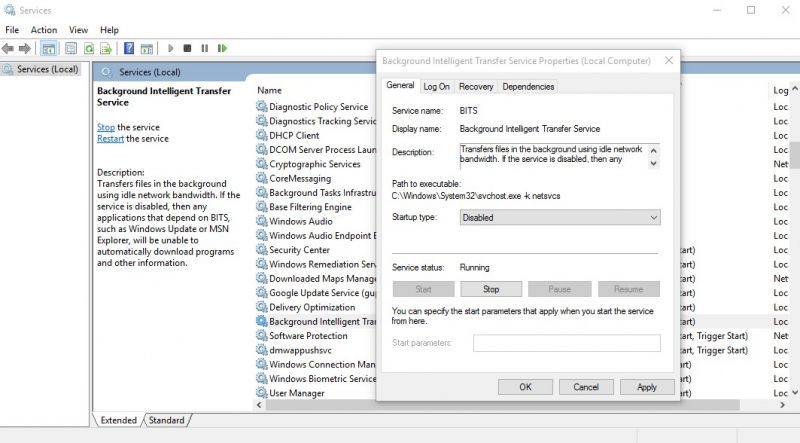
5. Next, find Background Intelligent Transfer Service under the Services. Right-click on the Background Intelligent Transfer Service and then select Properties. Under the ‘Startup type,’ select Disable and click on Apply
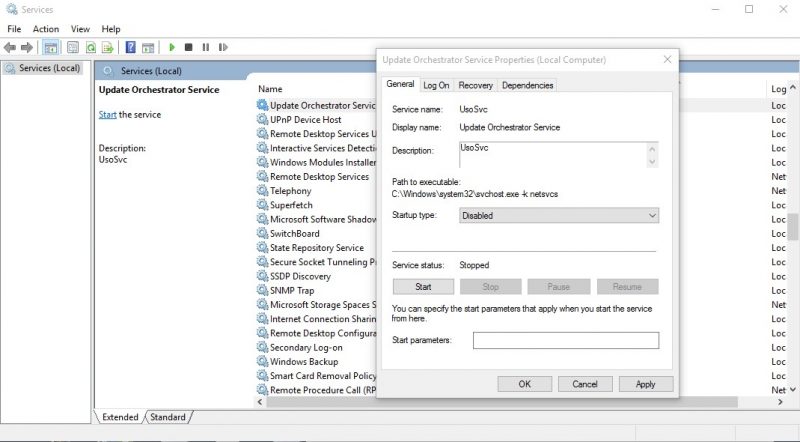
6. In the next step, find Update Orchestrator Service under the Services. Right-click on it and then select Properties. Now, under the ‘Startup Type’, select ‘Disable’ and click ‘Apply.’
2. Disable Superfetch Through Command Prompt
If you don’t want to follow all the steps listed below, you can use the Windows 10 command prompt to disable Superfetch from Windows. Follow the simple steps below to disable SuperFetch through the Windows 10 Command Prompt.
1. First, right-click on the Windows Start button and select the option Command Prompt (Admin).

2. Now, you will see the Command Prompt interface with administrator privileges.
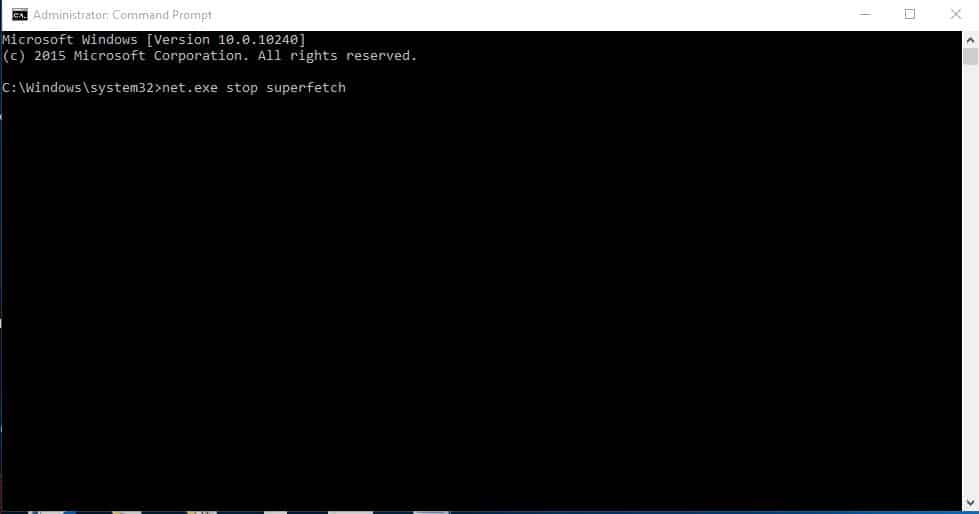
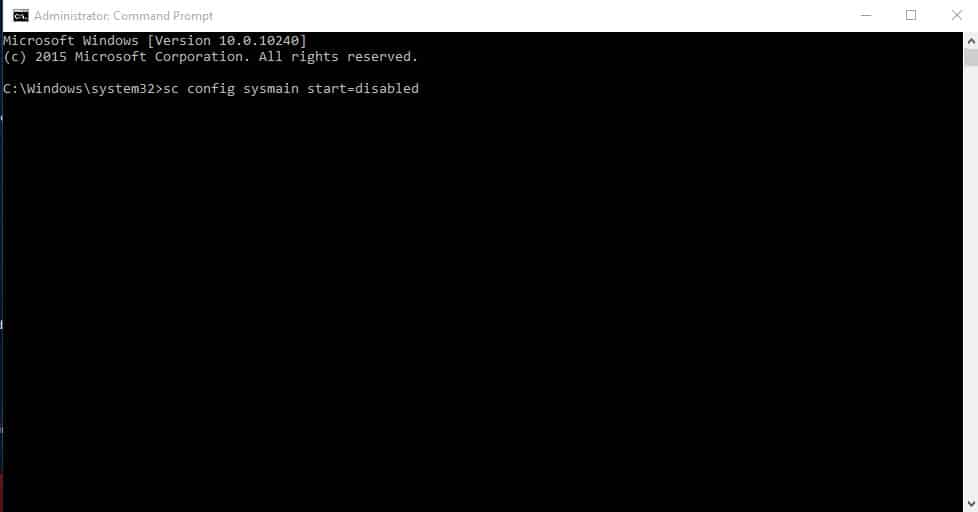
3. Now, on the Command Prompt window, type in net.exe stop superfetch (Without quotes) and press Enter.
4. Next, type in sc config sysmain start=disabled and press Enter.
3. Run System File Checker
System File Checker, or SFC, is a utility designed to find and fix corrupt system files. When system files are corrupted, the service host local system also experiences high disk usage.
Hence, we must run the System File Checker utility to find and replace the corrupted system files. Here’s what you need to do.
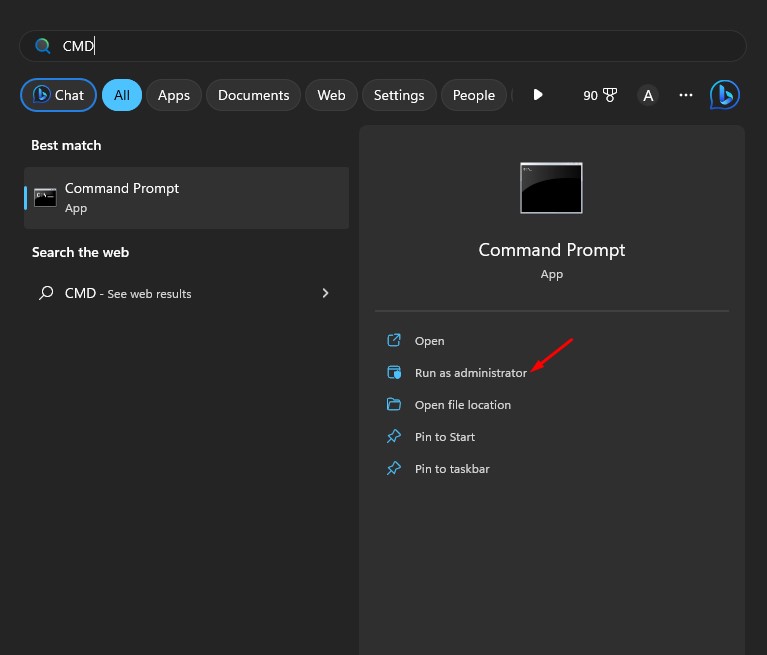
1. First, click the Windows Search and type in Command Prompt. Then, right-click on the CMD and select Run as administrator.
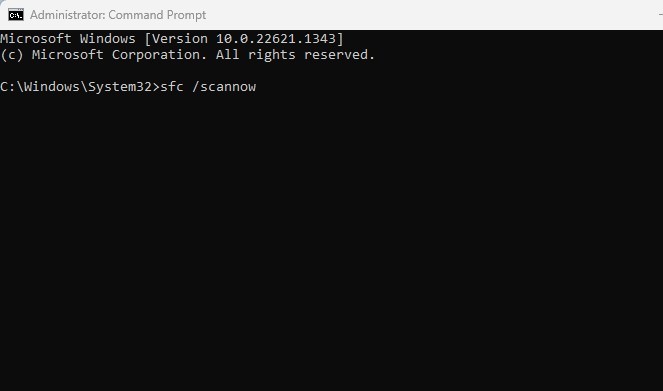
2. When the Command Prompt opens, type the given command and hit the Enter button.
sfc /scannow
3. Now, wait until the scan completes. Once completed, restart your Windows computer.
4. Perform a Clean Boot
Performing a clean boot is yet another best way to fix the Service Host Local System High CPU Usage problem.
Clean boot means disabling all third-party apps and then booting the computer. In this way, your PC will run only Microsoft services.
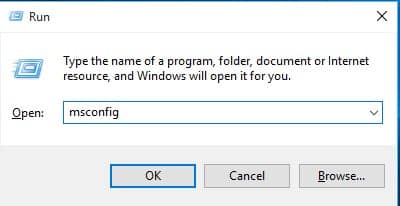
1. Press the Windows Key + R button on your keyboard. This will open the RUN dialog box. Next, type msconfig and hit the Enter button.
2. Next, on the System Configuration tab, switch to Services.
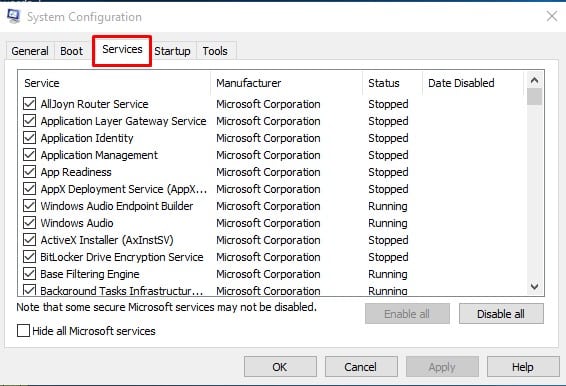
3. At the bottom, check the Hide All Microsoft services option and click Disable All.

After making the changes, restart your computer. If the problem doesn’t appear now, you must enable the services individually and check which ones are triggering the issue.
This is how you can fix Service Host: Local System High Disk Usage on Windows computers. If you have any other doubts, please make sure to discuss them with us in the comment box below.
The post How To Fix Service Host: Local System High Disk, CPU and Memory Usage? appeared first on TechViral.
from TechViral https://ift.tt/sXcyEKk

