

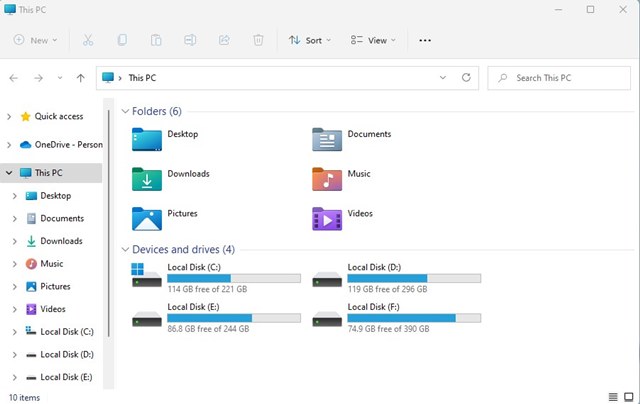
File Explorer allows you to browse your computer’s internal and external drives, folders, and file types. If you are not using an Administrator account, the file explorer on Windows 11 will open with standard-level privileges.
With Standard-level privileges, you might see many UAC prompts when accessing files and folders that require admin privileges, especially when accessing files and folders stored on the C: Drive on your Windows 11.
So, if you are tired of pressing the ‘Yes’ button on the UAC prompt every time you attempt to access system files and want to eliminate those prompts, here’s what you need to do.
1. Run Windows 11 File Explorer as Administrator
You can access the Windows folder to run File Explorer as an administrator. Here’s what you need to do.
- Open the File Explorer (This PC) on your PC.
2. Next, navigate to C: Drive > Windows.
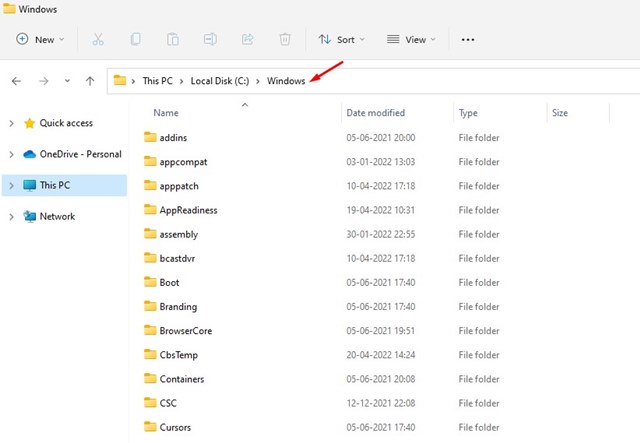
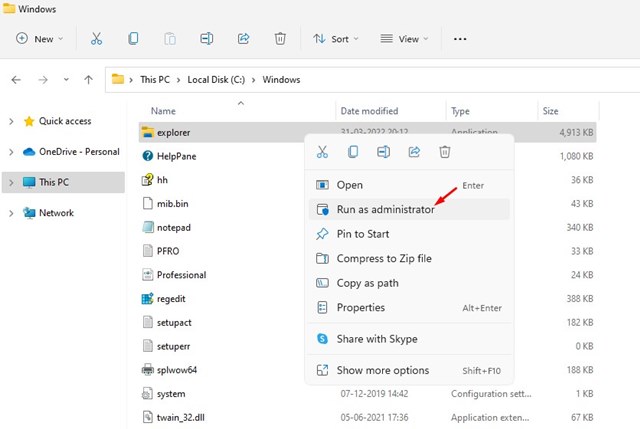
3. Find the Explorer app in the Windows folder. Right-click on the Explorer app and select the Run as administrator option.
This will launch File Explorer as an administrator on the Windows 11 operating system.
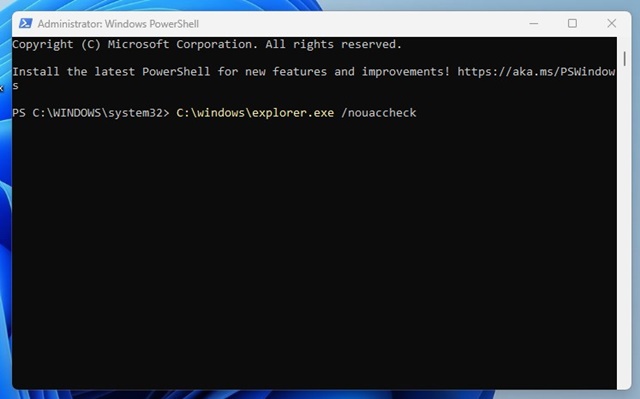
2. Run File Explorer as Administrator from PowerShell
The PowerShell utility on your computer to run File Explorer as an administrator. Here’s what you need to do.
1. Click on Windows Search and type in Windows PowerShell. Right-click on the PowerShell and select Run as administrator.
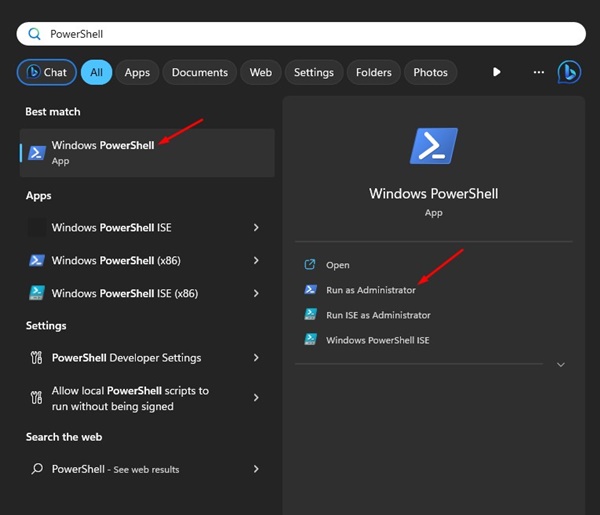
2. On the PowerShell utility, paste the given command and press Enter.
C:\windows\explorer.exe /nouaccheck
3. Run File Explorer as Administrator from Search
You can also run File Explorer as Administrator on Windows 11 via Search.
1. Click on the Windows Search and type in explorer.exe.

2. Right-click on Explorer.exe and select Run as Administrator.
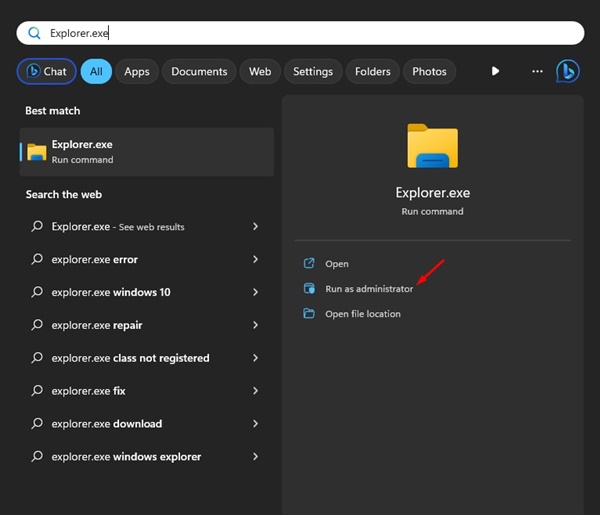
That’s how easy it is to run File Explorer as an administrator on Windows 11 via Search.
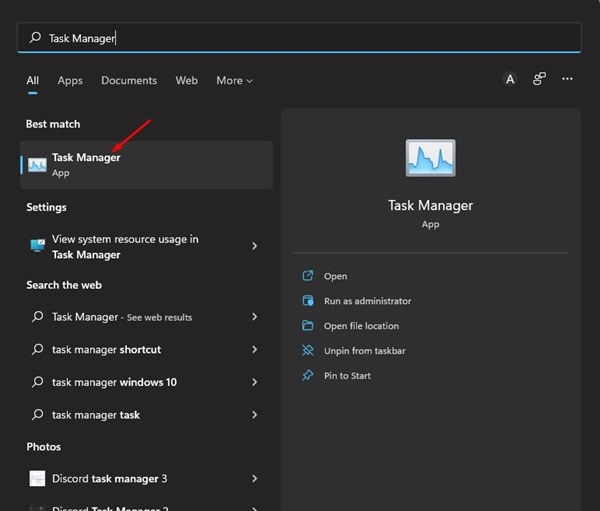
4. Run File Explorer as Administrator via Task Manager
The native Task Manager of Windows 11 can run File Explorer as administrator.
1. Click on the Windows 11 search and type in Task Manager. Next, open the Task Manager app from the list.
2. On the Task Manager, click the File menu and select Run New task.
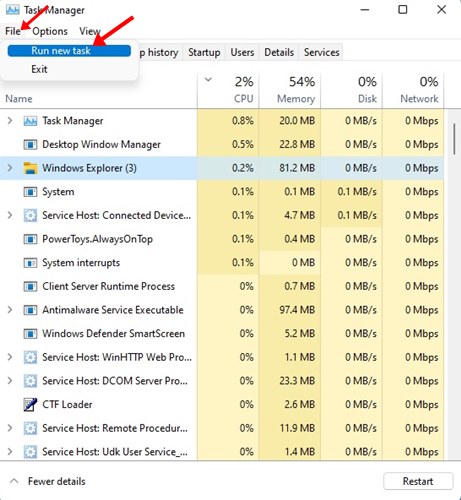
3. On the Create new task window, type in explorer.exe and check the box for Create this task with administrative privileges. Once you’ve done this, click the OK button.
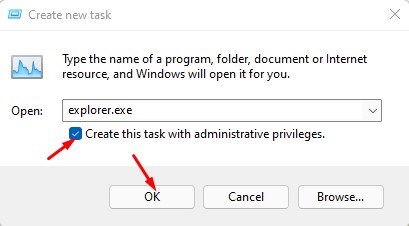
This will force File Explorer to restart with elevated privileges.
5. Use the Administrator Account on Windows 11
If you always want to run File Explorer as an administrator, you must use the Administrator account by default on your Windows 11. You no longer need to rely on the other two methods to open File Explorer with admin privileges.

We have already shared a detailed guide on enabling the administrator account in Windows 11. Read that guide to know the steps to allow the admin account.
Why should you run File Explorer as Administrator?
There are a few benefits that you will enjoy running File Explorer as an administrator.
- You can access the restricted files & folders.
- Running File Explorer as an administrator allows changing the protected system settings.
- Manage the file ownership and permissions.
- You will be able to operate tasks in bulk.
- You can access and modify the system files.
These are the best methods to run Windows 11 File Explorer as an administrator. If you have any doubts, let us know in the comment box below.
The post 5 Best Ways to Run File Explorer as Administrator in Windows 11 appeared first on TechViral.
from TechViral https://ift.tt/ZA3mN4W

