

Secure Boot is a security feature in your computer’s startup software. It safeguards the boot process when you start your computer. It is generally found on modern computers loaded with UEFI firmware.
Its ultimate role is to prevent unsigned UEFI drivers from loading during the startup process. Sometimes, malicious programs or malware can take control of your PC during the boot process. The role of Secure Boot is to prevent unauthorized access.
Modern PCs with UEFI automatically enable this feature, a great security feature that must be enabled every time.
Also Read: Can My PC Run Windows 11?
How to Disable Secure Boot in Windows
The only downside of Secure Boot is that it prevents users from doing certain things on their machines. For example, you can’t run two operating systems on a single machine without disabling Secure Boot.
Below, we have shared a step-by-step guide on how to do this in Windows.
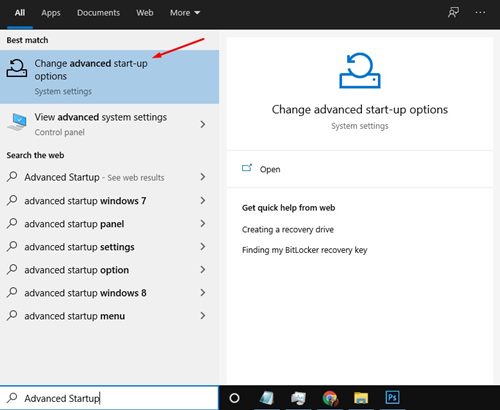
1. Open the Windows search box and type in Advanced Startup. Click on the Change Advanced Startup option.
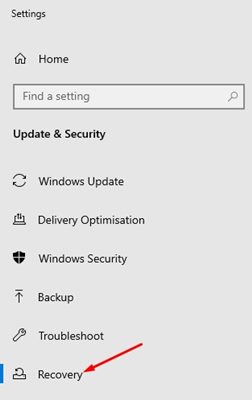
2. This will take you to the Update & Security page. Click on Recovery as shown below.
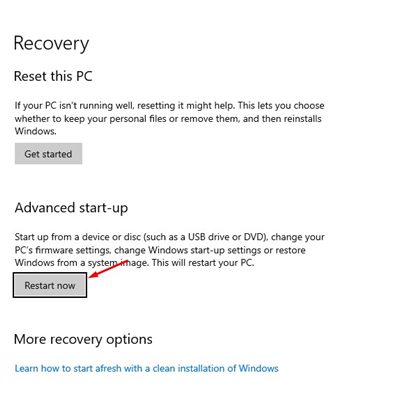
3. On the right pane, click on the Restart now.
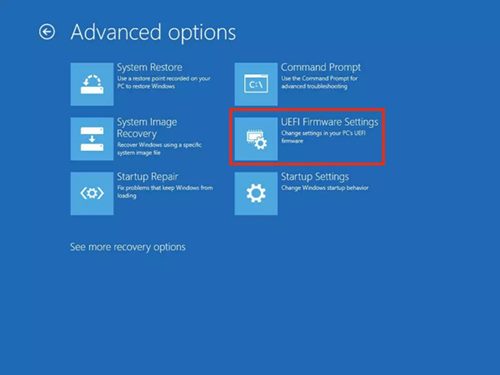
4. Your PC will now restart in advanced mode. To access this mode, select Troubleshoot > Advanced Options > UEFI Firmware Settings.
5. Your PC will restart once again. This time, your PC will start operating in BIOS. Select the Security tab on the BIOS and find the Secure Boot option.
6. You need to select the Secure Boot option to Disabled. You need to use the arrow button on the keyboard to select the Disabled option.

Save the changes in the BIOS. If you wish to enable the feature, select Enabled under the Secure Boot option in Step 6.
This article explains how to enable/disable Secure Boot in Windows. I hope it helps you. Please share it with your friends. If you have any questions, let us know in the comment box below.
The post How to Enable or Disable Secure Boot in Windows appeared first on TechViral.
from TechViral https://ift.tt/LerbvjW

