

Windows lets you change process priorities. A process priority determines how much of your computer’s resources are devoted to that process. Below, we share steps for running programs at a higher priority.
Run Windows Program at Higher Priority
Changing process priority on Windows is an easy process. Here’s how to do it.
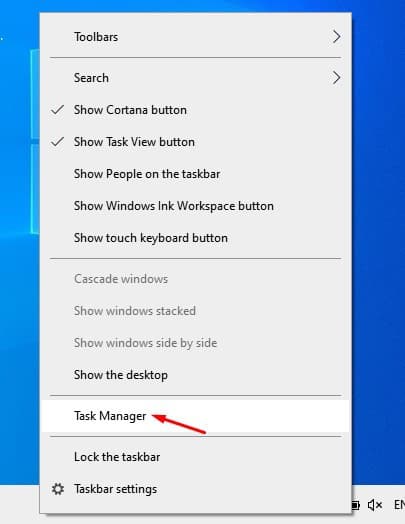
1. Right-click on the taskbar and select Task Manager.
2. Click on the process whose priority you want to change and click on Go to details.

3. You will now see the details tab. Right-click on the selected process and select Set Priority.

4. You will now see 6 Options – Realtime, High, Above Normal, Normal, Below Normal, and Low.
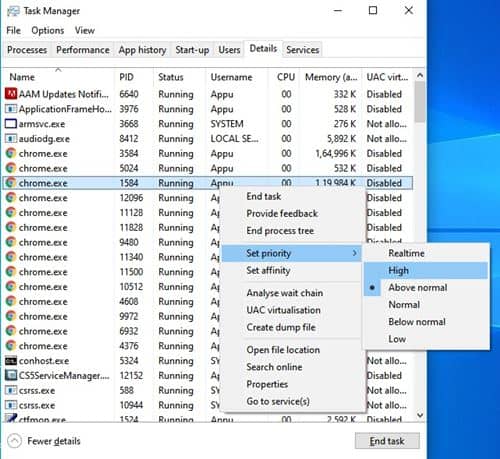
5. Realtime is the Highest Priority, and Low is the Lowest Priority. You can set the priority of each process, depending on your needs.
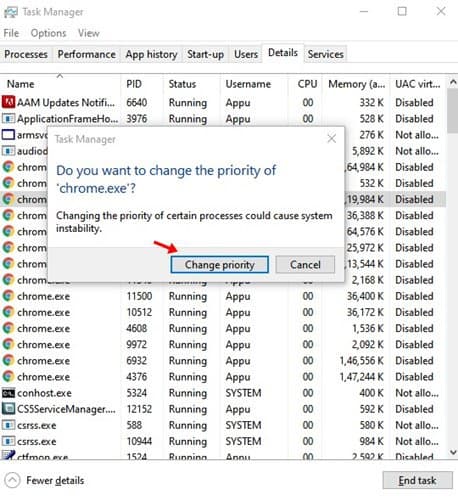
6. Click the Change Priority when prompted.
Note: We have used Windows 10 to demonstrate the process. The steps are the same for Windows 11 as well.
This article is about running an application at a higher priority in Windows. I hope it helped you. Please share it with your friends.
The post How to Run Windows Programs at Higher Priority appeared first on TechViral.
from TechViral https://ift.tt/ujByOpg

