

Energy Saver mode is a battery saver feature designed to extend your laptop’s battery life and reduce energy use. The feature extends the battery life by reducing a few animations and visual features and trading off some system performance.
Below, we have shared some simple steps to enable Energy Saver Mode on Windows 11 Laptops.
How to Enable the Energy Saver Mode on Windows 11
Enabling and disabling Energy Saver Mode in Windows 11 is super easy, provided your laptop uses the latest version of the operating system.
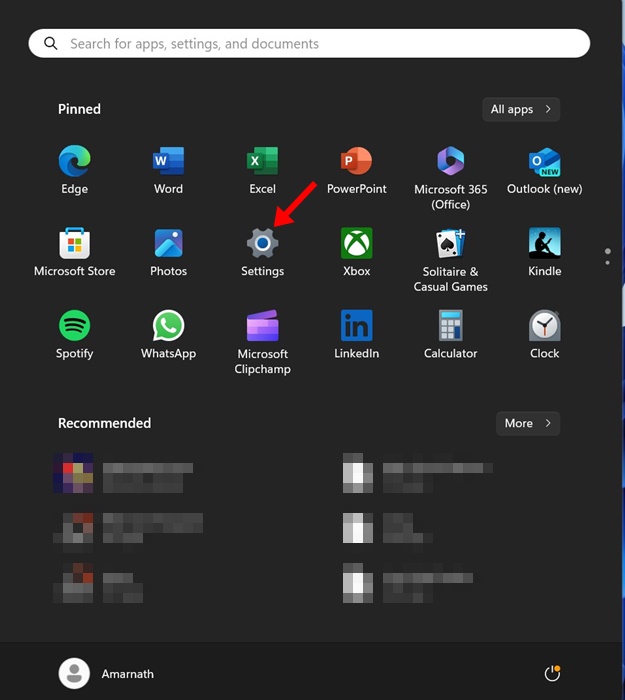
1. Click on the Windows 11 Start Button and select Settings.
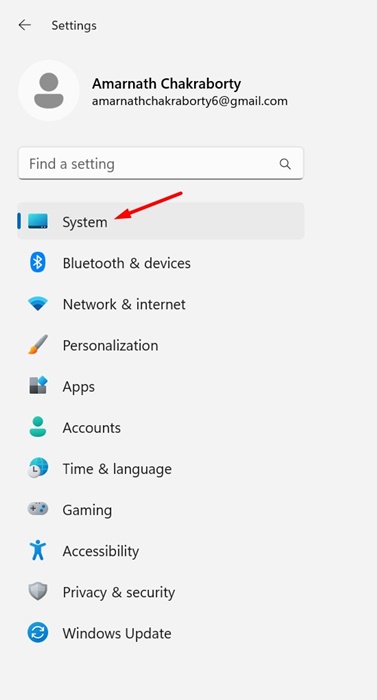
2. When the Settings app opens, switch to System.
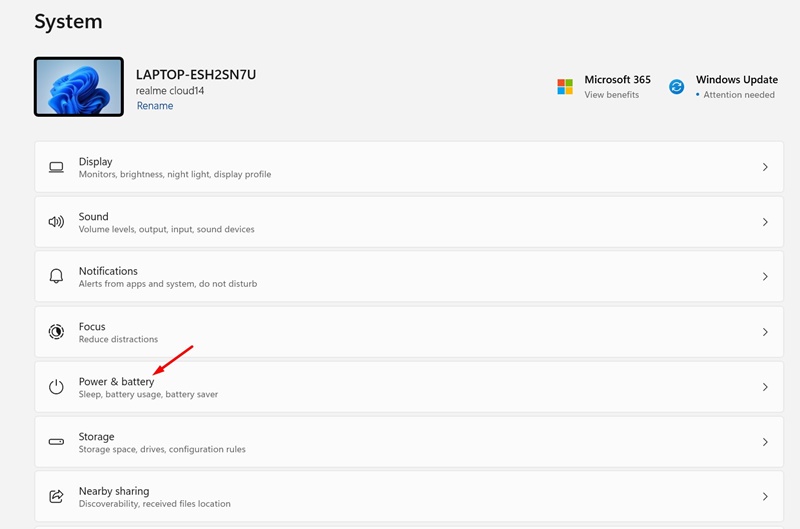
3. On the right side, scroll down and click on Power & Battery.
4. Scroll down a bit and expand the Energy Saver.
5. Toggle on the feature or run it automatically.
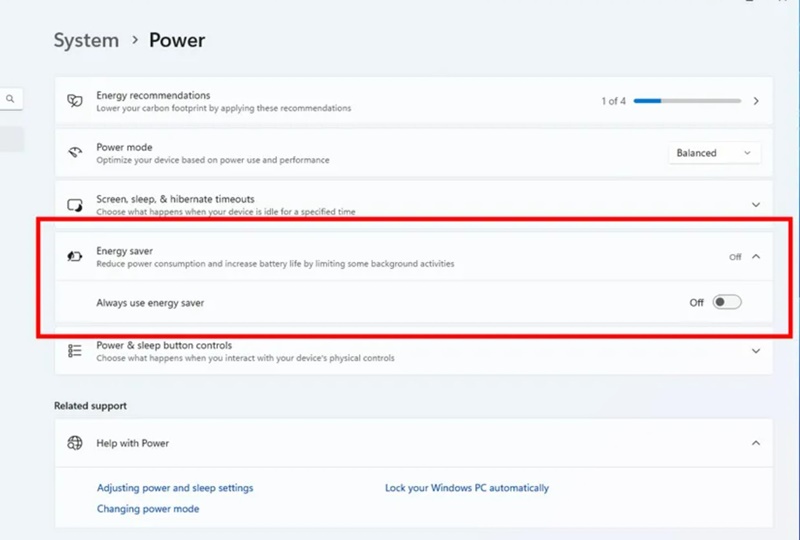
6. You can also enable the Always on energy saver option. This will enable the Energy Saver mode regardless of the current battery percentage.
7. If you don’t want to use the Energy Saver, you can toggle off the feature in Step 5.
While the Energy Saver mode may appear the same as Battery Saver, it’s a bit different. The new feature is meant for laptops to extend their battery life and works on desktop computers to conserve electricity.
This guide explains how to enable the new Energy Saver Mode on Windows 11 laptops and desktops. This feature could be great for those who want to conserve power on laptops and desktops.
The post How to Enable the Energy Saver Mode on Windows 11 appeared first on TechViral.
from TechViral https://ift.tt/3Tdu2E9

