

The default Windows Search covers specific folders like Documents, Pictures, Music, and the desktop. But, what if you want Windows 11 to search for files present in any other drive or folder?
If you want to do this, you need to switch Windows 11’s Enhanced Search Mode. This feature forces Windows 11 to index your entire PC, allowing you to find files no matter where they are stored.
Turn On Enhanced Search in Windows 11
Enabling the Enhanced Search mode in Windows 11 is easy, but you should know a few things.
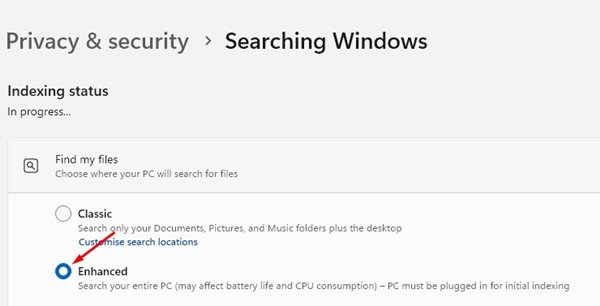
Enhanced search searches your entire PC, but it affects the battery life and raises the CPU consumption. Your PC should be plugged in for initial indexing.
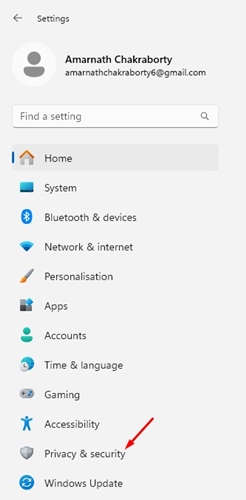
1. Open the Settings app on your Windows 11.
2. When the Settings app opens, click Privacy & Security.
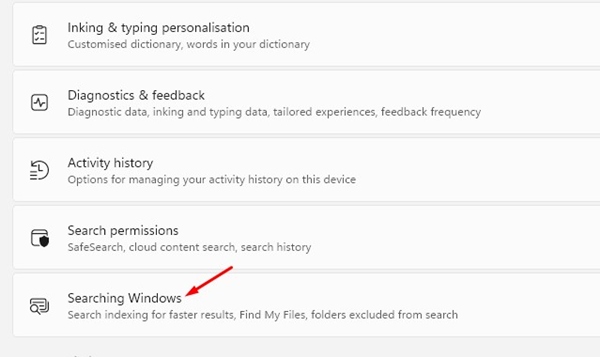
3. On the Privacy & Security, click Searching Windows.
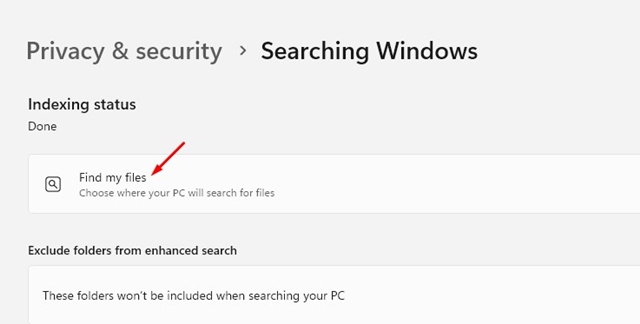
4. Expand the Find my Files.
5. Select Enhanced instead of Classic.
Rebuild the Search Index
If you’re experiencing problems after enabling the Enhanced Search, you should rebuild the search index.
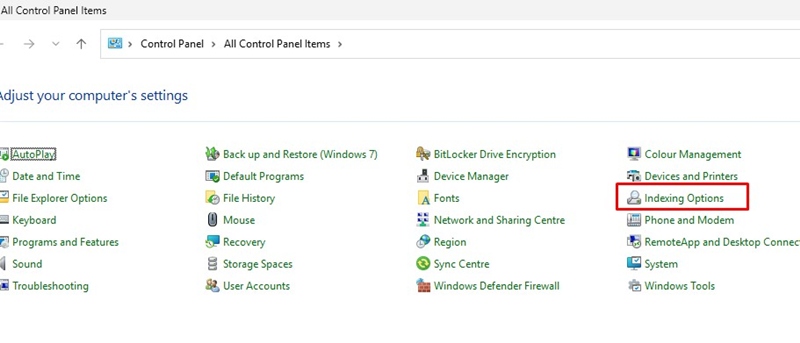
1. Open the Control Panel and click Indexing Options.
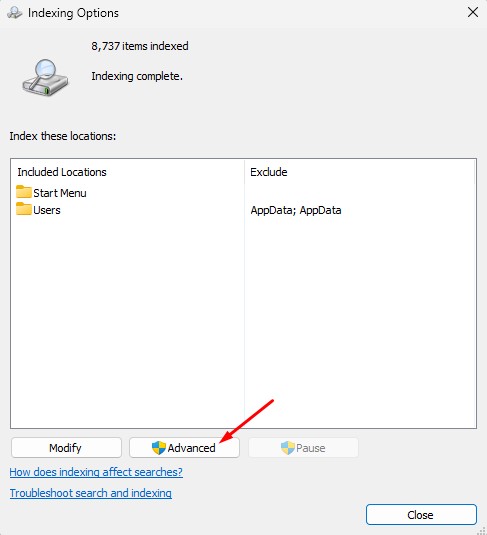
2. Switch to the Advanced.
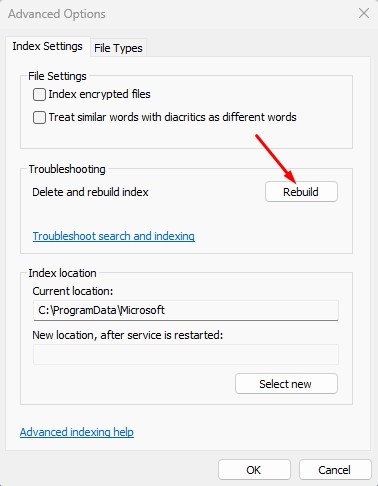
3. On the Troubleshooting section, click Rebuild.
4. Confirm your choice when prompted.
Make sure to restart your device if it’s not responding.
This article explains how to turn on Enhanced search in Windows 11. If you need more help with this topic, let us know in the comments.
The post How to Turn On Enhanced Search in Windows 11 appeared first on TechViral.
from TechViral https://ift.tt/tu9TFwU

