

While disabling BitLocker is not recommended if you care about your privacy and security, you may sometimes need to disable the security feature for a few reasons. Disabling BitLocker is pretty easy, especially on the Windows 11 operating system.
Turn Off BitLocker Drive Encryption on Windows 11
Below, we have shared a step-by-step guide to disable BitLocker drive encryption in the latest Windows 11 operating system.
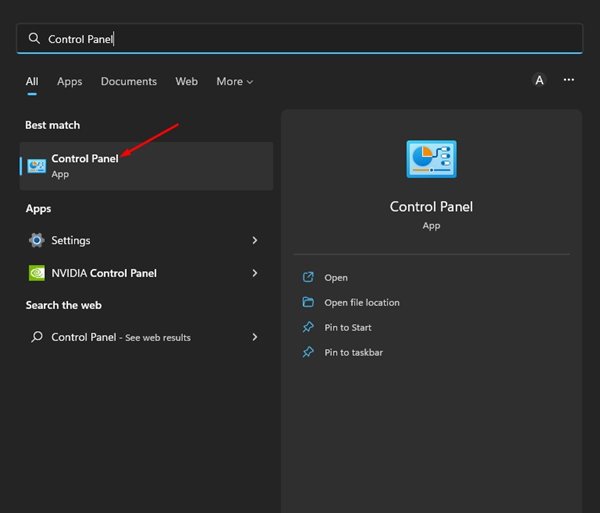
1. Open the Control Panel app from the Windows Search.
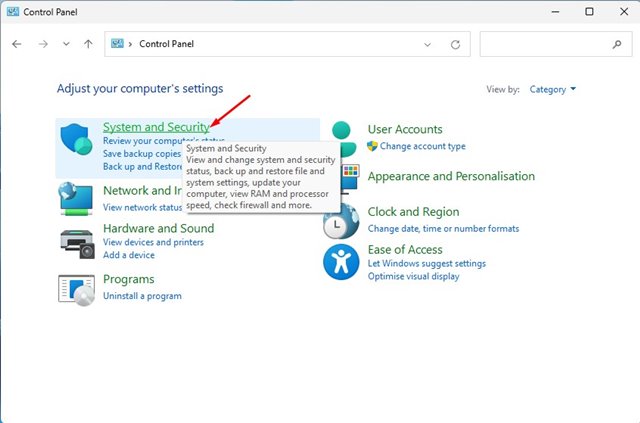
2. Switch to the Category View. Click the System and Security option.
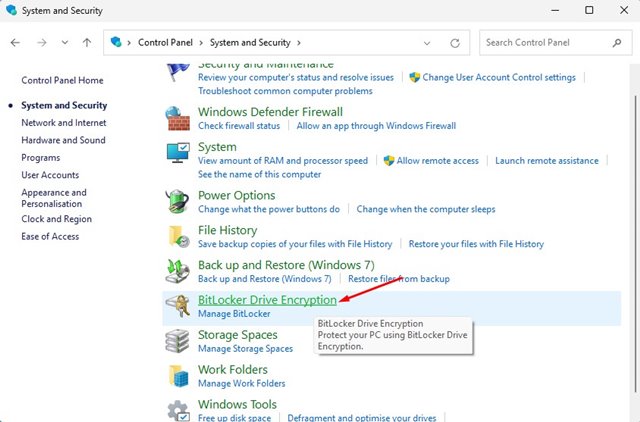
3. Scroll down and click on the BitLocker Drive Encryption.
4. Scroll down and find the drive where BitLocker encryption is turned on.
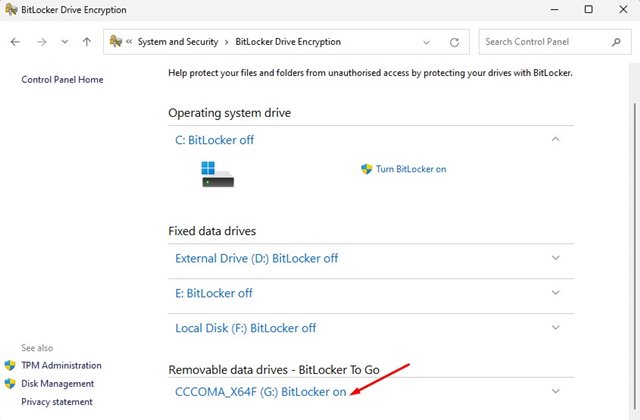
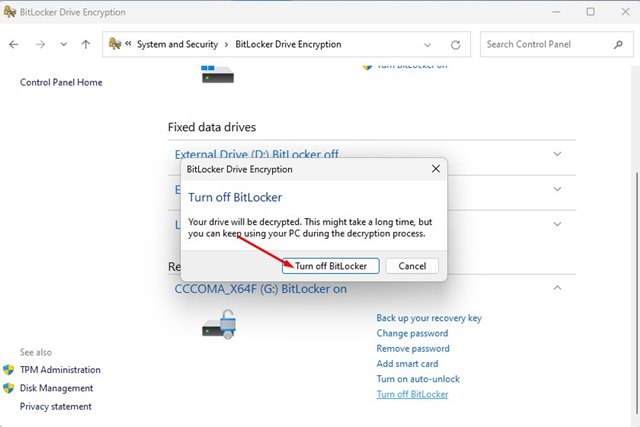
5. Click the Turn Off BitLocker link next to the encrypted drive. The encrypted drive could be your operating system, fixed data, or removable drive.

6. Click the Turn Off BitLocker button again.
Disable BitLocker Encryption using PowerShell
The Windows PowerShell utility can also turn off BitLocker Drive encryption on Windows 11. Here’s how you can turn off BitLocker encryption using the PowerShell utility on Windows.
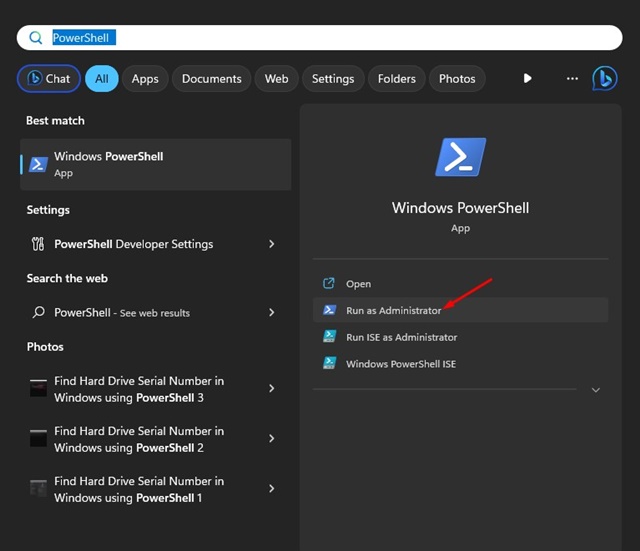
1. Type PowerShell in the Windows Search. Right-click on the PowerShell app and select Run as administrator.
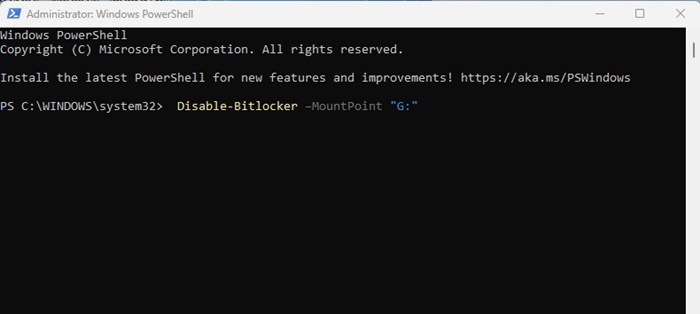
2. Execute the given command:
Disable-Bitlocker –MountPoint "drive letter:"
Important: Replace the drive letter with the actual letter of your Bitlocker encrypted drive.
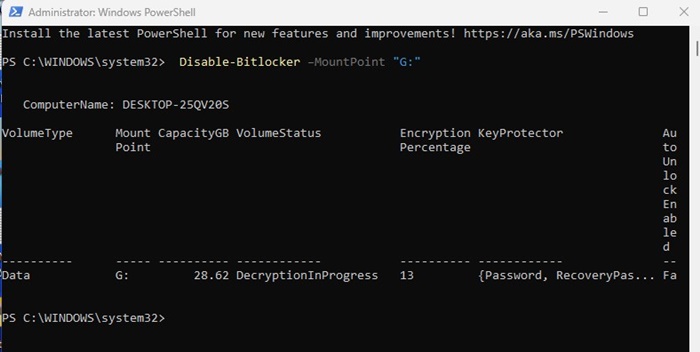
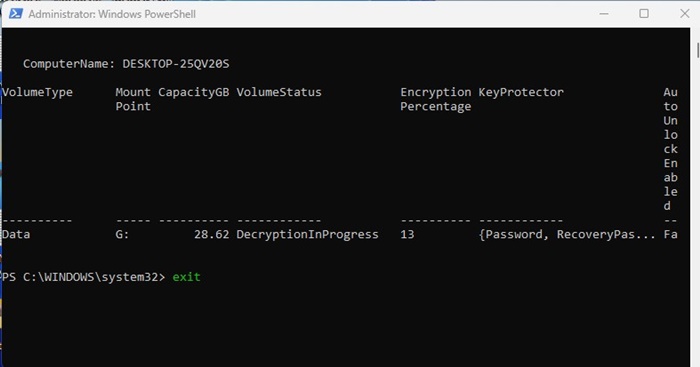
3. Wait until the BitLocker utility decrypts the drive. The process will take time.
4. You can type exit in PowerShell to close it. The drive will continue to decrypt in the background.
Other than BitLocker, you can also use other encryption software for Windows to encrypt your drive and keep your data secure. If you aren’t using BitLocker, follow our guide on using BitLocker on Windows 11. If you need more help with BitLocker Drive encryption, let us know in the comments.
The post How to Turn Off BitLocker Drive Encryption on Windows 11 appeared first on TechViral.
from TechViral https://ift.tt/MBgptfe

