

You can change your default system font to freshen up your Windows 11 PC’s look. And in this article, we will learn how to change the default system font on Windows 11. To change the font on Windows 11, you need to modify the registry settings. Hence, it’s recommended to safely back up the Registry file before following the steps.
1. Pick the Font from the Font Menu on Windows 11
First, you need to know the font’s name that you want to use as a default system font.
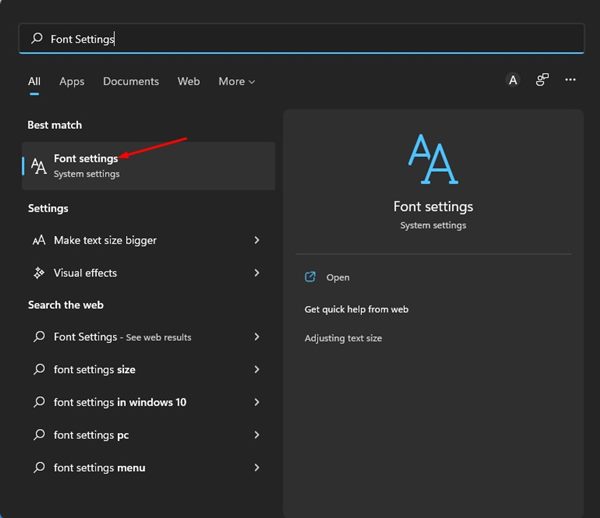
1. Click on the Windows 11 Search and type in Font Settings. Next, open the Font Settings option from the search results.
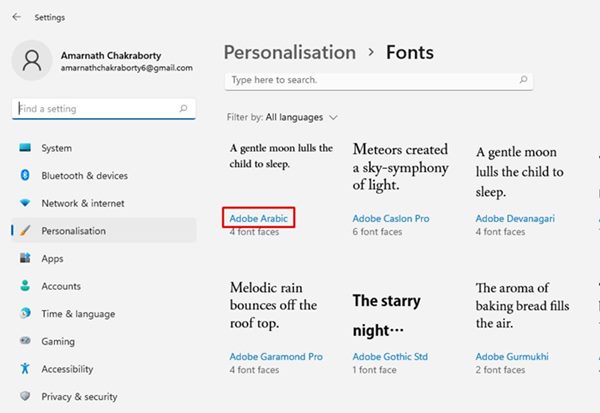
2. Scroll down and find the font you want to use as default. Next, note down the font name.
3. You can also add your own fonts on Windows 11 by following this method.
2. Change Default System Font on Windows 11
Once you know the font name, you can set it as a default system font. However, you need to create a registry file to change the system font.
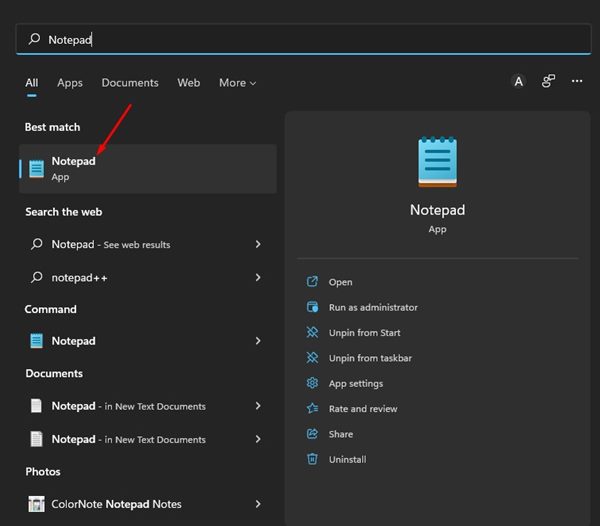
1. Open Notepad on your Windows 11 computer.
2. In Notepad, paste the following code:
Windows Registry Editor Version 5.00
[HKEY_LOCAL_MACHINE\SOFTWARE\Microsoft\Windows NT\CurrentVersion\Fonts]
"Segoe UI (TrueType)"=""
"Segoe UI Bold (TrueType)"=""
"Segoe UI Bold Italic (TrueType)"=""
"Segoe UI Italic (TrueType)"=""
"Segoe UI Light (TrueType)"=""
"Segoe UI Semibold (TrueType)"=""
"Segoe UI Symbol (TrueType)"=""
[HKEY_LOCAL_MACHINE\SOFTWARE\Microsoft\Windows NT\CurrentVersion\FontSubstitutes]
"Segoe UI"="FONT-NAME"
Important: Replace the FONT-NAME with the actual name of the font you want to set as default. For example, if you want to use Adobe Arabic as the default system font, the code would look like:
Windows Registry Editor Version 5.00
[HKEY_LOCAL_MACHINE\SOFTWARE\Microsoft\Windows NT\CurrentVersion\Fonts]
"Segoe UI (TrueType)"=""
"Segoe UI Bold (TrueType)"=""
"Segoe UI Bold Italic (TrueType)"=""
"Segoe UI Italic (TrueType)"=""
"Segoe UI Light (TrueType)"=""
"Segoe UI Semibold (TrueType)"=""
"Segoe UI Symbol (TrueType)"=""
[HKEY_LOCAL_MACHINE\SOFTWARE\Microsoft\Windows NT\CurrentVersion\FontSubstitutes]
"Segoe UI"="Adobe Arabic"
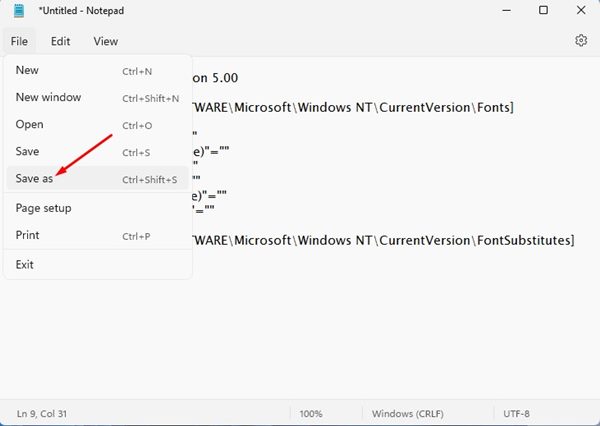
3. Once done, click on the File menu and select Save as.
4. On the Save as window, select ‘All files’ on the Save as type. Next, type in a name for the file followed by the .reg extension. For example: New System font.reg
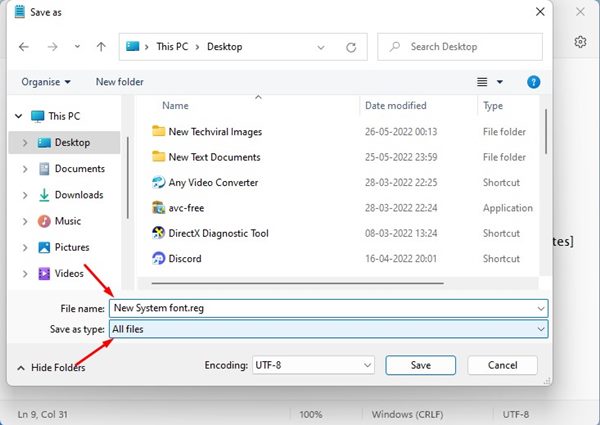
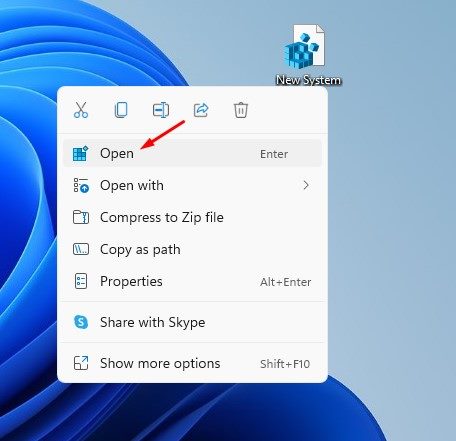
5. Click on the Save button on the Save As window. Next, right-click on the Registry file you have created and select Open.
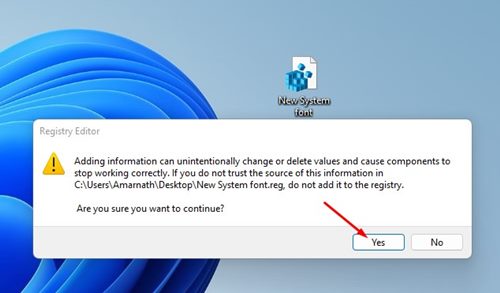
6. You will see a confirmation dialog box. Click on the Yes button to apply the new font.
3. How to Restore Default System Font on Windows 11
If you want to revert the font change, you need to create another registry file. Follow some of the simple steps we have shared below.
1. Open Notepad on your Windows 11 PC and paste the following code into it
Windows Registry Editor Version 5.00
[HKEY_LOCAL_MACHINE\SOFTWARE\Microsoft\Windows NT\CurrentVersion\Fonts]
"Segoe UI (TrueType)"="segoeui.ttf"
"Segoe UI Black (TrueType)"="seguibl.ttf"
"Segoe UI Black Italic (TrueType)"="seguibli.ttf"
"Segoe UI Bold (TrueType)"="segoeuib.ttf"
"Segoe UI Bold Italic (TrueType)"="segoeuiz.ttf"
"Segoe UI Emoji (TrueType)"="seguiemj.ttf"
"Segoe UI Historic (TrueType)"="seguihis.ttf"
"Segoe UI Italic (TrueType)"="segoeuii.ttf"
"Segoe UI Light (TrueType)"="segoeuil.ttf"
"Segoe UI Light Italic (TrueType)"="seguili.ttf"
"Segoe UI Semibold (TrueType)"="seguisb.ttf"
"Segoe UI Semibold Italic (TrueType)"="seguisbi.ttf"
"Segoe UI Semilight (TrueType)"="segoeuisl.ttf"
"Segoe UI Semilight Italic (TrueType)"="seguisli.ttf"
"Segoe UI Symbol (TrueType)"="seguisym.ttf"
"Segoe MDL2 Assets (TrueType)"="segmdl2.ttf"
"Segoe Print (TrueType)"="segoepr.ttf"
"Segoe Print Bold (TrueType)"="segoeprb.ttf"
"Segoe Script (TrueType)"="segoesc.ttf"
"Segoe Script Bold (TrueType)"="segoescb.ttf"
[HKEY_LOCAL_MACHINE\SOFTWARE\Microsoft\Windows NT\CurrentVersion\FontSubstitutes]
"Segoe UI"=-
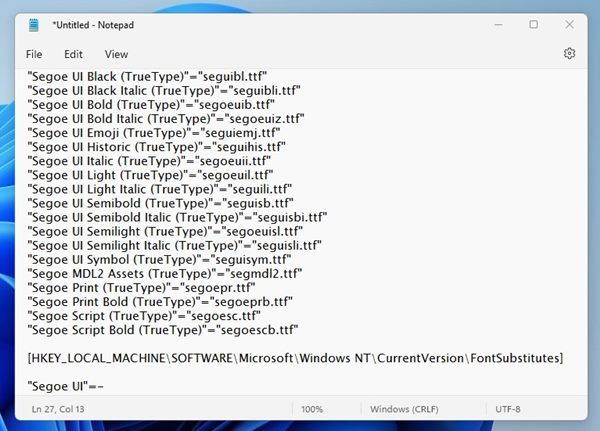
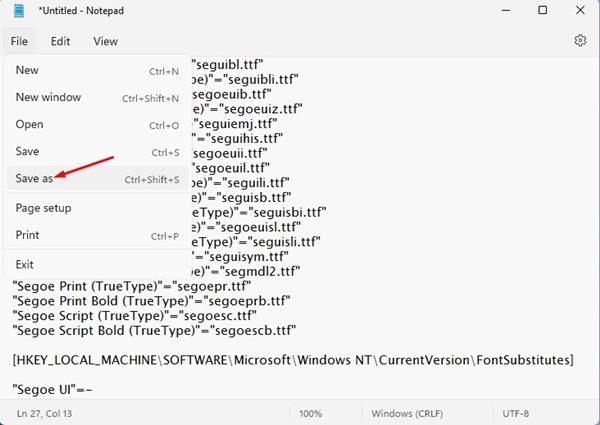
2. Click on the File menu and select Save as.
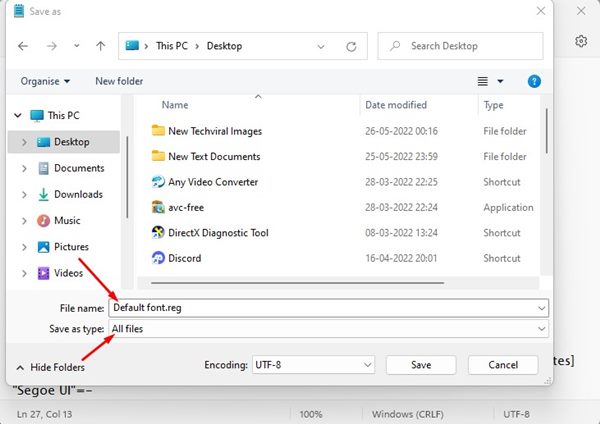
3. On the Save as window, select ‘All files’ on the Save as type. Next, type in a name for the file followed by the .reg extension. For example: Default font.reg
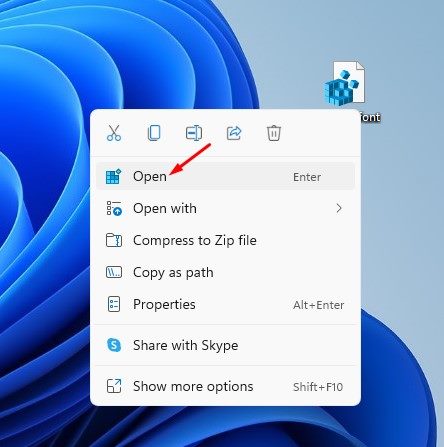
4. Next, click on the Save button to save the registry file. Once saved, right-click on the Registry file and select Open.
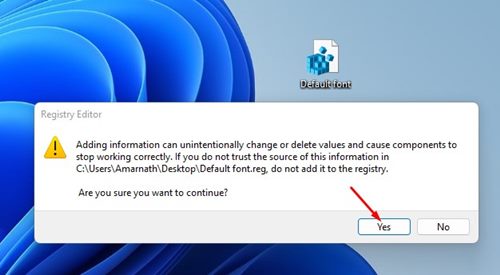
5. On the confirmation prompt, click Yes.
That’s all about changing the default system font ona Windows 11 PC. If you want more customization options, you can use third-party apps to customize Windows 11. Third-party customization apps will enable live wallpapers, Start menu & Taskbar customization on your Windows 11 PC.
The post How to Change Default System Font on Windows 11 appeared first on TechViral.
from TechViral https://ift.tt/eMb6tp1