When it comes to mobile operating systems, Android usually steals the show. You won’t believe it, but millions of users now use Android. Android provides users with more customization options than every other mobile operating system. Not only customization but also the app availability is relatively high on Android.
However, like every other mobile operating system, Android is not entirely bug-free. On regular usage, Android users often deal with system errors, Google Play Store errors, etc. One such error is known as ‘Error Code 910’
What is Error Code 910?
A Google Play Store error usually occurs while installing apps from the Play Store. It prevents users from installing or updating the apps. The full error message reads, “*App name* can’t be installed. Try again, and if the problem continues, get help troubleshooting. (Error Code: 910)”
Now, you all might be wondering the reason behind the ‘Error code 910’? Well, it mostly occurs due to corrupted data and cache files. However, it can also occur when the destination file is inaccessible or due to a glitched Google Account.
Whatever the reason, we have shared some of the best methods to fix Error 910 on the Google Play Store in this article.
How to Fix Error 910 On Google Play Store
To Fix Google Play Store error code 910, users must follow some simple methods below. So, let’s check out how to fix the Error 910 ‘Can’t install app’ error message from the Google Play Store.
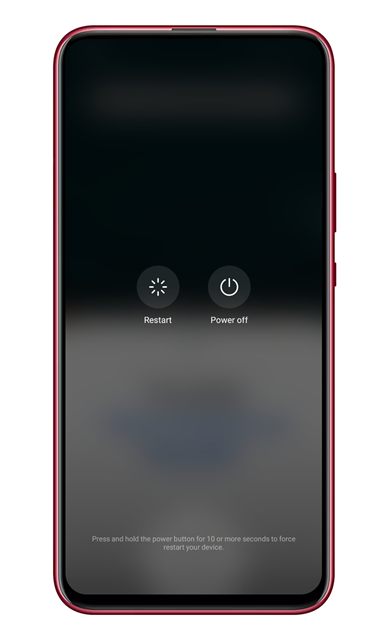
1. Restart Your Android device
Well, this is the first thing you can do to fix the Play Store or any other errors on Android. A simple restart could fix most Android problems, including Error 910 on Google Play Store. So, before following the next methods, restart your Android device.
2. Clear Google Play Store Cache File
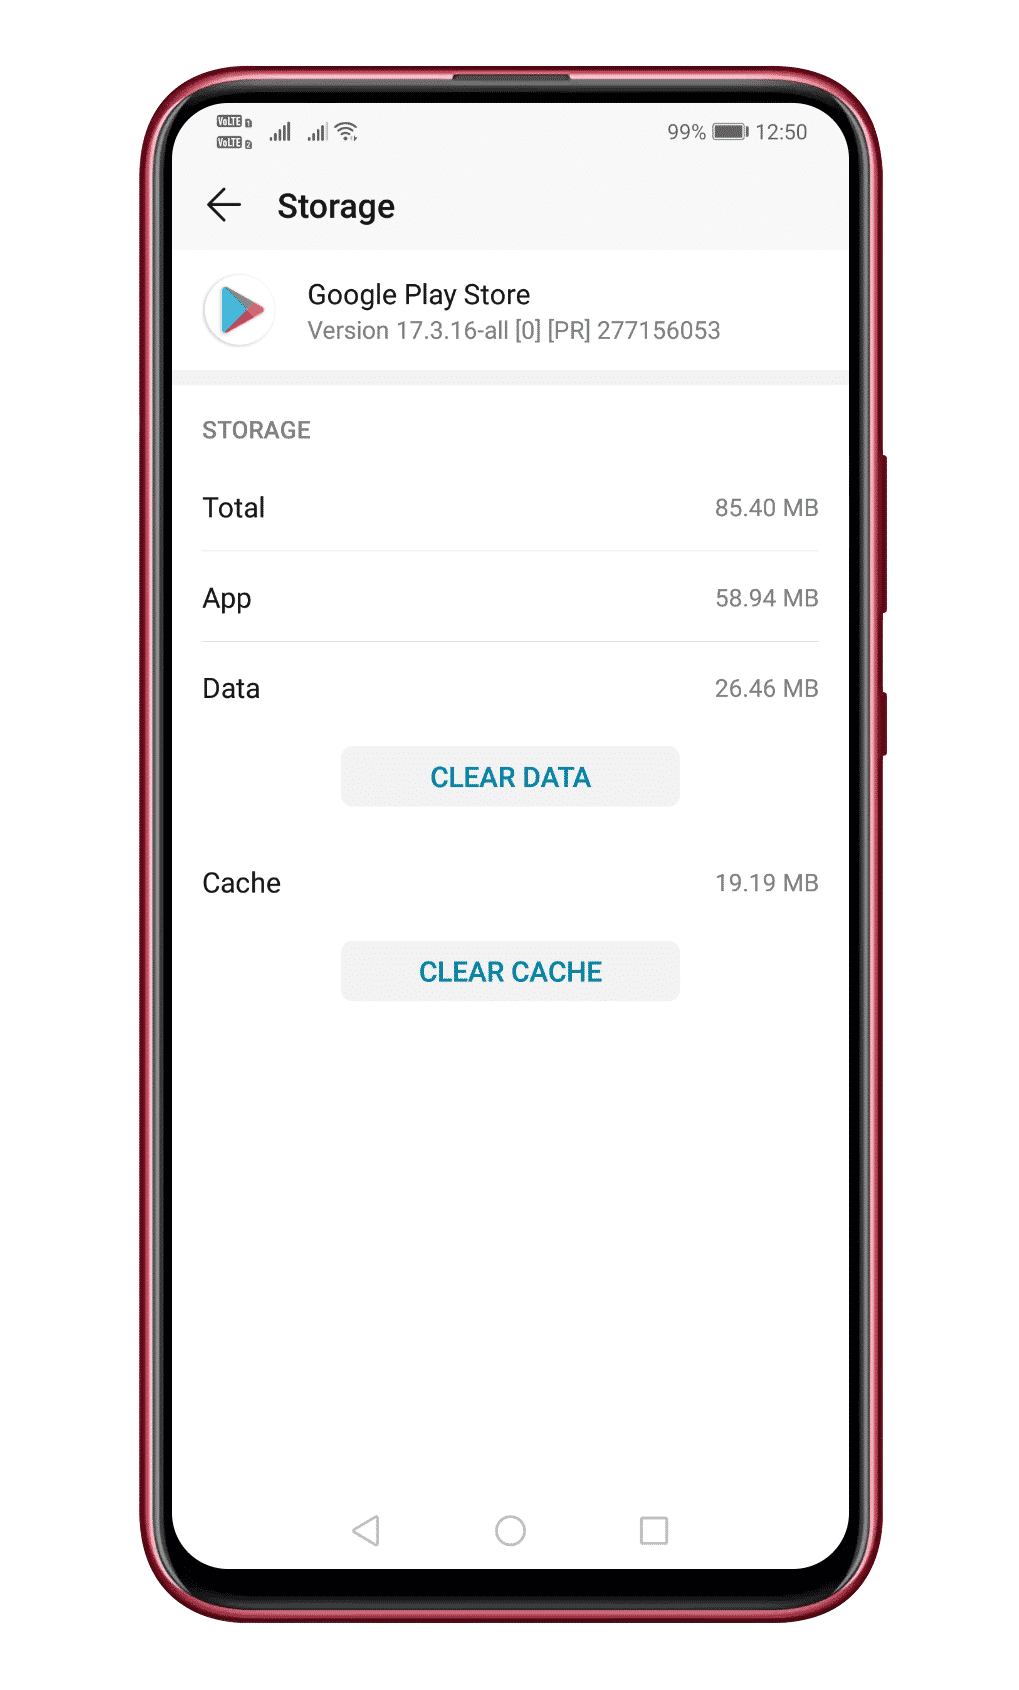
The Play Store Error 910 mainly occurs due to corrupted cache files and data. So, in this method, users need to clear the Google Play Store cache & data to fix the error message. Follow the steps below to clear the Google Play Store Cache & data.
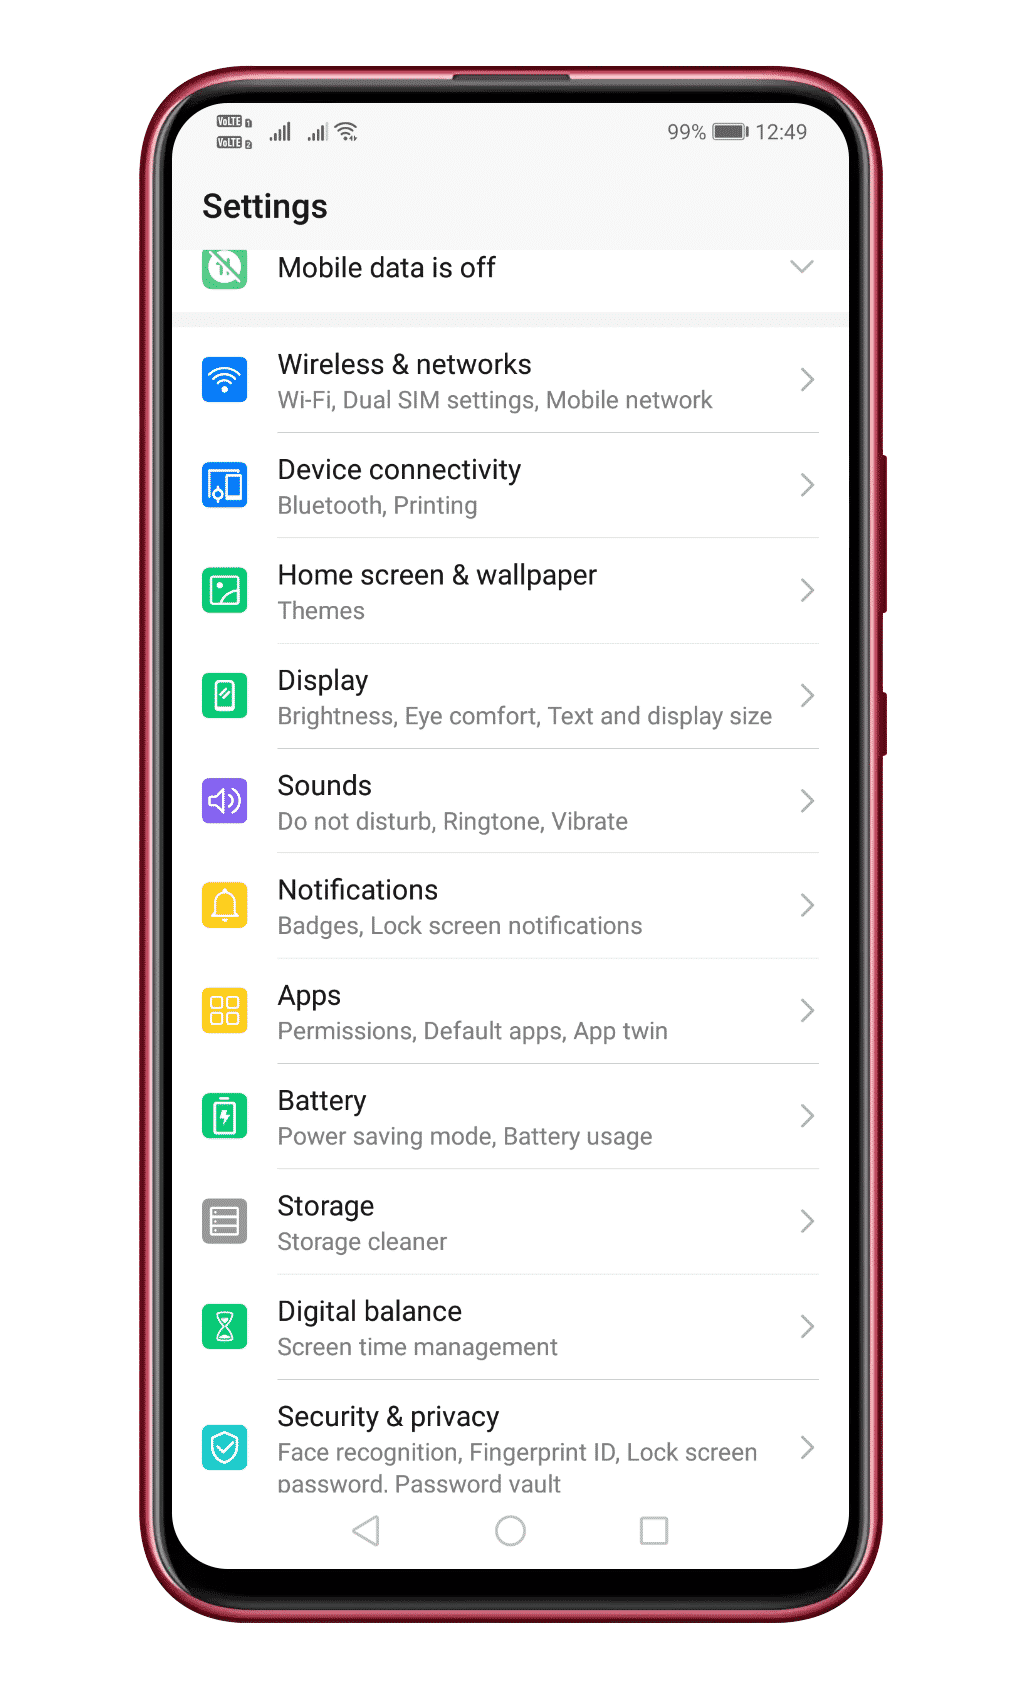
1. First of all, open Settings and open the Apps. Under the Apps, tap on the ‘Installed Apps’ section.
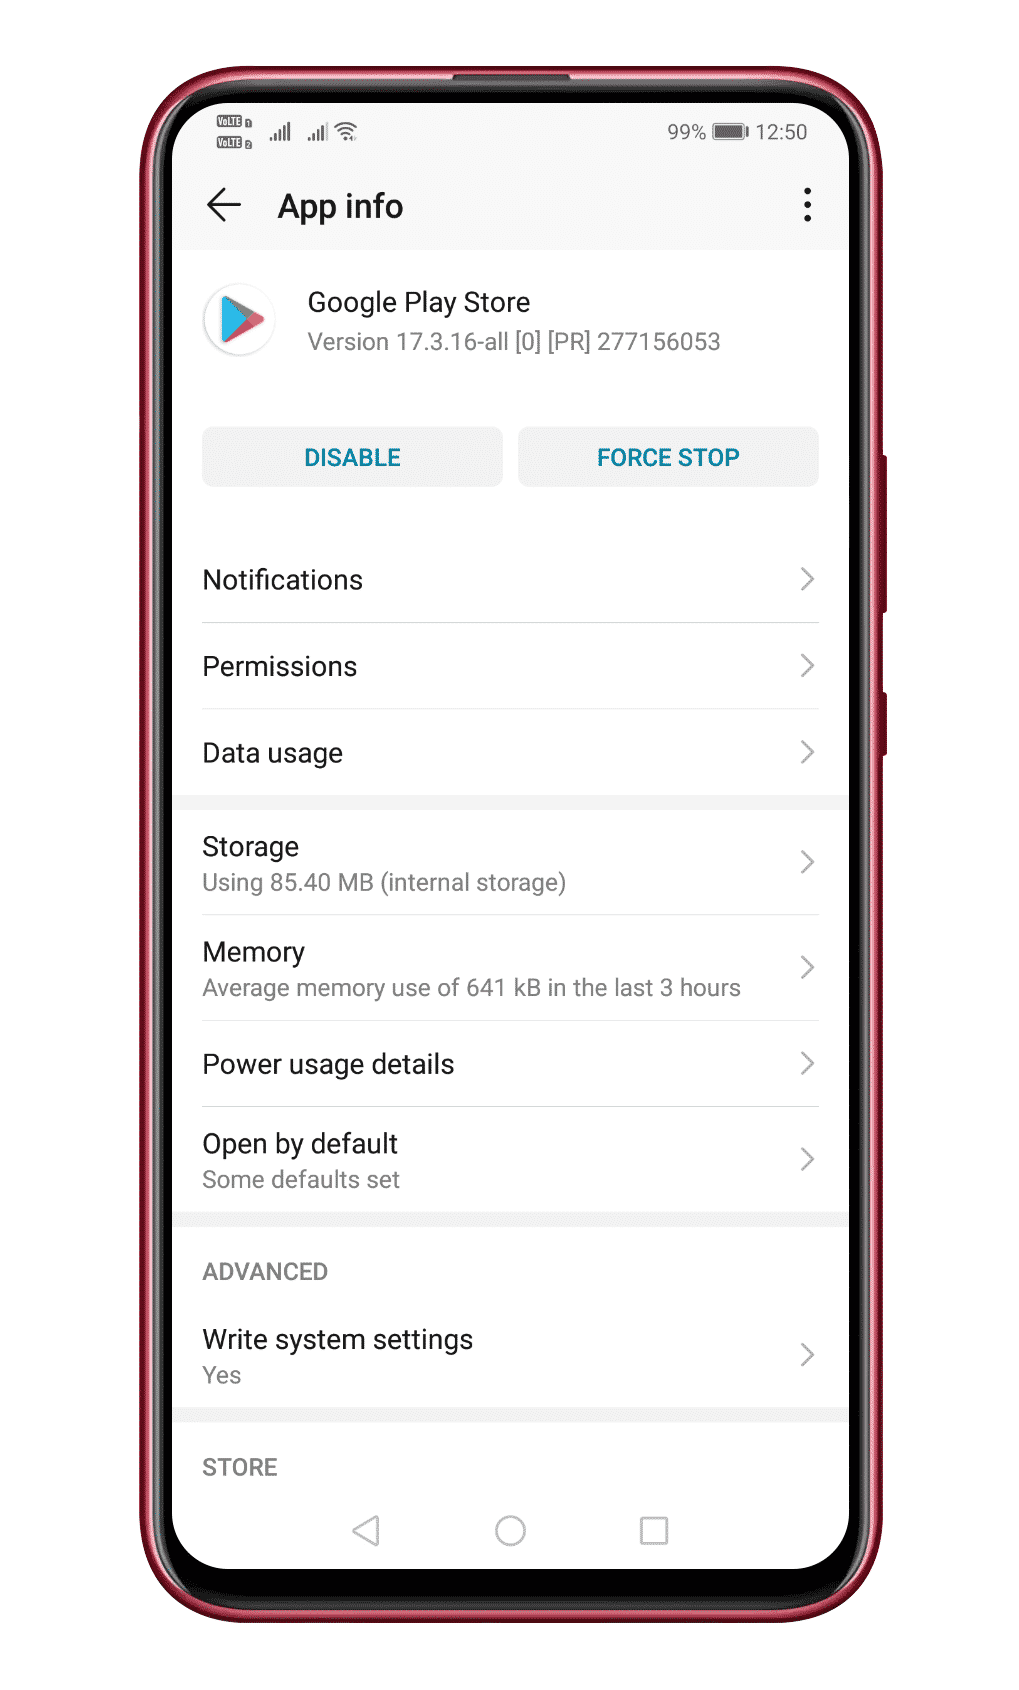
2. From the list of apps, tap on the Google Play Store option.
3. There, you need to tap on the Clear data
That’s it, you are done! Now restart your Android device to fix Error 910 on Google Play Store.
3. Clear the Google Services Framework cache
Google Services framework is installed as an app on your Android, but since it’s a system app, it’s kept hidden from you. You can clear its cache to resolve the Google Play Store error Code 910. Here’s what you need to do.
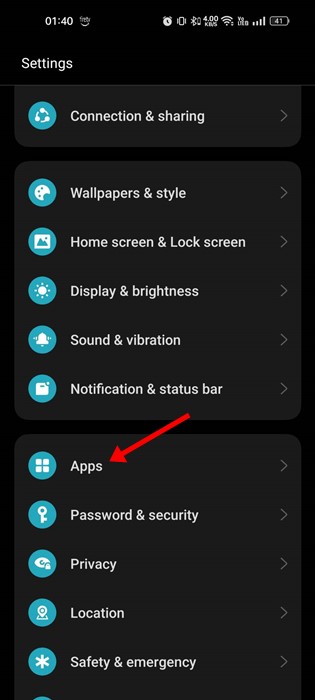
1. First, open your Android app drawer and tap on the Apps.
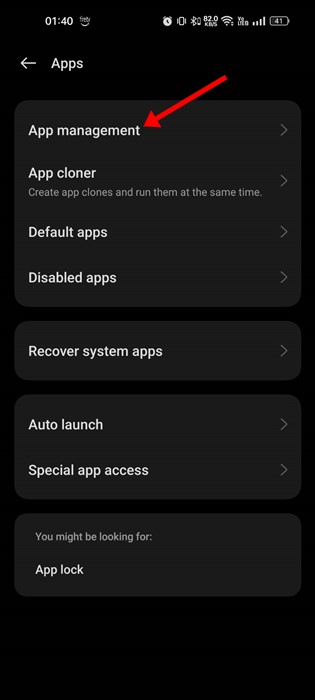
2. On the Apps, tap on App Management.
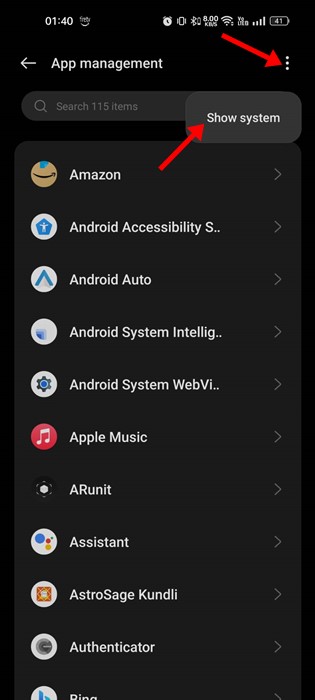
3. Next, tap on the three dots in the top-right corner and select Show system.
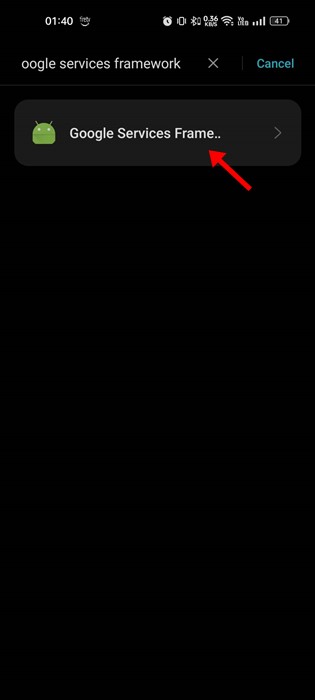
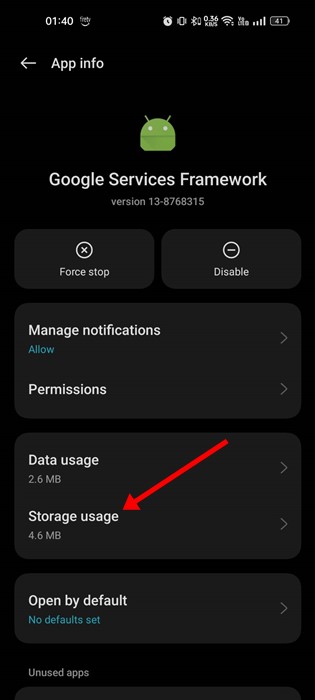
4. Now use the search bar to search for Google Services Framework. Tap on the app once you find it.
5. Next, on the Google Services Framework, tap on Storage Usage.
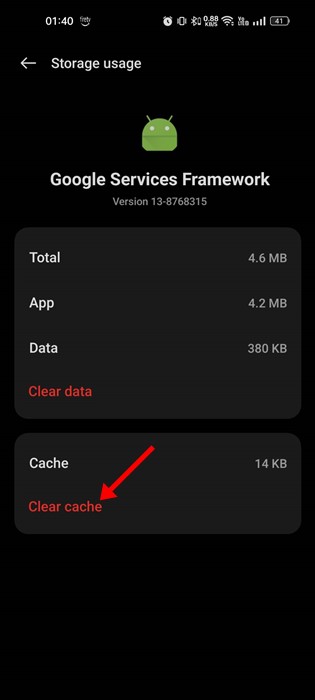
6. On the Storage usage screen, tap on Clear Cache.
This will clear the Google Services Framework cache on your Android. Make sure to restart your Android after clearing the cache file.
4. Re-Link Your Google Account
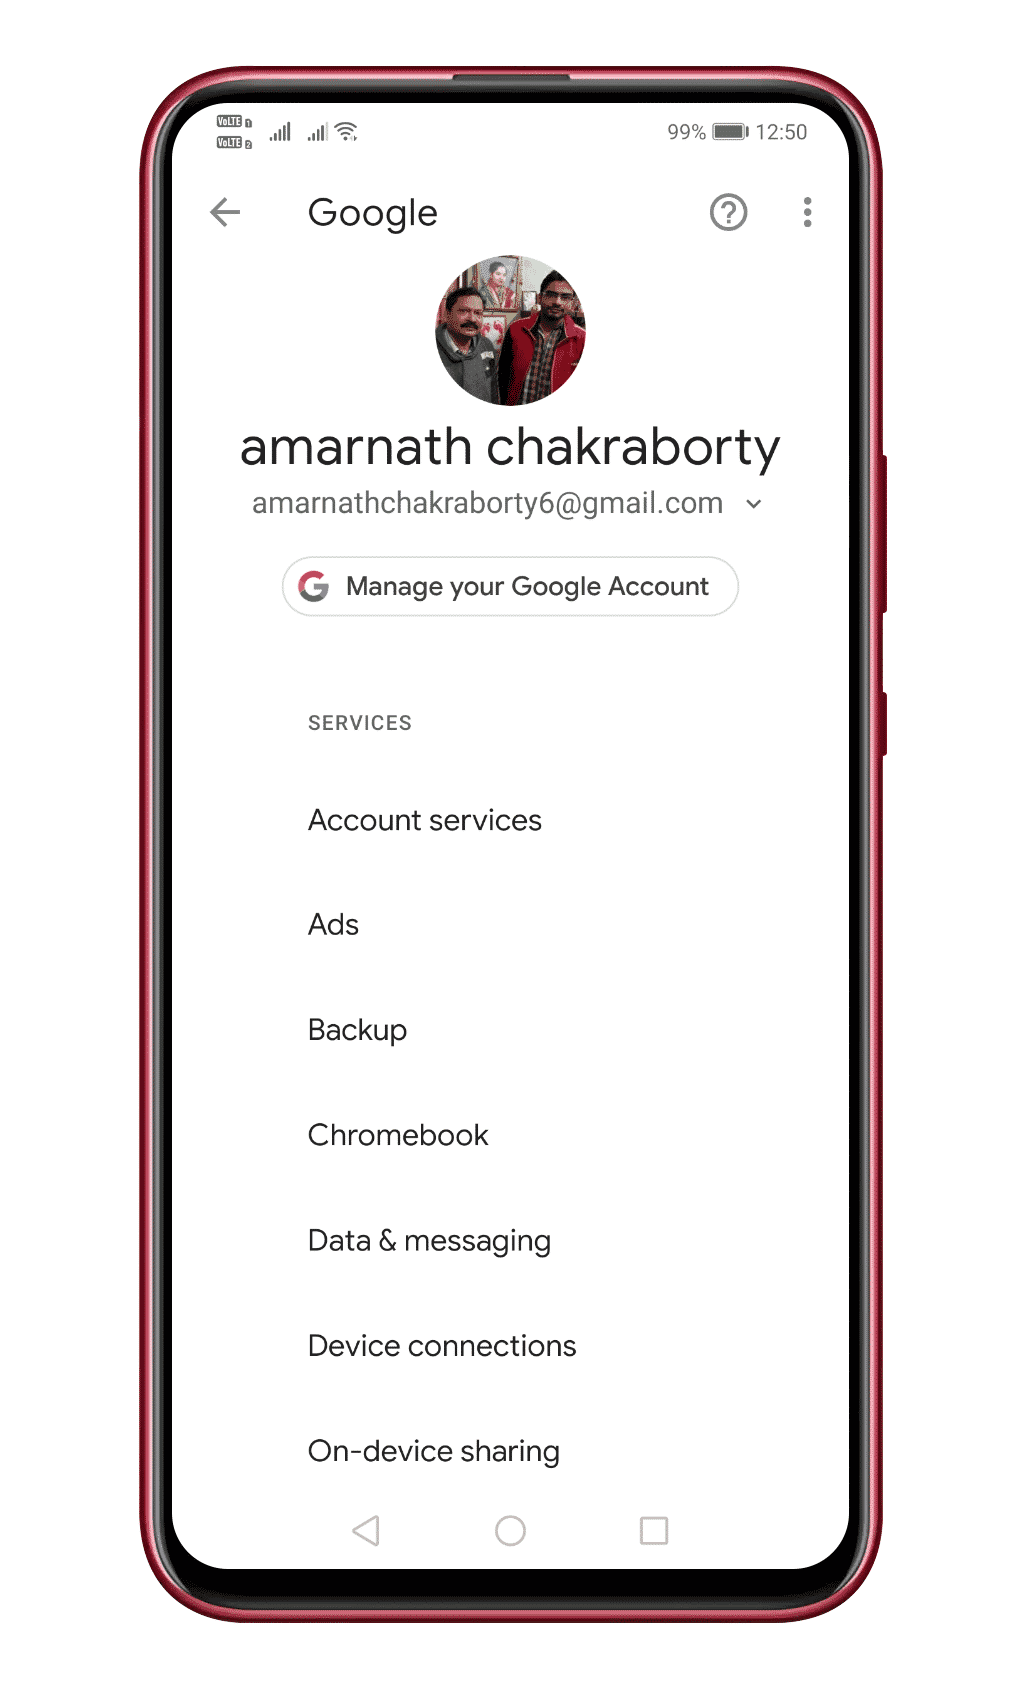
The troubleshooting guide provided by Google to fix Error 910 on the Google Play Store recommends users re-link their Google Account. This thing fixes any account-related problems. So, if you are getting the Error code 910 prompt due to incorrect account settings, then this method would fix the problem.
- Open the app drawer and then tap on Settings
- Under Settings, tap on Accounts
- Under the Accounts, you need to select the current Google Account and then tap on Remove
- Once removed, restart your Android device and then re-add the Google Account.
Once done, restart your Android device to fix the Google Play Store error message.
5. Update DNS
Some users have claimed to have fixed the Error code 910 from the Google Play Store by switching DNS. So, in this method, we will use Google DNS to fix Error 910 on Google Play ‘Can’t install app’.
- First of all, open Settings and tap on WiFi
- Long press on the connected WiFi and tap on Modify network
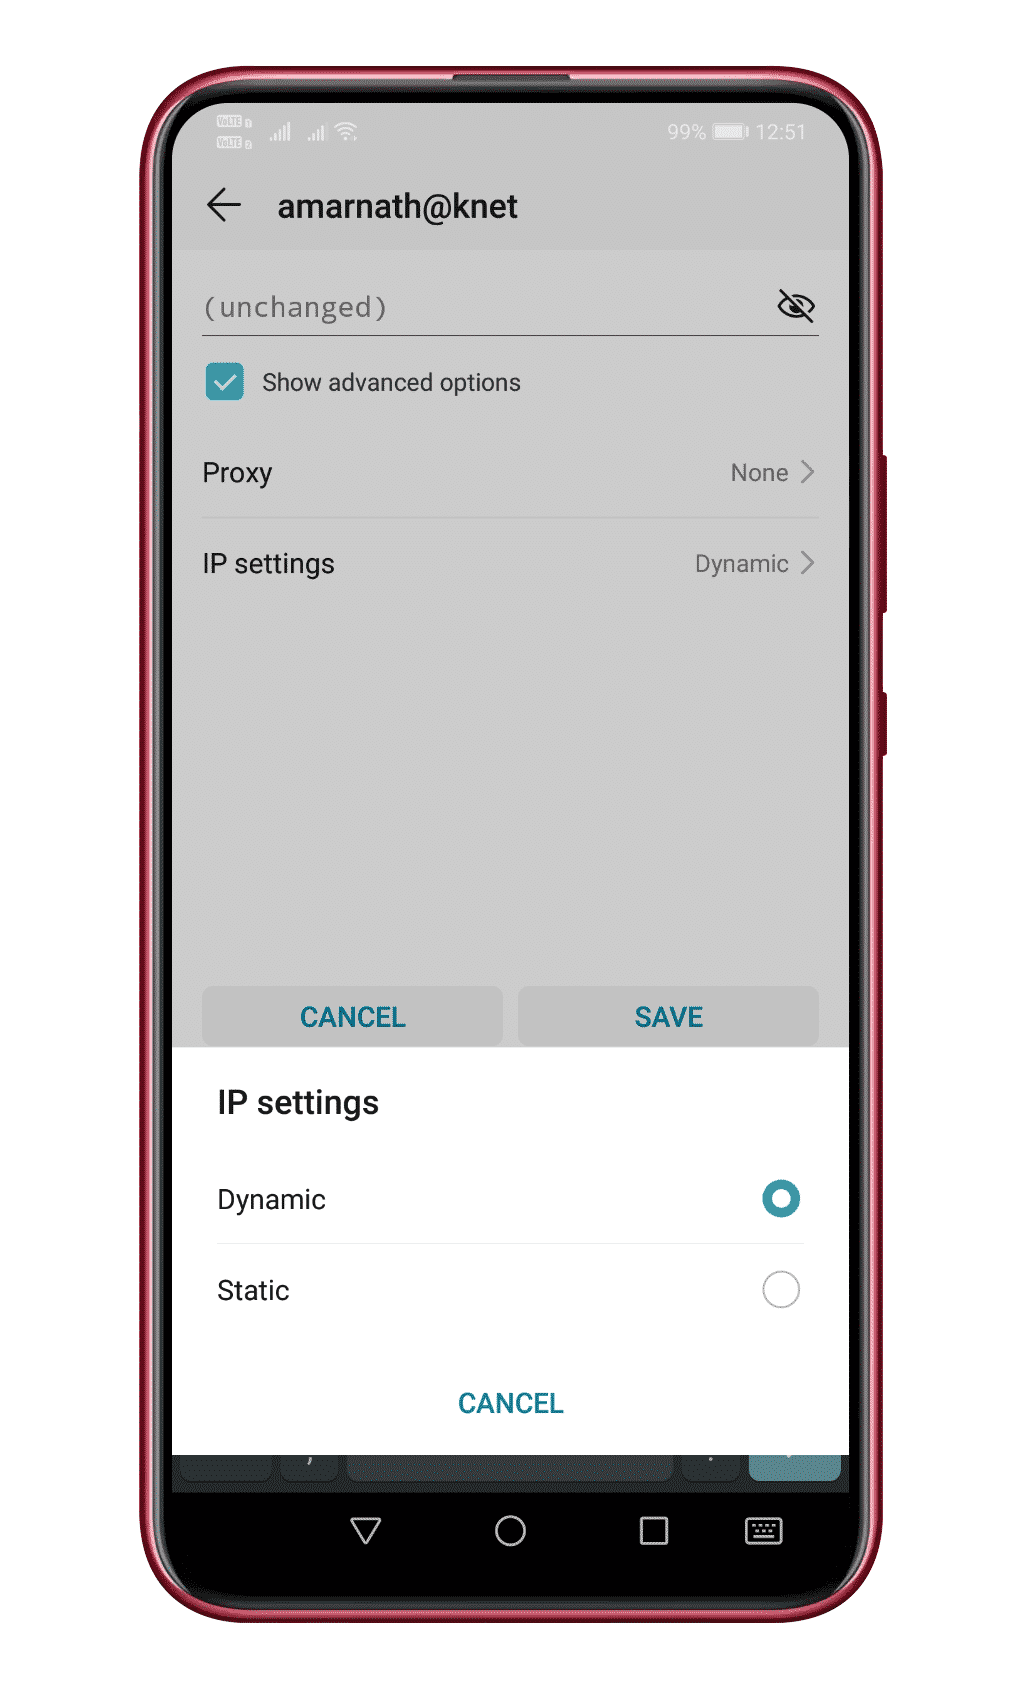
- Once done, tap on the Show advanced options
- In the next step, tap on the drop-down icon behind IP Settings and select Static
- Under the DNS 1 and DNS 2 fields, enter – 8.8.8.8 and 8.8.4.4.
- Finally, tap on the Save button.
That’s it, you are done! Now reconnect to the WiFi network and download the app. You won’t get the Google Play Store Error Code 910 anymore.
6. Sideload the APK File from third-party sites
If the above fixes failed to fix Error 910 on the Google Play Store, you must consider a third-party store. You can use a third-party service to install or update the app that’s failing with the ‘Error code 910’.
For third-party stores, consider our article – 10 Best Third-Party App Stores For Android. However, download the app from trusted sources to avoid any security issues.
7. Eject the SD Card
This might be odd, but ejecting the SD card has helped many users fix the problem. SD cards are known to interfere with the app installation from the Play Store, especially if the SD card is corrupted.
So, if you have a faulty SD card on your device, you can eject it and then try downloading the app again from the Google Play Store.
On Android, you don’t even have to physically remove the SD card, as there’s an option within the settings that lets you eject the SD card virtually. Here’s what you need to do.
- Launch the Settings app on your Android phone.
- When the Settings app opens, select Storage.
- On the Storage screen, find your SD card.
- Next, tap on the eject button beside it.
After making the changes, open the Google Play Store and try downloading the app that shows Error Code 910.
So, these are the three best methods to fix Google Play Store Error Code 910 on Android. In the comment box below, let us know if you know any other method to fix the problem.
The post How To Fix Error 910 On Google Play Store appeared first on TechViral.
from TechViral https://ift.tt/jFRomqx


