

Formatting not only deletes all files but also un-indexes them, which means the space those files occupy is considered unused. Many users also feel that formatting USB drives increases the read/write speed, but it’s not entirely true. The upgrade in performance is more prominent only when a significant storage space is cleared.
Note: If you plan to format a USB drive to change its file system, you should know the advantages & disadvantages of each file system. You can check our guide on exFAT vs. NTFS vs. FAT32 to know more about the preferred file system for USB drives.
1. Format USB Flash Drives on Windows 11 from the File Explorer
You don’t need to use any third-party tool to format your USB drive. Like every other version of Windows, Windows 11 also allows you to format any connected drive right from the File Explorer.
1. Connect the USB drive you want to format to your Windows 11 computer.
2. Open the This PC (File Explorer) of Windows 11.
3. Right-click on the connected USB drive and select Format.
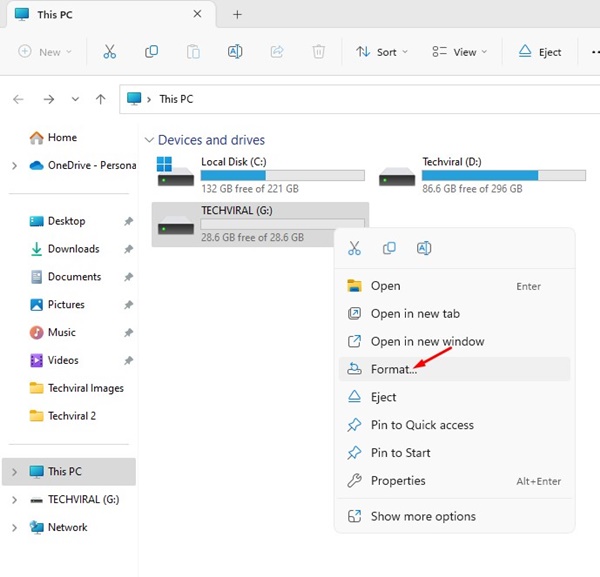
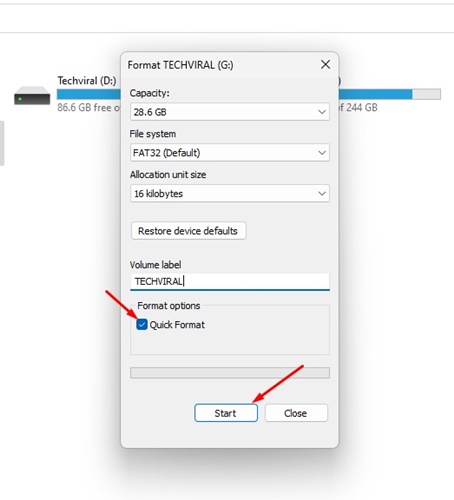
4. On the File System, select NTFS or FAT32, and check Quick Format.
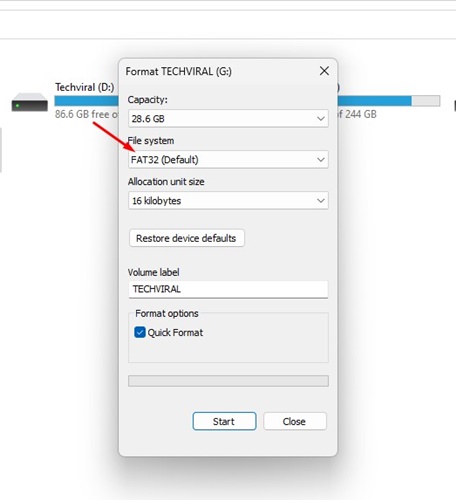
5. Click Start.
6. Click OK.
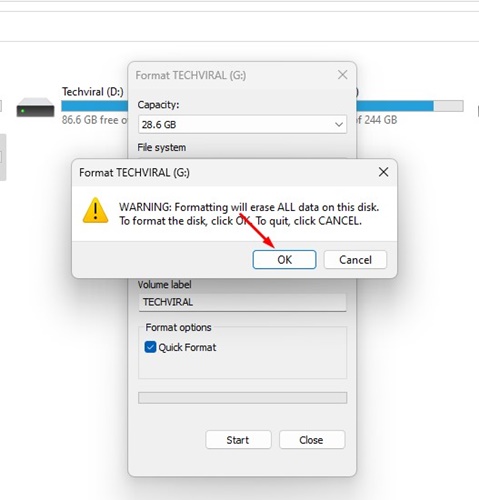
7. This will format your USB drive. You will see a confirmation prompt.
2. Format USB Drive on Windows 11 Using the Settings App
Windows 11 includes a separate storage management feature. You can use it to format a USB drive or any connected drive on your Windows 11 computer.
1. Press the Windows Key + I button to open the Settings.
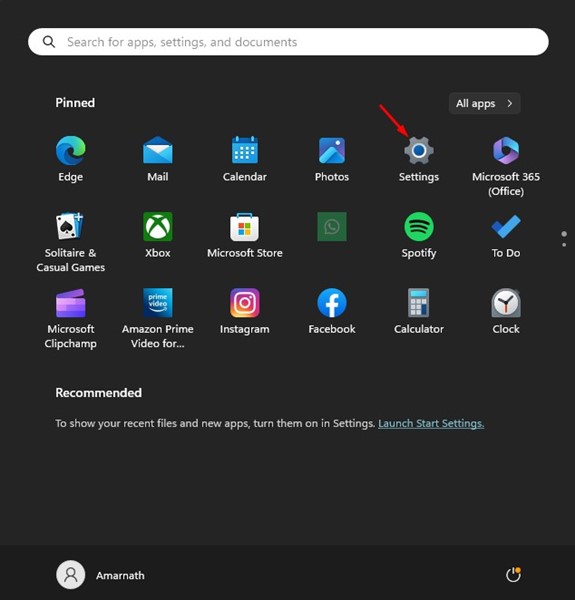
2. Switch to System > Storage.

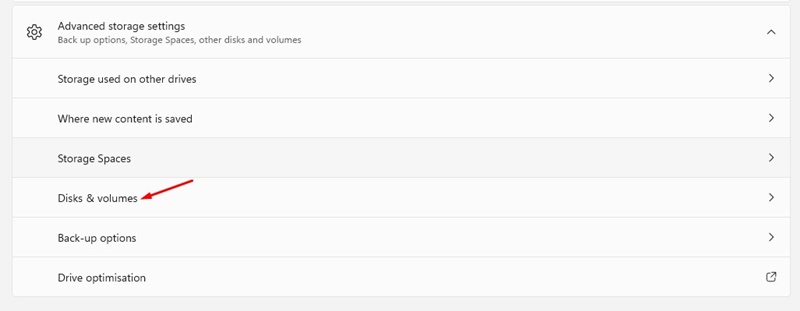
3. Click on Advanced Storage Settings.

4. Click on Disks & volumes.
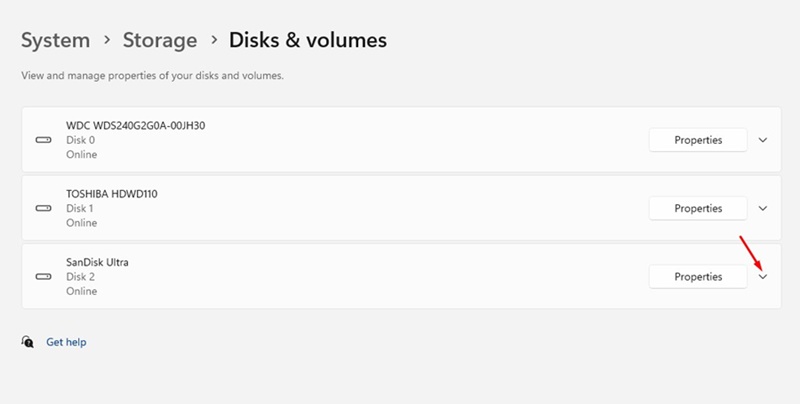
5. Click on the drop-down icon beside your connected USB Drive.
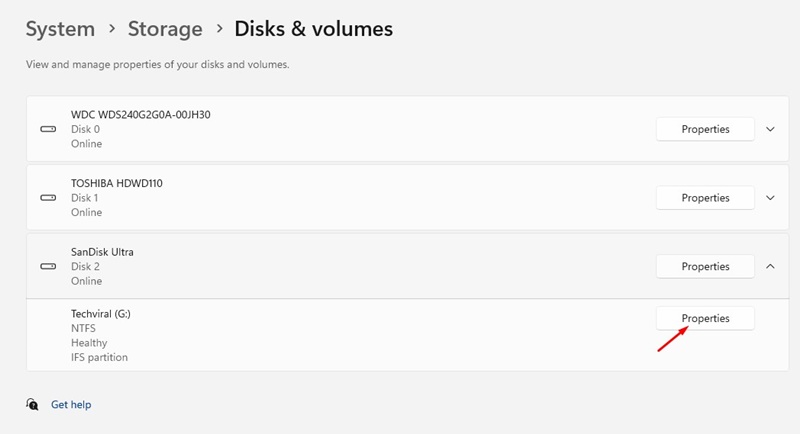
6. Click Properties.
7. Click on Format.
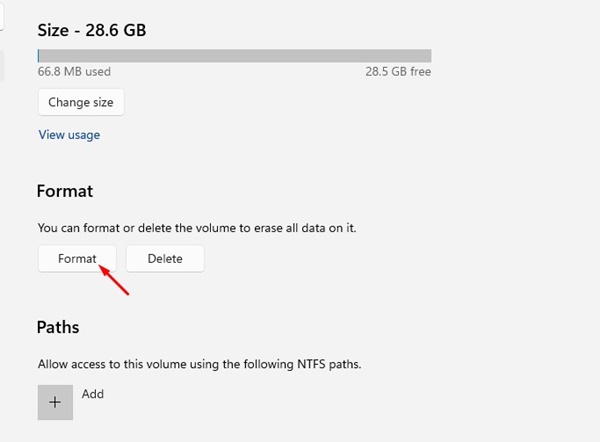
8. Enter the Label, File System, and click Format.

3. Format USB drive Using the Disk Management Utility
Like every other version of Windows, you can use the Disk Management utility on Windows 11 to format a USB drive.
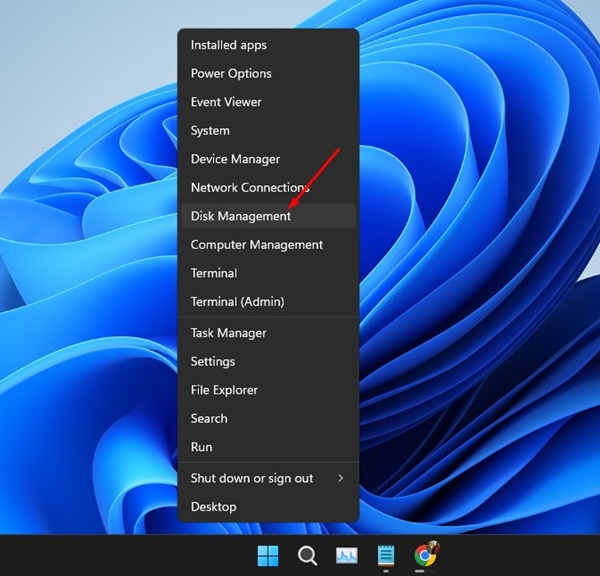
1. Right-click the Windows 11 Start button and select Disk Management.
2. Find your connected USB Drive.
3. Right-click on the removable drive and select Format.

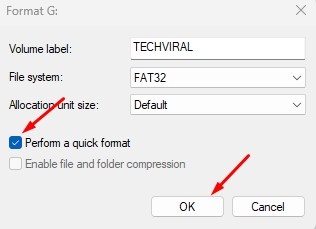
4. On the format prompt, set the Volume Label and File System. Check the Perform a quick format and click on OK.
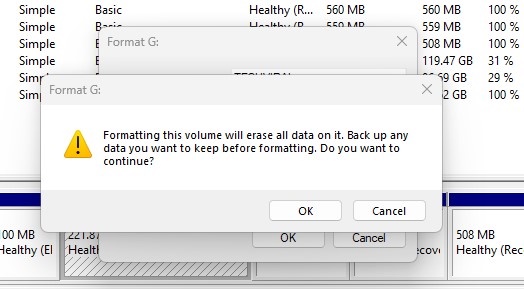
5. On the Format confirmation prompt, click OK.
4. Format a Pendrive using CMD
If you’re comfortable handling the command line utility of Windows, you can follow these steps to format a Pendrive.
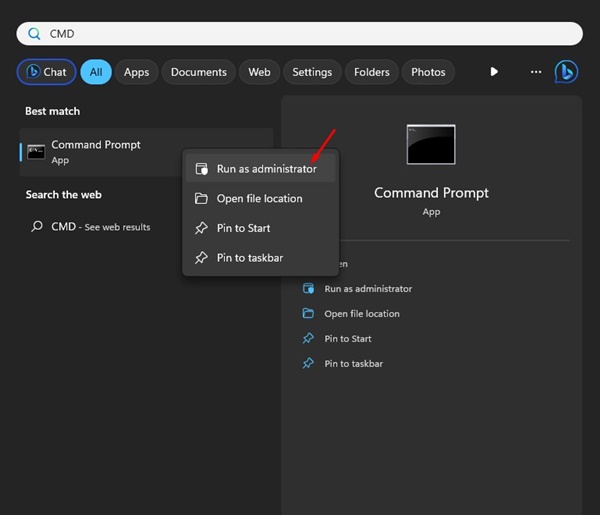
1. Type CMD in the Windows 11 search. Right-click on the Command Prompt app and select Run as administrator.
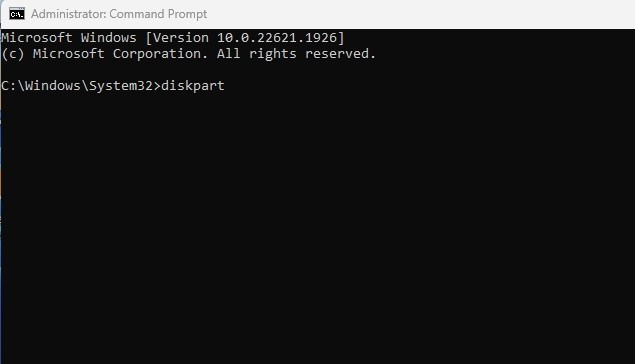
2. Type diskpart and press Enter.
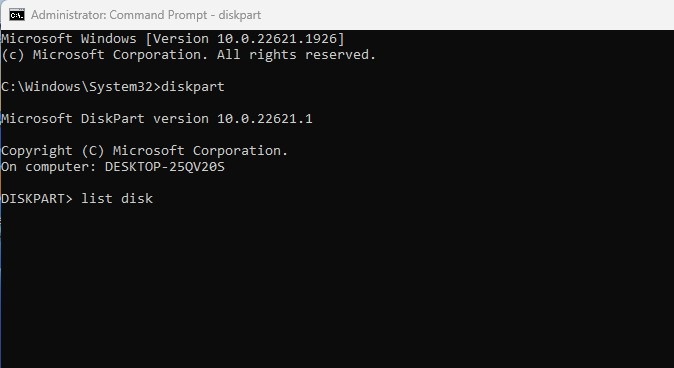
3. Execute the list disk command in the CMD.
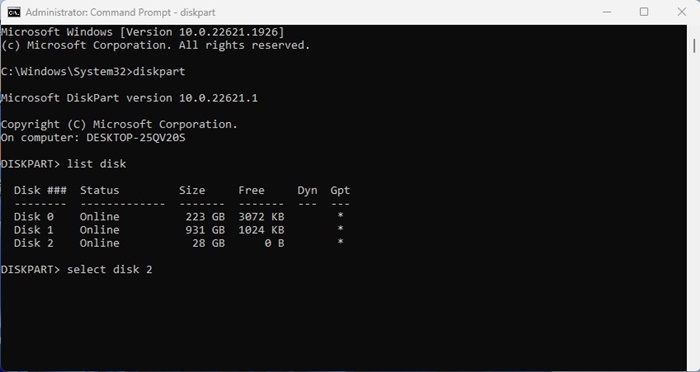
4. Execute the command: select disk + number (Replace the number with the actual number displayed beside your USB drive). For example, select disk 2
5. Type list volume and press Enter.
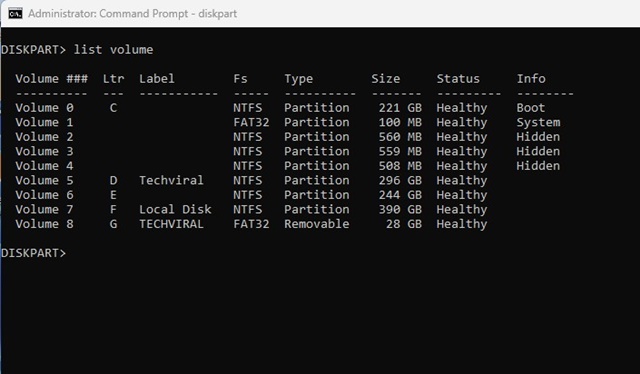
6. The above command will list all volumes available on your PC and their number. Note down the volume number of your USB Drive and execute the command: select volume number
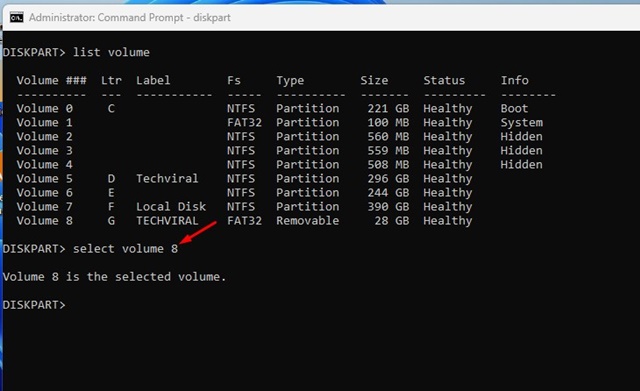
Important: Replace the number with the actual number of your volume.
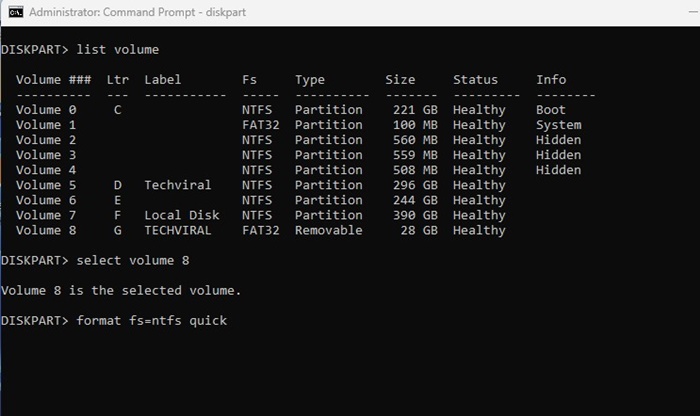
7. The volume will be selected; execute this command:
format fs=ntfs quick
8. This will format your USB drive. Type exit on the command prompt to close the utility.
These are the best methods for formatting a USB Drive on a Windows 11 computer. All these methods work on older versions of Windows, like Windows 10, Windows 7, etc.
The post 4 Best Ways to Format a USB Drive on Windows 11 appeared first on TechViral.
from TechViral https://ift.tt/ATBWOSL

