

The system properties page provided information about the PC’s full hardware and software specifications. However, since it was removed in Windows 11, you will have to rely on other ways to check the full specifications of your PC. Here are some ways to check your PC’s full specifications on Windows 11.
1. Find via System Settings
You can find almost all important information about your PC in the Windows 11 Settings.
1. Right-click the Windows Start button and select Settings.
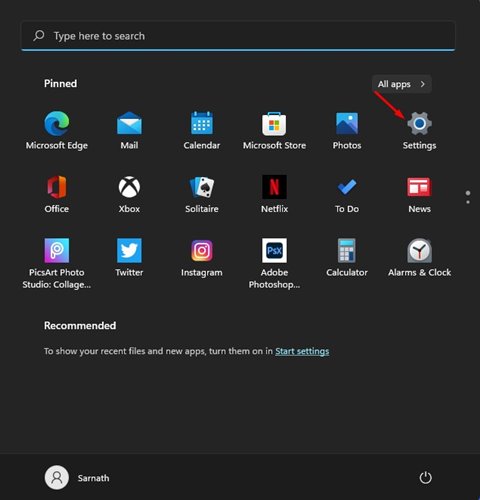
2. Click System.

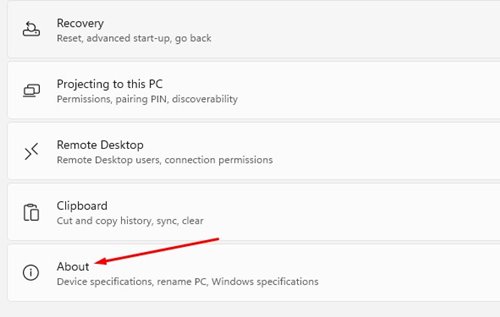
3. Scroll down and click About.
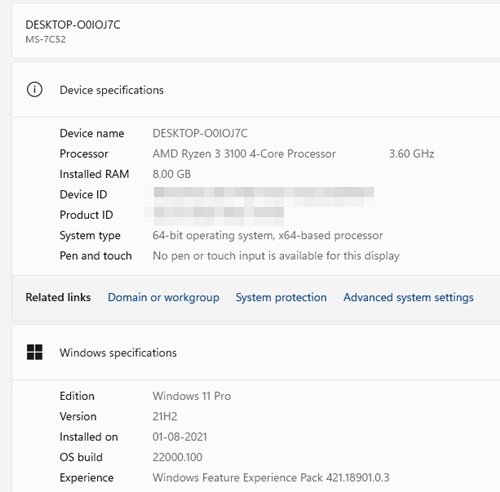
4. You need to look at the Device Specification section. This will list the Processor and Installed RAM.
2. Using the RUN Command
To check the system specifications on Windows 11, use the RUN dialog box.
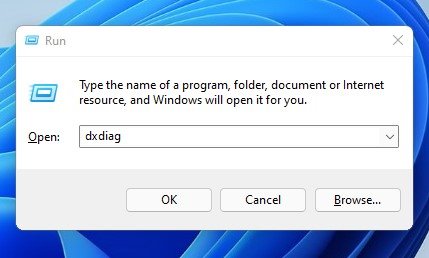
1. Press the Windows Key + R button on your keyboard.
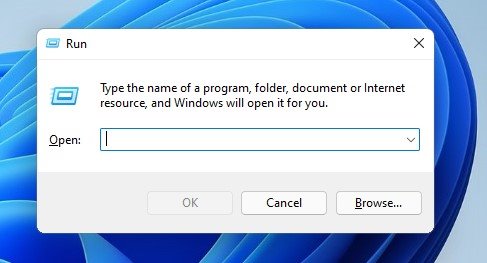
2. Type dxdiag and press Enter.
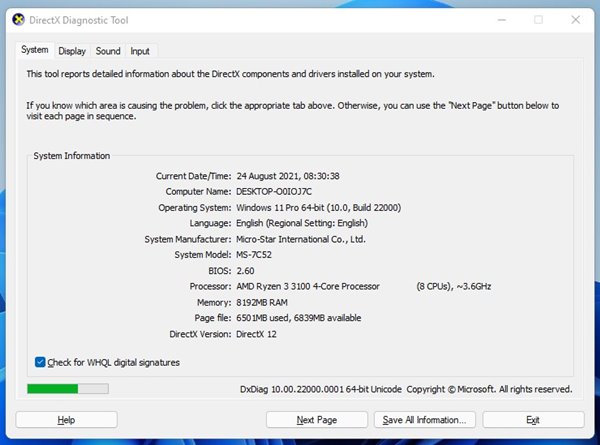
3. The System tab will display Motherboard details, BIOS version, Processor, and RAM.
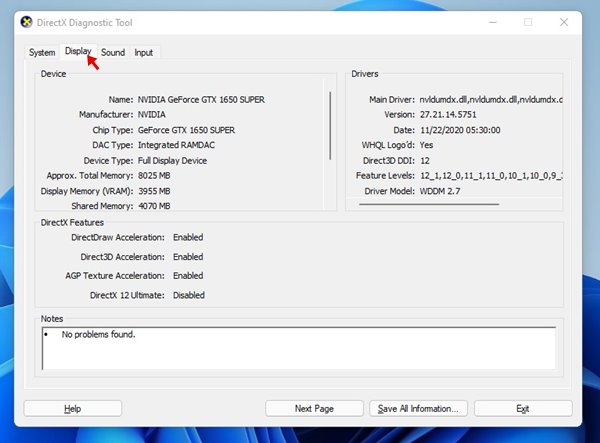
4. Select the Display tab to check the graphics specifications of your computer.
3. Using Command Prompt
Like the RUN dialog box, you can use the Command Prompt to check your PC’s specifications.
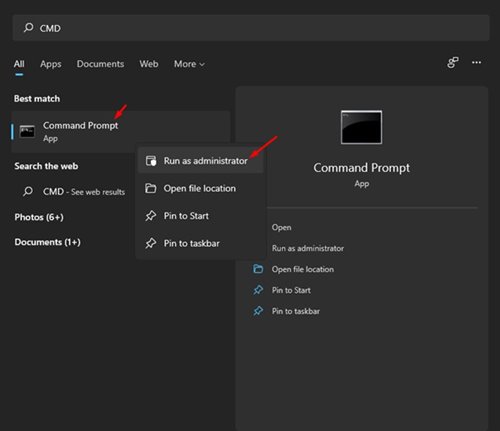
1. Open Windows search and type in CMD. Right-click on CMD and select Run as administrator.
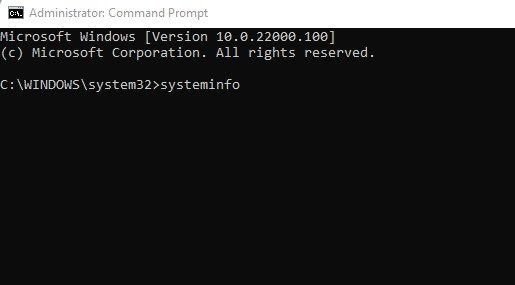
2. Type in systeminfo and press Enter.
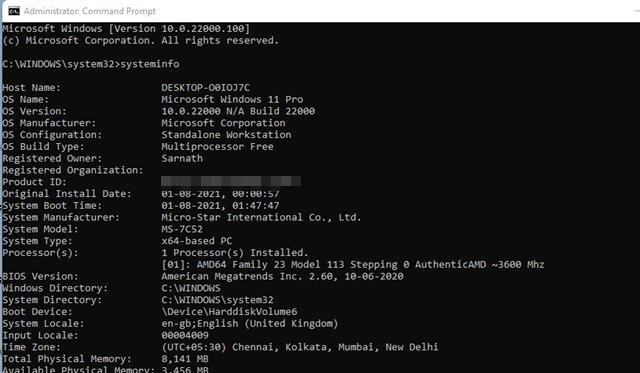
3. This will display information on all your installed components.
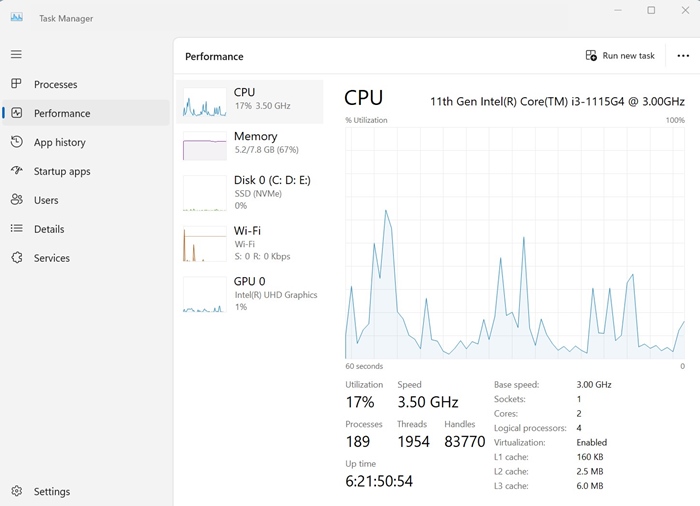
4. Check the PC’s Specs via Task Manager
Windows 11’s Task Manager can be used to obtain crucial information about your PC.
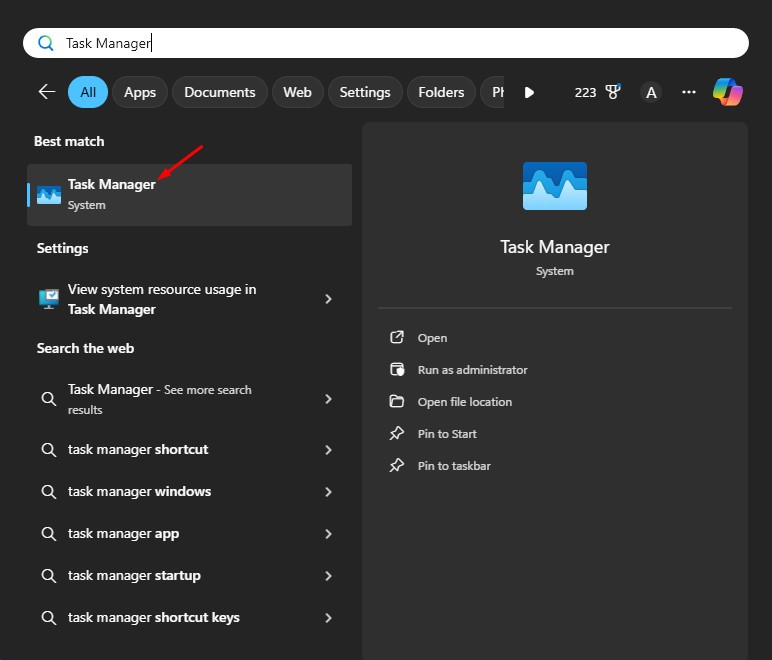
1. Open Task Manager from the Windows Search.
2. Switch to the Performance tab.
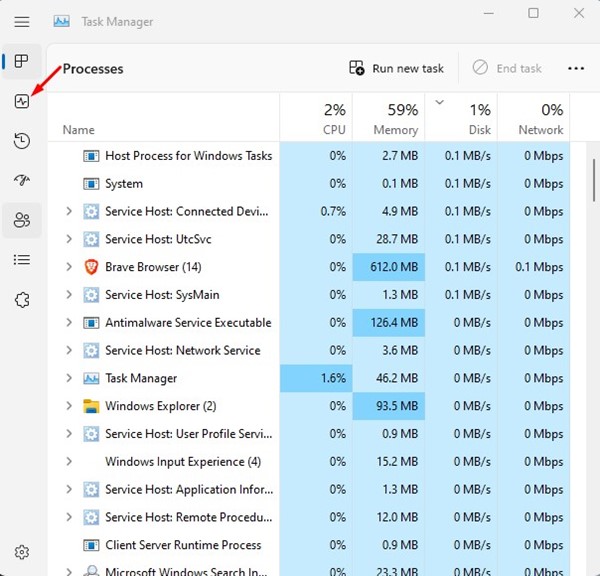
3. Switch between CPU, Memory, GPU, WiFi, etc. tabs to gain information.
This guide explains how to check your PC’s full specifications on Windows 11. If you have any questions, let us know in the comment box below.
The post 4 Ways to Check Your PC’s Full Specification On Windows 11 appeared first on TechViral.
from TechViral https://ift.tt/1sL9Bb4