

To help Windows 11 users who often feel the need to force restart their device, Microsoft introduced an Emergency Restart feature. This feature allows users to force restart Windows 11 when the device isn’t responding.
How to Use Emergency Restart on Windows 11?
It’s easy to use Emergency Restart on Windows 11. Here’s what you should do.
1. If your PC isn’t responding, press the CTRL + ALT + DEL button on your keyboard.
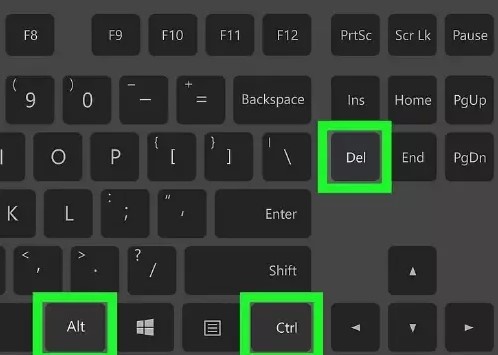
2. This will open the screen from where you can restart your device. The screen will also show a few other basic options.
3. To use the Emergency Restart feature, press and hold the CTRL key and click the Power button.
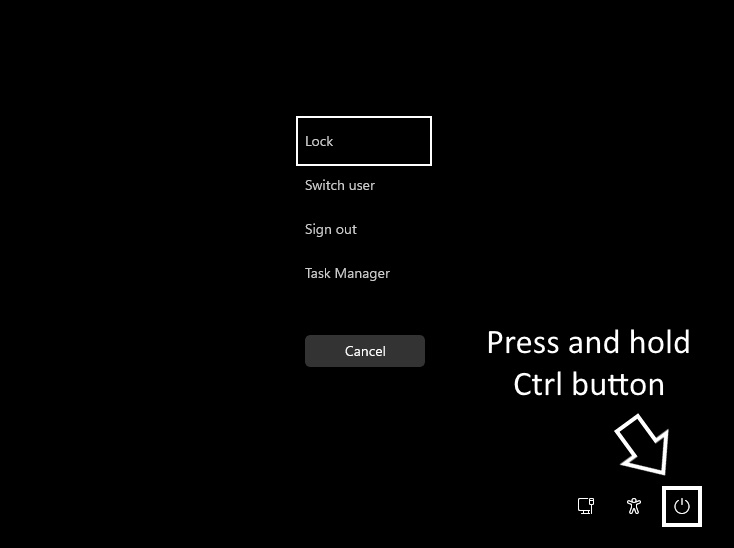
4. You will now see the Emergency Restart screen. Click OK.

Once you press the OK button, your system will terminate all running processes & forcibly reboot. This won’t save any of your work.
Other Ways to Restart Windows 11?
The emergency restart option should be your last resort because it doesn’t save any of your work. Here are some other ways to restart Windows 11.
1. Click on the Windows 11 Start button & click on the Power Button. On the Power Menu, select Restart.
2. Press the CTRL + ALT + DEL keys and click on the Power button at the bottom right corner.
3. Press the ALT + F4 button on the Windows desktop. Next, select the Restart option from the drop-down menu.
4. Open Windows PowerShell and execute the command: Restart-Computer
5. Open the Command Prompt utility and execute the command: -shutdown -r -t 00
6. Restart Windows 11 using the Emergency Restart feature.
This guide is about enabling Emergency Restart in Windows 11 computers. This great feature ignores all running processes and forcibly reboots your PC. You should utilize this feature whenever you need it.
The post How to Enable Emergency Restart in Windows 11 appeared first on TechViral.
from TechViral https://ift.tt/15ygCuK