

The YouTube app for Android has a feature to set the default video quality. You can use this feature to save some bandwidth. Here’s what you need to do.
1. Open the YouTube app on your Android smartphone.
2. Tap on your profile picture in the bottom right corner.
3. On the next screen, tap on the Settings icon at the top left.
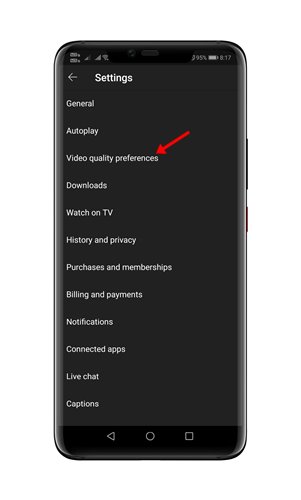
4. Tap the Video Quality Preferences option.
5. You will be presented with two options to change the default video quality – WiFi and Mobile Network.
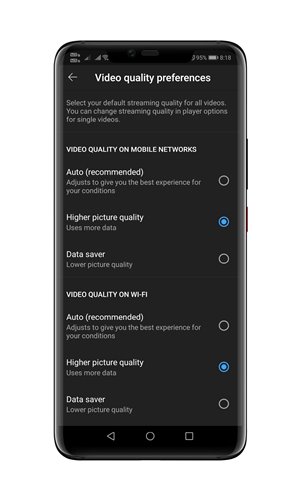
6. Select the Higher Picture Quality option if you want YouTube to play high-quality videos. Make sure to select the ‘Higher Picture Quality’ option on both WiFi and mobile networks.
Here’s what the three video playback quality means:
- Auto: This option adjusts to give you the best experience for your conditions.
- Higher Picture Quality: This option enables high-resolution videos, but it uses more data.
- Data Saver: This option lowers the video quality, but videos load faster.
This guide is about setting the default YouTube video playback quality on Android. If you have any doubts about this, let us know in the comment box below.
The post How to Set Default YouTube Video Quality On Android appeared first on TechViral.
from TechViral https://ift.tt/KDqdfZu

